columbia shoes size guide

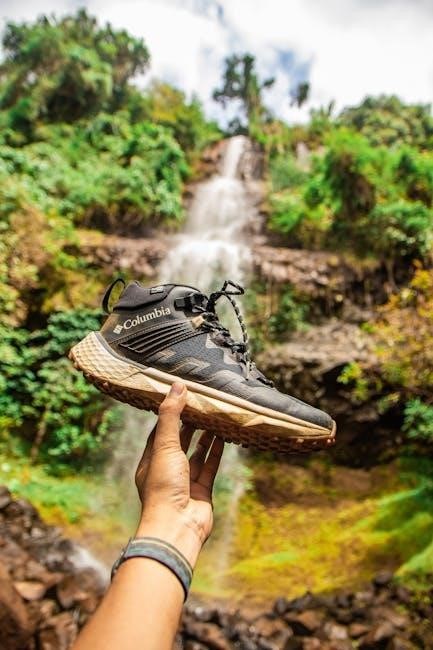
Columbia’s size guide helps ensure optimal fit and comfort for outdoor enthusiasts. With detailed charts and tips, it aids in selecting the right footwear for various activities, enhancing performance and satisfaction.

1.1 Understanding the Importance of Proper Fit

Proper fit is essential for comfort, performance, and preventing foot-related issues. Ill-fitting shoes can cause discomfort, blisters, or even long-term foot problems. Columbia’s size guide emphasizes the importance of aligning shoe size with foot length and width. Foot swelling during activities and foot shape play a significant role in achieving the right fit. Ensuring adequate toe box space and considering width options can enhance overall comfort and mobility, making proper fit a critical factor in choosing Columbia footwear.

1.2 Overview of Columbia Shoe Sizing

Columbia offers a comprehensive sizing system to cater to diverse foot shapes and preferences. Their shoes generally run true to size, but individual fit may vary. The brand provides detailed size charts, including US, UK, and EU conversions, to help customers find their perfect match. Measurements are based on foot length and width, ensuring accuracy. Additionally, Columbia considers factors like foot swelling during activities and offers width options for enhanced comfort, making their sizing system versatile and user-friendly.

How Columbia Shoes Fit

Columbia shoes typically fit true to size, offering comfort and support. They cater to various foot shapes, with options for width and sizing adjustments for activities.

2.1 Do Columbia Shoes Run True to Size?

Columbia shoes generally run true to size, offering a comfortable fit for most wearers. However, those with wider feet may find sizing slightly snug. It’s recommended to consider activity-specific needs, as foot swelling during outdoor adventures may require a half or full size up for optimal comfort. Always check the size chart or reviews for specific styles to ensure the best fit.

2.2 Common Feedback on Fit and Comfort

Customers often praise Columbia shoes for their consistent fit and comfort, especially in outdoor settings. Many highlight the true-to-size accuracy, while some note that styles with waterproofing may feel slightly tighter initially. Feedback also emphasizes the importance of considering foot shape and toe box space for long-lasting comfort during activities like hiking or trail running.

Columbia Shoe Size Chart

Columbia offers detailed size charts for men, women, and kids, ensuring accurate fit. The guide provides measurements in inches and centimeters, aiding in precise size selection.

3.1 Men’s Shoe Size Chart

Columbia’s men’s shoe size chart offers a precise guide, ensuring the best fit. Sizes range from 7 to 16, with corresponding measurements in inches and centimeters. The chart helps men choose their ideal size by aligning foot length with the provided data, ensuring comfort and performance. This comprehensive guide is essential for selecting footwear that meets individual needs, whether for casual wear or outdoor adventures.

3.2 Women’s Shoe Size Chart

Columbia’s women’s shoe size chart provides accurate measurements to ensure a perfect fit. Sizes range from 5 to 12, with corresponding inch and centimeter lengths. The chart helps women choose their ideal size by matching foot length to the provided data, ensuring comfort and support. This detailed guide is essential for selecting footwear tailored to individual needs, whether for everyday wear or rigorous outdoor activities, ensuring optimal performance and satisfaction.

3.3 Kids’ Shoe Size Chart

Columbia’s kids’ shoe size chart offers sizes from toddler to youth, ensuring a comfortable fit for growing feet. The chart includes both US and EU sizes, with corresponding length measurements. It helps parents select the right footwear for their children, whether for casual wear or active play. This guide ensures proper fit and support, promoting healthy foot development and all-day comfort for kids engaging in various activities.

Measuring Your Foot for the Perfect Fit

Accurate foot measurement is essential for selecting the right Columbia shoe size. Use a Brannock device or ruler to measure length and ensure consistent sizing for optimal comfort and performance.

4.1 Step-by-Step Guide to Measuring Foot Length

To measure foot length accurately, place your foot flat on a ruler or Brannock device. Ensure your weight is evenly distributed. Measure from the back of the heel to the tip of your longest toe. If your measurement falls between sizes, consider sizing up for comfort. This method ensures a precise fit, aligning with Columbia’s size chart, which provides measurements in inches and centimeters for accuracy.

4.2 How to Measure Foot Width

To measure foot width accurately, stand barefoot on a flat surface. Wrap a flexible measuring tape around the widest part of your foot, just above the toes. Ensure the tape is snug but not tight. Record the measurement in inches or centimeters. This step helps determine if you need standard, wide, or narrow sizes. Accurate width measurement ensures proper fit and comfort, preventing issues like tightness or slipping during activities. Use this data to align with Columbia’s size chart for the best fit.

Tips for Choosing the Right Size

Consider foot swelling during activities, measure foot length accurately, and align with Columbia’s size chart. Try shoes later in the day for the best fit.

5.1 Considering Foot Swelling During Activities

Foot swelling during activities like hiking or prolonged walking is common. To ensure comfort, consider sizing up by a half or full size. This allows extra space in the toe box, preventing discomfort.

This is especially important for long hikes or in warmer conditions, where feet tend to swell more. Proper fit ensures better performance and reduces the risk of blisters or irritation during outdoor adventures.

5.2 How to Size for Hiking and Outdoor Activities

For hiking and outdoor activities, proper sizing is crucial for comfort and performance. Columbia recommends selecting a size that accommodates foot swelling and provides ample toe room. Typically, hikers opt for a half to full size larger than their everyday shoe size. This ensures a comfortable fit during extended use and varied terrain, reducing the risk of blisters and discomfort. Consider the thickness of socks and any additional insoles when making your selection.

Sizing Differences Across Columbia Styles

Columbia offers various styles with distinct fits. Hiking boots, trail shoes, and casual footwear may differ in sizing due to design and intended use. Always refer to size charts for accurate fit.

6.1 Hiking Boots vs. Trail Shoes

Hiking boots and trail shoes differ in fit and design. Boots are sturdier, often waterproof, with robust support, while trail shoes are lighter and more flexible. Boots may fit snugger due to ankle support, while trail shoes offer a roomier toe box. Consider activity intensity and terrain when choosing. Hiking boots are ideal for rugged trails, while trail shoes suit faster, less demanding routes. Always refer to Columbia’s size chart for the best fit.

6;2 Casual vs. Performance Footwear

Casual and performance footwear differ in fit and purpose. Casual shoes prioritize comfort for everyday wear, often with a relaxed fit, while performance shoes are designed for specific activities, offering snug support and advanced features; Casual styles may run slightly roomier, while performance shoes fit true to size for optimal functionality. Columbia’s sizing ensures both comfort and performance, catering to diverse needs with precision.

US, UK, and EU Size Comparisons

Columbia’s size chart includes precise conversions between US, UK, and EU sizes, ensuring accurate fit across regions. This comprehensive guide helps global customers find their perfect size easily.

7.1 Converting US Sizes to UK Sizes

Columbia’s US to UK size conversions are precise, ensuring a consistent fit across regions. For example, a US men’s size 8 corresponds to a UK size 7.5. This conversion applies to both men’s and women’s footwear, with a general difference of 1.5 to 2 sizes between the two systems. Columbia’s size chart provides exact measurements, making it easy for international customers to find their perfect fit. Always refer to the official chart for accurate conversions to avoid sizing mismatches.

7.2 Converting US Sizes to EU Sizes

Columbia’s US to EU size conversions are designed for international consistency. For example, a US men’s size 8 typically corresponds to an EU size 42. The conversion follows a standard difference of about 3-4 sizes between the two systems. Columbia’s size chart provides exact numerical correlations to ensure accuracy. Customers can easily find their EU size by referencing the official chart, which aligns US sizes with their European equivalents for a seamless fit across global markets.

Understanding Width Options

Columbia offers standard, wide, and narrow widths to cater to diverse foot shapes, ensuring a comfortable and supportive fit for all customers.

8.1 What is Considered Standard Width?

Standard width in Columbia shoes refers to the medium fit, designed to accommodate average foot proportions. It provides sufficient space for comfort without being too tight or loose, ensuring optimal support and flexibility for everyday wear and outdoor activities. This width is suitable for most people and aligns with common sizing standards in footwear.

8.2 When to Choose Wide or Narrow Sizes

Columbia offers wide and narrow sizes to cater to different foot shapes. Opt for wide sizes if you have broader feet or experience discomfort in standard widths. Narrow sizes are ideal for slimmer feet to prevent excessive movement. Consider your activity type, as hiking may require more room, while casual wear might suit narrower fits. Measuring your foot accurately ensures the best choice for optimal comfort and support.

Common Sizing Mistakes to Avoid

Avoid assuming all brands fit the same and not measuring your feet regularly. Ignoring width options and failing to consider foot swelling during activities can lead to poor fit.

9.1 Assuming All Brands Fit the Same

One common mistake is assuming all shoe brands fit similarly. Columbia shoes generally fit true to size, but other brands may vary. Ignoring this can lead to discomfort or poor performance. Always consult Columbia’s size chart and consider personal factors like foot swelling or width. For example, some hikers recommend sizing up for long treks due to foot expansion. Using Columbia’s fit guide ensures the best match for your footwear needs and activity level.

9.2 Not Considering Foot Shape and Toe Box Space

Ignoring foot shape and toe box space is a common mistake. Columbia shoes cater to various foot shapes, but failing to consider this can lead to discomfort. Ensure the toe box provides enough room for toes to move naturally, especially during activities like hiking. A tight fit can cause blisters and restrict movement. Measure your foot length and width accurately, and compare with Columbia’s size chart to find the best fit for your foot shape and activity needs.

Breaking in Columbia Shoes

Breaking in Columbia shoes ensures comfort and prevents blisters. Wear thick socks, start with short walks, and gradually increase duration for a smooth transition to comfortable footwear.

10.1 Tips for Breaking in New Shoes

Breaking in new Columbia shoes can be made easier with a few simple tips. Start by wearing them around the house with thick socks to help mold the shoe to your foot. Gradually increase your wear time, beginning with short walks. Using a shoe stretcher or applying heat to tight areas can also soften the material. Rotate between new and old shoes to avoid excessive strain. Moisturizing leather styles can prevent cracking and extend their lifespan. Consistency is key to achieving a comfortable fit without causing discomfort or blisters. Proper care during the break-in period ensures long-lasting wear and optimal performance for any adventure.

10.2 How to Avoid Blisters and Discomfort

Avoiding blisters and discomfort when wearing Columbia shoes starts with proper sizing and fit. Ensure there’s enough room for toes to move freely, especially during activities. Wearing moisture-wicking socks can reduce friction and prevent hotspots. Applying a blister shield or using insoles with added cushioning can also help. Opting for waterproof styles may reduce moisture buildup, which can cause discomfort. Prioritizing fit and using these strategies ensures a more enjoyable experience for any adventure or activity.

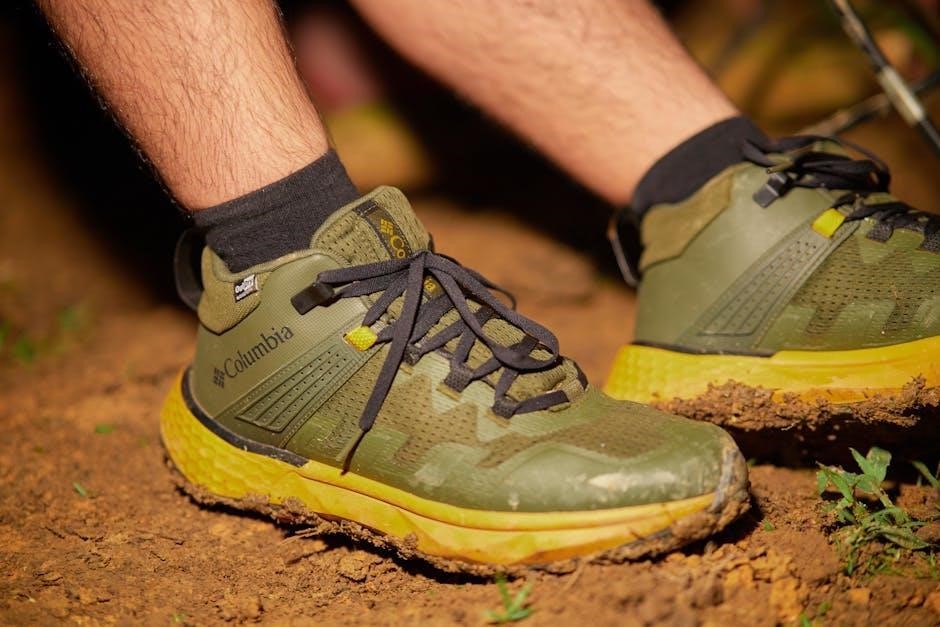
Columbia Footwear Technology and Fit

Columbia’s footwear integrates advanced technologies like waterproofing and cushioning to enhance comfort and support. These innovations ensure a snug, responsive fit while maintaining durability for outdoor adventures.

11.1 How Waterproofing Affects Fit

Waterproofing in Columbia footwear adds a layer of protection but can slightly stiffen the material, potentially affecting flexibility. However, Columbia designs their waterproof shoes to maintain a comfortable fit, ensuring breathability and support without compromising on weather resistance. This balance allows for optimal performance in wet conditions while keeping the foot comfortable and dry during outdoor activities.

11.2 Impact of Cushioning and Support Features

Columbia’s cushioning and support features, like midsole technology and arch support, enhance comfort and stability. These elements may slightly alter the internal space of the shoe, potentially affecting fit. Proper sizing is crucial to ensure that the cushioning and support features function as intended, providing optimal comfort and performance during activities without causing discomfort or restriction.

Customer Reviews and Size Feedback

Customers often praise Columbia shoes for consistent sizing and comfort. Many recommend sizing up for activities, especially for those with wider feet, to ensure optimal fit.

12.1 Real-Life Experiences with Columbia Sizes

Many hikers report that Columbia shoes fit true to size, offering excellent comfort during long treks. Some users with wider feet recommend sizing up for a better fit. Others appreciate the accurate size chart, ensuring a perfect match. Overall, real-life experiences highlight Columbia’s reliability in providing consistent sizing, making them a top choice for outdoor enthusiasts.

12.2 Common Themes in Customer Reviews

Customers frequently praise Columbia shoes for fitting true to size, ensuring comfort and reliability. Many recommend sizing up for hiking to accommodate foot swelling. Some users with wider feet note a snug fit and suggest opting for a half size larger. Overall, reviews highlight consistent sizing, durability, and comfort, making Columbia a trusted choice for outdoor activities and everyday wear.

Size Guide for Specific Activities

Columbia’s size guide offers tailored recommendations for hiking, backpacking, and running. Customers often suggest sizing up for high-impact activities to accommodate foot swelling, enhancing comfort and performance.

13.1 Sizing for Hiking and Backpacking

For hiking and backpacking, proper shoe sizing is crucial to prevent discomfort and blisters. Columbia recommends considering foot swelling during long treks and suggests sizing up by a half or full size. Opting for waterproof boots with sturdy support ensures durability on rugged trails. The Columbia Women’s Newton Ridge Plus Waterproof Amped boots are highly rated for such activities, offering reliability and comfort. Prioritize a snug yet roomy fit to accommodate thick socks and ensure optimal performance on the trail.

13.2 Sizing for Running and Trail Running

For running and trail running, proper sizing is essential to ensure responsiveness and comfort. Columbia recommends sizing up by a half size to accommodate foot movement and swelling during intense activities. A snug fit is crucial to prevent blisters, while maintaining enough room in the toe box for natural toe splay. Opting for lightweight, cushioned models like the Columbia Redmond V2 ensures superior performance on both trails and paved paths, blending durability with comfort for long-distance efforts.

Columbia Size Guide for Accessories

Columbia’s accessories, like socks and insoles, are designed to complement footwear fit. Choose sizes that align with your shoe size for optimal comfort and performance.

14.1 Socks and Insoles Compatibility

Choosing the right socks and insoles is crucial for comfort and fit. Columbia recommends selecting socks that match your shoe size to avoid tightness or slipping. Insoles should also align with your footwear size for optimal support. Proper compatibility ensures even pressure distribution, preventing discomfort during outdoor activities. Measure your feet regularly, as foot size can change over time, and consider the thickness of socks when selecting insoles for the best fit.

14.2 How Accessories Affect Shoe Fit

Accessories like orthotics, lacing systems, and sock thickness can significantly impact shoe fit. Orthotics may require a larger size for comfort, while tighter lacing can reduce internal space. Thicker socks can cause snugness, potentially necessitating a half-size increase. Ensuring accessories align with shoe design and foot shape is essential for optimal fit. Columbia recommends trying shoes with intended accessories to avoid sizing mismatches and discomfort during wear.

Frequently Asked Questions

Discover answers to common queries about Columbia shoe sizing, returns, and care to make informed decisions for the best fit and long-lasting comfort;

15.1 Can I Return or Exchange Shoes That Don’t Fit?

Columbia offers a straightforward return and exchange policy for shoes that don’t fit. If your purchase doesn’t meet your expectations, you can initiate the process online. Ensure the shoes are in their original condition with tags attached. Returns are typically processed within a few days, and exchanges are available for a different size or style. This hassle-free approach ensures you find the perfect fit without stress, aligning with Columbia’s commitment to customer satisfaction.

15.2 How Do I Care for My Columbia Shoes to Maintain Fit?

To maintain the fit and longevity of your Columbia shoes, clean them regularly with a soft brush or cloth to remove dirt. Avoid harsh chemicals, as they may damage materials. Allow shoes to air dry naturally, away from direct heat. For leather styles, condition periodically to retain suppleness. Store in a cool, dry place to prevent warping. Avoid extreme temperatures, which can degrade adhesives. Proper care ensures your shoes remain comfortable and supportive for years of outdoor adventures.

Choosing the right Columbia shoe size ensures comfort and performance. Use the size guide to make informed decisions, ensuring the perfect fit for all your outdoor adventures.

16.1 Final Thoughts on Choosing the Right Size

Choosing the right Columbia shoe size is crucial for comfort and performance. Always consider foot swelling, measure accurately, and align your choice with your activity needs. Proper fit enhances durability and outdoor experiences, ensuring your shoes remain reliable companions for years of adventures. By following the size guide and personal preferences, you can confidently select footwear that supports your active lifestyle and delivers the comfort Columbia is known for, making every step enjoyable and stress-free.

16.2 Encouragement to Use the Size Guide Effectively

Embrace Columbia’s size guide to unlock the best fit for your adventures. By understanding your measurements and activity needs, you’ll avoid unnecessary returns and ensure lasting comfort. Proper sizing enhances performance and durability, making every step more enjoyable. Take the time to measure accurately and consider factors like foot swelling or width options. With Columbia’s comprehensive guide, you’re empowered to make informed choices, ensuring your footwear supports your active lifestyle and delivers the comfort and reliability you deserve on every trail or street.

word ladders pdf

Word ladders are engaging word puzzles where players transform one word into another by changing one letter at a time. This activity enhances vocabulary, promotes creative thinking, and offers educational fun for all ages.

Origins and History of Word Ladders

Word ladders, also known as word chains, have a rich history rooted in linguistic puzzles. The concept emerged in the 19th century as a tool for exploring language structure and vocabulary. The idea gained popularity in the early 20th century when it was used in educational settings to teach vocabulary and spelling. Over time, word ladders evolved into a popular activity in language learning, creativity exercises, and even cognitive development. The term “ladder” refers to the step-by-step transformation of words, mirroring the rungs of a ladder. Today, word ladders are widely used in classrooms, workshops, and online platforms, offering a fun and engaging way to improve linguistic skills. Their versatility has made them a staple in educational resources, including PDF guides and worksheets, which provide structured exercises for learners of all ages.

How to Create Word Ladders

To create word ladders, start with a beginning and ending word. Plan intermediate words by changing one letter at a time, ensuring each step forms a valid word. Use dictionaries or online tools to verify and generate steps efficiently.

Basic Rules of Word Ladders

Word ladders follow specific rules to ensure fun and challenging puzzles. First, only one letter can be changed at each step to form a new word. Each intermediate word must be valid and found in a dictionary. The word length remains constant throughout the ladder. Players cannot rearrange letters or skip steps. Tools like Scrabble dictionaries or online generators can help verify words. These rules apply universally, making word ladders accessible and consistent for all participants. They encourage logical thinking and vocabulary growth while maintaining a clear structure for solving puzzles. By adhering to these guidelines, word ladders provide an engaging and educational experience for users of all ages.

Steps to Build a Word Ladder

Building a word ladder involves a systematic approach to create an engaging puzzle. Start by selecting a starting and ending word, ensuring they are of the same length. Next, identify intermediate words by changing one letter at a time, verifying each with a dictionary. Use tools like Scrabble dictionaries or online generators to find valid words. Plan the ladder step-by-step, ensuring each transition is logical. For educational purposes, choose words that align with learning objectives. Finally, review the ladder to ensure all rules are followed and the puzzle is solvable. This method ensures a fun and educational experience, making word ladders a valuable tool for vocabulary expansion and problem-solving skills. By following these steps, educators and enthusiasts can create effective word ladders tailored to various needs and skill levels.

Examples of Word Ladders

Word ladders are demonstrated through sequences of words where each step changes one letter. A classic example is transforming “cat” into “dog”: cat → cot → dot → dog. Another example is changing “more” into “less”: more → lore → lose → less. These ladders showcase how single-letter changes create new valid words. For educational purposes, ladders often align with themes, such as seasonal words or academic vocabulary. For instance, a ladder might progress from “spring” to “summer”: spring → spuing → spueng → spueneg → spuened → spuendg → spuendr → spuendy → spuendya → spuendyb → spuendybr → spuendybro → spuendybrou → spuendybrout → spuendybrouth → spuendybrouthe → spuendybrouther → spuendybrouthers → spuendybrouthees → spuendybrouthee → spuendybroutheed → spuendybroutheeds → spuendybroutheedss → spuendybroutheedsss → spuendybroutheedssss → spuendybroutheedsssss → spuendybroutheedssssss → spuendybroutheedsssssss → spuendybroutheedssssssss → spuendybroutheedsssssssss → spuendybroutheedssssssssss → spuendybroutheedsssssssssss → spuendybroutheedssssssssssss → spuendybroutheedsssssssssssss → spuendybroutheedssssssssssssss → spuendybroutheedsssssssssssssss → spuendybroutheedssssssssssssssss → spuendybroutheedsssssssssssssssss → spuendybroutheedssssssssssssssssss → spuendybroutheedsssssssssssssssssss → spuendybroutheedssssssssssssssssssss → spuendybroutheedsssssssssssssssssssss → spuendybroutheedssssssssssssssssssssss → spuendybroutheedsssssssssssssssssssssss → spuendybroutheedssssssssssssssssssssssss → spuendybroutheedsssssssssssssssssssssssss → spuendybroutheedssssssssssssssssssssssssss → spuendybroutheedsssssssssssssssssssssssssss → spuendybroutheedssssssssssssssssssssssssssss → spuendybroutheedsssssssssssssssssssssssssssss → spuendybroutheedssssssssssssssssssssssssssssss → spuendybroutheedsssssssssssssssssssssssssssssss → spuendybroutheedssssssssssssssssssssssssssssssss → spuendybroutheedsssssssssssssssssssssssssssssssss → spuendybroutheedssssssssssssssssssssssssssssssssss → spuendybroutheedsssssssssssssssssssssssssssssssssss → spuendybroutheedssssssssssssssssssssssssssssssssssss → spuendybroutheedsssssssssssssssssssssssssssssssssssss → spuendybroutheedssssssssssssssssssssssssssssssssssssss → spuendybroutheedsssssssssssssssssssssssssssssssssssssss → spuendybroutheedssssssssssssssssssssssssssssssssssssssss → spuendybroutheedsssssssssssssssssssssssssssssssssssssssss → spuendybroutheedssssssssssssssssssssssssssssssssssssssssss → spuendybroutheedsssssssssssssssssssssssssssssssssssssssssss → spuendybroutheedssssssssssssssssssssssssssssssssssssssssssss → spuendybroutheedsssssssssssssssssssssssssssssssssssssssssssss → spuendybroutheedssssssssssssssssssssssssssssssssssssssssssssss → spuendybroutheedsssssssssssssssssssssssssssssssssssssssssssssss → spuendybroutheedssssssssssssssssssssssssssssssssssssssssssssssss → spuendybroutheedsssssssssssssssssssssssssssssssssssssssssssssssss → spuendybroutheedssssssssssssssssssssssssssssssssssssssssssssssssss → spuendybroutheedsssssssssssssssssssssssssssssssssssssssssssssssssss → spuendybroutheedssssssssssssssssssssssssssssssssssssssssssssssssssss → spuendybroutheedsssssssssssssssssssssssssssssssssssssssssssssssssssss → spuendybroutheedssssssssssssssssssssssssssssssssssssssssssssssssssssss → spuendybroutheedsssssssssssssssssssssssssssssssssssssssssssssssssssssss → spuendybroutheedssssssssssssssssssssssssssssssssssssssssssssssssssssssss → spuendybroutheedsssssssssssssssssssssssssssssssssssssssssssssssssssssssss → spuendybroutheedssssssssssssssssssssssssssssssssssssssssssssssssssssssssss → spuendybroutheedsssssssssssssssssssssssssssssssssssssssssssssssssssssssssss → spuendybroutheedssssssssssssssssssssssssssssssssssssssssssssssssssssssssssss → spuendybroutheedsssssssssssssssssssssssssssssssssssssssssssssssssssssssssssss → spuendybroutheedssssssssssssssssssssssssssssssssssssssssssssssssssssssssssssss → spuendybroutheedsssssssssssssssssssssssssssssssssssssssssssssssssssssssssssssss → spuendybroutheed

Educational Benefits of Word Ladders

Word ladders enhance vocabulary, improve problem-solving skills, and reinforce letter-sound relationships. They support differentiated instruction, engaging students of all learning levels and fostering a deeper understanding of word structures in a fun, interactive way;

Vocabulary Expansion Through Word Ladders

Word ladders are a powerful tool for expanding vocabulary by introducing new words in a structured and engaging way. By transforming one word into another through incremental changes, students encounter a variety of terms, often with related meanings. This activity encourages learners to explore word relationships and understand how small changes can lead to entirely new definitions. For example, transforming “more” into “less” by changing one letter at a time introduces words like “lore” and “lose,” which expand vocabulary while highlighting connections between meanings. Word ladders also provide hands-on practice with word roots, prefixes, and suffixes, helping students recognize patterns and build a stronger foundation in language. This method is particularly effective for visual and kinesthetic learners, as it combines problem-solving with creative thinking. Over time, regular use of word ladders can significantly enhance vocabulary retention and comprehension, making it a valuable educational resource.

Improving Problem-Solving Skills

Word ladders are an excellent tool for enhancing problem-solving abilities, as they require strategic thinking and careful planning. Each step in a word ladder challenges the brain to think creatively while adhering to specific rules, such as changing only one letter at a time. This activity encourages learners to evaluate multiple possibilities, weigh options, and make logical decisions. By navigating through word transformations, individuals develop critical thinking skills, as they must often backtrack or try alternative paths when a step doesn’t lead to a valid word. Over time, this process builds resilience and adaptability, key components of effective problem-solving. The structured yet open-ended nature of word ladders makes them ideal for fostering analytical skills in a fun and engaging way. Regular practice can improve cognitive flexibility and enhance the ability to approach challenges systematically, benefiting learners in academic and real-world scenarios alike.

Types of Word Ladders

Word ladders come in various forms, including themed ladders for specific topics, multilingual ladders for language learning, and double ladders requiring two changes per step for added complexity.

Themed Word Ladders

Themed word ladders add an extra layer of engagement by focusing on specific topics, such as holidays, animals, or professions. These ladders use words related to a central theme, making them ideal for tailored learning experiences. For example, a holiday-themed ladder might transform “ghost” into “witch” by changing one letter at a time, keeping the spooky theme intact. Similarly, animal-themed ladders could shift “cat” to “dog” through intermediate steps like “cot” and “cog.” This approach not only builds vocabulary but also connects words to real-world contexts, enhancing retention and interest. Educators often use themed ladders to align with curriculum topics, while learners enjoy the relevance and fun of exploring familiar themes. Themed ladders are particularly effective for younger students, as they combine learning with creativity and play.

Multilingual Word Ladders

Multilingual word ladders are innovative tools that bridge language learning and linguistic exploration. These ladders allow users to transition from a word in one language to its equivalent in another by altering one letter at a time. For instance, transforming the English word “hello” into the Spanish “hola” through intermediate bilingual steps. This method not only enhances vocabulary in multiple languages but also highlights linguistic similarities and differences. Multilingual ladders are particularly useful for language learners, as they provide a visual and interactive way to understand cognates and etymology. Educators can integrate these ladders into language classes to make learning engaging and culturally enriching. Additionally, they serve as a creative resource for bilingual education programs, fostering a deeper appreciation for language diversity and interconnectedness.

Resources for Word Ladders

Explore diverse resources like PDF guides, worksheets, and online tools to create and solve word ladders. These materials offer interactive activities, making learning fun and accessible for all skill levels.

PDF Guides and Worksheets

PDF guides and worksheets are excellent resources for exploring word ladders. These materials often include step-by-step instructions, puzzles, and exercises designed to help users create and solve ladders effectively.

Many PDF guides are tailored for educational purposes, offering word ladders for different grade levels. They frequently feature themed puzzles, such as holiday-themed or vocabulary-focused ladders, to make learning engaging.

Worksheets often include blank ladders for students to complete, along with answer keys for easy grading. These tools are ideal for classroom use or independent practice, promoting vocabulary expansion and problem-solving skills.

Additionally, PDF guides may provide tips for constructing custom word ladders, making them useful for educators and enthusiasts alike. Their reproducibility and ease of download make them a popular choice for language learning and literacy programs.

Overall, PDF guides and worksheets are versatile and practical resources for anyone looking to enjoy or teach word ladders in a structured and fun manner.

Online Tools and Generators

Online tools and generators are invaluable resources for creating and exploring word ladders. These platforms allow users to generate custom ladders quickly and efficiently, often with options to customize difficulty and theme.

Many online generators enable users to input start and end words, producing a step-by-step ladder automatically. Some tools also provide interactive features, such as solving ladders in real-time or sharing results with others.

Additionally, these tools often support multilingual word ladders, catering to language learners and educators. They are particularly useful for classroom activities, as they can produce themed ladders aligned with curriculum topics.

Online generators are also great for educators, offering pre-made ladders and the ability to create personalized exercises. Their accessibility and versatility make them a popular choice for both casual enthusiasts and educational professionals.

Overall, online tools and generators are essential for anyone looking to engage with word ladders dynamically and efficiently, whether for fun or educational purposes.

Interactive Activities

Interactive activities are a great way to engage with word ladders, making learning fun and dynamic. These activities can be found in various forms, such as online games, printable worksheets, and classroom exercises.

One popular interactive activity involves solving word ladder puzzles in real-time. Players are given a start and end word, and they must transform the first into the second by changing one letter at a time. This activity enhances problem-solving skills and vocabulary.

Another interactive approach is through themed word ladders, where all words relate to a specific topic, such as animals or countries. This adds an extra layer of challenge and educational value.

Digital tools also offer interactive features, such as drag-and-drop letter games or timed challenges, making word ladders more engaging for tech-savvy learners.

Overall, interactive activities make word ladders an enjoyable and effective tool for improving language skills in a variety of settings.

Advanced Strategies for Word Ladders

Mastering word ladders requires more than just changing letters; it involves strategic thinking and a deep understanding of word relationships. One advanced strategy is to reverse-engineer ladders by starting from the end word and working backward, which can reveal hidden patterns and connections.

Another technique is to use Scrabble dictionaries or word lists to identify high-probability transitions, ensuring each step is valid and meaningful. Experienced players also recognize common letter patterns, such as prefixes, suffixes, and word families, to navigate ladders more efficiently.

Additionally, advanced strategies involve minimizing dead ends by previewing multiple steps ahead. This foresight allows players to choose paths with higher potential for completion. By combining these methods, word ladder enthusiasts can tackle even the most complex puzzles with confidence and precision.

Real-World Applications of Word Ladders

Word ladders are widely used by educators and language learners to enhance vocabulary and cognitive skills. They also find applications in creative writing, team-building exercises, and even cognitive therapy sessions.

Use in Educational Settings

Word ladders are a valuable tool in educational settings, helping students develop vocabulary and problem-solving skills. They are often used in literacy programs to teach word relationships, phonics, and spelling. Teachers use word ladders to engage students in active learning, encouraging creativity and critical thinking. These exercises are particularly effective for differentiated instruction, catering to learners of varying skill levels. Word ladders also support language acquisition in ESL classrooms and are integrated into curricula for grades K-8. Their step-by-step approach makes complex vocabulary accessible, fostering confidence and a deeper understanding of language. By incorporating word ladders into lesson plans, educators can create interactive and meaningful learning experiences that align with educational standards and promote academic growth.

Language Learning Applications

Word ladders are a powerful tool in language learning, helping learners build vocabulary and understand word relationships. They are particularly effective for ESL students, as they illustrate how small changes can create new meanings. By transforming one word into another, learners practice pronunciation, spelling, and syntax. Word ladders also highlight patterns in language, making them useful for teaching grammar and vocabulary in context. They encourage active engagement and problem-solving, fostering a deeper connection to the language. Additionally, word ladders can be adapted for multilingual learners, bridging gaps between languages. Their step-by-step nature makes complex vocabulary accessible, while their interactive design promotes self-directed learning. As a result, word ladders are widely used in language curricula, offering a fun and effective way to master new languages and cultural expressions. Their versatility ensures they remain a valuable resource for language acquisition at all levels.

Word ladders are a timeless and versatile tool for learning and entertainment, offering a unique way to explore language and creativity. By transforming words step-by-step, they challenge the mind and foster problem-solving skills. Their adaptability to various educational levels and themes makes them invaluable for both students and educators. Word ladders not only enhance vocabulary but also promote critical thinking and linguistic awareness. They are particularly effective in engaging learners of all ages, providing a fun yet educational experience. Their ability to connect words in meaningful ways highlights the beauty of language and its endless possibilities. Whether used in classrooms or for personal growth, word ladders continue to inspire and educate, proving their lasting value in the world of words and learning. They remain a cherished activity, bridging the gap between fun and intellectual development.

where the wild things are pdf

Overview of “Where the Wild Things Are”

Where the Wild Things Are is a beloved children’s story by Maurice Sendak, following Max’s journey to a fantastical land of wild creatures.

Significance of the Book

The book, winner of the 1964 Caldecott Medal, explores themes of imagination and childhood, resonating with readers of all ages, now available as a PDF.

Where the Wild Things Are, written and illustrated by Maurice Sendak, is a timeless children’s story about a young boy named Max who voyages to a magical land inhabited by mysterious creatures. Celebrated for its vivid imagery and emotional depth, the book has become a cornerstone of children’s literature, earning the prestigious Caldecott Medal in 1964. Its universal themes of imagination, independence, and the comfort of home resonate with readers across generations. The story’s enduring popularity has led to its availability in various formats, including PDF, making it easily accessible to a global audience.

Where the Wild Things Are holds a special place in children’s literature for its exploration of imagination, independence, and the complexities of childhood. Its vivid storytelling and iconic illustrations have made it a beloved classic, earning the Caldecott Medal in 1964. The book’s ability to address emotional depth through simple yet powerful narrative has resonated with readers worldwide. Its availability in PDF format has further amplified its reach, allowing new generations to experience Max’s magical journey and the timeless lessons it offers.

Author Background

Maurice Sendak: Biography and Contributions

Maurice Sendak, born in 1928 in Brooklyn, was a celebrated author and illustrator. His iconic book, Where the Wild Things Are, earned the 1964 Caldecott Medal, solidifying his legacy in children’s literature until his passing in 2012.

Maurice Sendak was a renowned American illustrator and writer, best known for Where the Wild Things Are. Born in 1928 in Brooklyn, his work often explored complex emotions, earning him the 1964 Caldecott Medal. Sendak’s unique storytelling and vibrant illustrations have left a lasting impact on children’s literature, making his books, including the PDF version of Where the Wild Things Are, timeless classics cherished by readers worldwide.

Plot Summary

Storyline of “Where the Wild Things Are”

Max, wearing his wolf suit, travels to a fantastical land inhabited by wild creatures. He tames them, becoming their king, but ultimately returns home, finding comfort.

Where the Wild Things Are follows Max, a young boy in a wolf costume, who travels to a mysterious land after being sent to his room for mischief. There, he encounters fantastical creatures known as the “Wild Things,” whom he tames and rules as their king. Max leads the Wild Things in a joyful rumpus but soon realizes the comfort of home. His journey explores themes of imagination, courage, and the universal longing for belonging and security.

Themes and Symbolism

Exploring Themes in the Book

Where the Wild Things Are explores themes of imagination, childhood emotions, and the balance between freedom and comfort, resonating deeply with readers of all ages;

Symbolism in the Story

The Wild Things symbolize untamed emotions and instincts, while Max’s journey represents growth, self-discovery, and the universal struggle between independence and the comfort of home.

Where the Wild Things Are delves into universal themes such as imagination, childhood emotions, and the balance between freedom and comfort. Max’s journey symbolizes a child’s struggle for independence and the need for parental love. The story also explores the concept of identity, as Max navigates between his wild nature and the responsibilities of growing up. These themes resonate deeply with readers, making the book a timeless classic in children’s literature, now widely available as a PDF.

Where the Wild Things Are is rich in symbolism, with Max’s wolf suit representing rebellion and raw childhood energy. The wild creatures embody untamed emotions and the challenges of growing up. Max’s journey to their land symbolizes a child’s internal struggle for independence and understanding. The crown he wears as their king signifies leadership and control, while his return home highlights the comfort of family and reality. The story’s symbols explore themes of identity, emotion, and the balance between wildness and domesticity, resonating deeply with readers of all ages.

Illustrations

The Role of Illustrations in the Book

Maurice Sendak’s iconic illustrations in Where the Wild Things Are bring the fantastical world to life, with intricate details and expressive creatures that captivate readers in the PDF version.

Maurice Sendak’s illustrations in Where the Wild Things Are are central to the story, blending whimsy and intensity. His detailed, expressive artwork captures Max’s journey and the wild creatures’ emotions, immersing readers in the fantastical world. The PDF version preserves these iconic visuals, ensuring the story’s magic remains intact for digital readers. Sendak’s unique style, combining intricate textures and dynamic compositions, has made the illustrations timeless and unforgettable, enhancing the narrative’s emotional depth and universal appeal.

Significance and Reception

Critical and Public Reception

Where the Wild Things Are received widespread acclaim for its unique storytelling and illustrations, earning the 1964 Caldecott Medal and becoming a modern classic in children’s literature.

Awards and Accolades

Where the Wild Things Are earned the prestigious Caldecott Medal in 1964, recognizing its outstanding illustrations and storytelling. This honor solidified its place as a timeless classic in children’s literature. The book has been widely praised for its imaginative narrative and emotional depth, making it a beloved choice for readers worldwide. Its enduring popularity highlights its lasting impact on the genre, ensuring its continued relevance and acclaim across generations.

Where the Wild Things Are has received widespread acclaim for its unique storytelling and captivating illustrations. Critics praise Maurice Sendak’s ability to explore complex emotions through simple yet profound narratives. The public has embraced the book as a timeless tale of imagination and childhood. Its availability in PDF format has further amplified its reach, allowing new generations to experience Max’s journey. The story’s universal themes continue to resonate, making it a cherished read for both children and adults alike.

PDF Availability and Download

How to Access the PDF Version

The PDF of Where the Wild Things Are is widely available online. It can be downloaded for free from various sources, including Flip PDFs and direct links.

The PDF version of Where the Wild Things Are can be easily accessed through various online platforms. Websites like Flip PDFs offer free downloads, with options to view or save the file. Direct links are available on multiple sources, ensuring quick access. The PDF is also accessible through specific file names such as Where The Wild Things Are.pdf or sendak_m_where_the_wild_things_are.pdf. Additionally, the file is available in sizes like 18.1 MB or 38.2 MB, catering to different user preferences. Always ensure to download from legitimate and safe sources to avoid any security risks. By searching for keywords like “Where the Wild Things Are PDF free download,” users can find reliable links to access the book conveniently.

Legitimate Sources for Download

Legitimate sources for downloading Where the Wild Things Are in PDF format include trusted platforms like Flip PDFs and file-sharing sites offering free access. Users can search for specific files such as Where The Wild Things Are.pdf or sendak_m_where_the_wild_things_are.pdf. Additionally, websites like ettron.com provide direct links to the PDF. Always verify the authenticity of the source and ensure the file is downloaded legally and safely to avoid copyright infringement or security risks.

Formats

PDF and EPUB Versions

Where the Wild Things Are is available in PDF and EPUB formats, ensuring accessibility across various devices. The PDF version preserves the book’s original illustrations and layout, making it a popular choice for readers who appreciate the visual storytelling. EPUB offers flexibility for those preferring adjustable text sizes and reflowable content. Both formats cater to different reading preferences, ensuring the story remains engaging and accessible to all audiences.

The book is widely available in both PDF and EPUB formats, catering to diverse reader preferences. The PDF version retains the original illustrations and layout, ideal for preserving Maurice Sendak’s iconic visuals. EPUB offers flexibility, with adjustable text sizes and reflowable content, making it suitable for various devices. Both formats ensure the story remains accessible and engaging, whether read on a tablet, e-reader, or smartphone. This adaptability has helped the book reach a broader audience while maintaining its timeless appeal.

Why Choose PDF?

Advantages of the PDF Format

PDF retains the book’s original visuals and layout, preserving Maurice Sendak’s iconic illustrations. It also offers easy accessibility and free downloads, making it a popular choice.

The PDF format offers a seamless reading experience, preserving the book’s vibrant illustrations and original layout. It ensures compatibility across all devices, providing easy access anytime, anywhere. PDFs are ideal for offline reading, making them perfect for travelers or those without constant internet access. Additionally, PDFs are widely available for free download, allowing readers to enjoy Maurice Sendak’s timeless story without cost. This format is also shareable and printable, enhancing its convenience for educators and families. Its popularity stems from its reliability and high-quality presentation of both text and images, making it a preferred choice for fans of Where the Wild Things Are.

Impact on Children’s Literature

Influence on the Genre

Where the Wild Things Are revolutionized children’s literature by introducing complex emotions and darker themes, inspiring future authors to explore deeper storytelling in kids’ books.

Where the Wild Things Are has profoundly influenced children’s literature by introducing darker, more complex themes and emotions, breaking traditional storytelling norms. Maurice Sendak’s bold approach encouraged authors to explore deeper, more realistic narratives, expanding the genre’s boundaries. The book’s success paved the way for stories that embrace imagination and emotional depth, making it a cornerstone of modern children’s literature. Its availability in formats like PDF and EPUB ensures continued accessibility, inspiring future generations of writers and readers alike.

Book Summary

Detailed Summary of Content

Where the Wild Things Are follows Max, a young boy in a wolf suit, who voyages to a land of fantastical creatures after being sent to his room for mischief, teaching him valuable lessons about bravery, belonging, and home.

Where the Wild Things Are, written and illustrated by Maurice Sendak, tells the story of Max, a young boy who travels to a magical land inhabited by fierce creatures. Dressed in his wolf suit, Max navigates a journey of self-discovery, becoming the king of the Wild Things. Through his adventures, Max learns about bravery, leadership, and the comfort of home. The book, a 1964 Caldecott Medal winner, is celebrated for its timeless themes and iconic illustrations, now widely available as a PDF for readers worldwide.

Main Character: Max

Character Analysis of Max

Max, the protagonist, is a curious boy in a wolf suit who embarks on an adventurous journey, showcasing courage, imagination, and a universal childhood spirit.

Max, the protagonist, is a curious and adventurous boy who wears a wolf suit, symbolizing his wild and imaginative nature. His journey to the land of the Wild Things reflects his desire for exploration and control. Max’s character embodies childhood innocence, creativity, and resilience. Through his experiences, he learns about responsibility and the comfort of home. Max’s emotional depth and relatable struggles make him a universal and endearing character for readers of all ages.

Reading Resources

Additional Resources for Readers

Download the PDF version for easy access. Explore study guides, companion books, and online resources to deepen your understanding of Max’s adventure and the book’s themes.

Enhance your reading experience with study guides, teacher resources, and companion books. Discover audiobook versions for on-the-go listening. Explore PDF and EPUB formats for digital convenience. Utilize online platforms offering free downloads and legitimate sources like Harper Collins. Engage with discussion forums and educational websites for deeper insights. These resources provide a comprehensive understanding of Max’s journey and the book’s themes, making it ideal for both personal enjoyment and classroom use.

Discussion Topics

Where the Wild Things Are sparks discussions on bravery, imagination, and emotional growth. Explore Max’s journey, the symbolism of the wild things, and its relevance to childhood experiences.

Points for Educators and Readers

Discussion topics for Where the Wild Things Are include analyzing Max’s emotional journey, the symbolism of the wild things, and the book’s exploration of imagination and independence. Educators can use the story to spark conversations about bravery, family dynamics, and self-expression. Readers can reflect on how Max’s adventures relate to their own childhood experiences. The book’s themes of growth and belonging also invite deeper exploration, making it a rich resource for both classrooms and personal reading.

Final Thoughts on the Book

Where the Wild Things Are remains a timeless tale, celebrated for its vivid storytelling and universal themes, now accessible as a convenient PDF for readers worldwide.

Where the Wild Things Are is a cultural icon, blending timeless themes of imagination, childhood, and emotional growth. Its enduring legacy, marked by the 1964 Caldecott Medal, continues to captivate readers globally. The story’s universal appeal lies in its ability to resonate with both children and adults, exploring complex emotions through simple yet profound storytelling. As a PDF, the book remains accessible, ensuring Maurice Sendak’s masterpiece reaches new generations, preserving its magic for years to come.

how do i sign a secured pdf

A secured PDF is a document protected by passwords or encryption, ensuring only authorized users can access or modify its contents. This method enhances document security, preventing unauthorized access and protecting sensitive information.

1.1 What is a Secured PDF?

A secured PDF is a document protected by passwords or encryption, ensuring only authorized users can access or modify its contents. It typically requires a password to open or edit, safeguarding sensitive information from unauthorized access. Secured PDFs often use encryption to protect data integrity and confidentiality, making them ideal for sharing confidential documents securely. They may also have restrictions on printing, copying, or further sharing, adding an extra layer of security for critical files.

1.2 Importance of Securing PDFs

Securing PDFs is essential to protect sensitive information from unauthorized access. Password protection and encryption ensure confidentiality, especially for legal, financial, or personal documents. This security measure prevents data breaches and maintains the integrity of the content. It also helps comply with data protection regulations, safeguarding both individuals and organizations from potential risks. Securing PDFs is a critical step in ensuring that shared documents remain accessible only to intended recipients, preserving trust and security in digital communication.

1.3 Common Uses of Secured PDFs

Secured PDFs are widely used for sharing confidential documents, such as financial statements, legal contracts, and personal records. They are ideal for businesses to protect sensitive data when sending invoices or proposals. Academic institutions also use them to securely distribute copyrighted materials. Additionally, individuals employ secured PDFs for tax returns, medical records, and other private information. This ensures that the content remains protected from unauthorized access, making it a reliable method for safeguarding digital information across various industries and personal use cases.

Tools and Software for Signing Secured PDFs

Popular tools include Adobe Acrobat, online PDF signers, and mobile apps. These platforms offer features like password removal, digital signatures, and secure document management, ensuring easy and safe signing of protected PDFs.

2.1 Adobe Acrobat Reader

Adobe Acrobat Reader is a widely-used tool for viewing and signing secured PDFs. It supports password-protected documents and allows users to add digital signatures. With Acrobat, you can open encrypted PDFs, remove security settings, and sign them electronically. The software provides features like password protection, encryption, and signature management, making it a reliable choice for handling sensitive documents securely. It also enables users to fill forms and add annotations, ensuring a seamless experience for signing secured PDFs efficiently.

2.2 Online PDF Signers

Online PDF signers are convenient tools for signing secured PDFs without downloading software. Platforms like Smallpdf, DocuSign, and SignNow allow users to upload PDFs, add digital signatures, and download the signed document. These services often support password-protected files and offer features like form filling, encryption, and multi-user collaboration. They are ideal for quick, secure, and remote signing processes, eliminating the need for physical storage or complex installations. Online signers also provide cloud-based solutions for easy access and sharing.

2.3 Mobile Apps for PDF Signing

Mobile apps like Adobe Fill & Sign, SignNow, and DocuSign enable users to sign secured PDFs on-the-go. These apps support password-protected documents, allowing users to import, sign, and share PDFs seamlessly. With touch-friendly interfaces, they offer features like signature drawing, typing, or uploading pre-saved signatures. Offline access and cloud syncing make them versatile for remote workflows, ensuring efficiency and security for professionals handling sensitive documents. These apps are compatible with both Android and iOS, providing a reliable solution for mobile-first users.

Preparing to Sign a Secured PDF

Ensure you have the correct password to unlock the PDF. Verify permissions allow signing. Create a backup to avoid data loss during the signing process.

3.1 Understanding Password Protection

Password protection is a critical security feature for PDFs, ensuring only authorized users can access or modify the document. There are two main types of passwords: the user password, which grants access to view the document, and the permissions password, which controls actions like editing, printing, or adding signatures. Knowing these passwords is essential for making changes, including signing the PDF. Understanding password protection helps maintain document security and ensures compliance with confidentiality requirements.

3.2 Removing Security Restrictions

Removing security restrictions from a PDF is necessary to enable editing or signing. If the PDF is protected by a user password, entering it grants access to view the document. For permission-related restrictions, tools like Adobe Acrobat allow you to remove security settings by navigating to “Protect” options. Additionally, software like qpdf can decrypt password-protected files using specific commands. Always ensure you have authorization to remove restrictions to avoid unauthorized access or legal issues.

3.3 Creating a Backup of the PDF

Creating a backup of a secured PDF ensures data safety before making modifications. Save the file to a secure location, such as an external drive or cloud storage. This step prevents data loss if errors occur during the signing process. Always verify the backup’s integrity by opening it to confirm its contents. This precaution is especially crucial for sensitive or legally binding documents, ensuring accessibility and security of your work.

Methods to Sign a Secured PDF

Secured PDFs can be signed by typing, drawing, or inserting a pre-saved signature, offering secure and efficient ways to authenticate documents electronically.

4.1 Typing Your Signature

Typing your signature is a straightforward method for signing secured PDFs. Users can utilize tools like Adobe Acrobat to type their name, which is then converted into a digital signature. This method is ideal for those who prefer a clean, professional look without the need for handwriting. The typed signature can be customized in terms of font style, size, and color to match personal preferences. It ensures consistency and legibility, making it a popular choice for both personal and professional documents. Additionally, typed signatures are easily scalable and can be reused across multiple documents, saving time and effort. This approach is particularly useful when a handwritten signature is not feasible or practical. By using this method, users maintain the security and integrity of their secured PDFs while ensuring their signatures are clear and professional. Furthermore, typed signatures are compatible with most PDF editing software, making the process seamless and efficient. Overall, typing your signature offers a convenient and reliable way to sign secured PDFs digitally.

4.2 Drawing Your Signature

Drawing your signature on a secured PDF is a personal and intuitive method. Open the PDF in a compatible editor like Adobe Acrobat, navigate to the sign tool, and select the draw option. Use your mouse or touchscreen to create your signature. Practice on a separate canvas if needed for accuracy. Once satisfied, place the signature in the desired location within the document. Ensure the PDF is saved properly, maintaining its security settings. This method offers a professional look and is ideal for those who prefer handwritten signatures. It’s also supported by various online and mobile apps, providing flexibility and convenience. Drawing your signature ensures a unique and authentic touch to your secured PDFs. This approach is user-friendly and accessible across different devices and platforms. By following these steps, you can efficiently add a drawn signature to your secured PDF while preserving its security features. This method is particularly useful for maintaining a personal touch in professional and legal documents. Overall, drawing your signature is a reliable and straightforward way to sign secured PDFs digitally.

4.3 Inserting a Pre-Saved Signature

Inserting a pre-saved signature into a secured PDF streamlines the signing process. Simply open the PDF in an editor like Adobe Acrobat or an online tool. Navigate to the signature tool, choose the option to insert an image, and select your pre-saved signature file. Adjust the size and position as needed. This method is efficient for frequent use, ensuring consistency and saving time. Ensure the signature is clear and visible. This approach is ideal for users who prefer convenience and professionalism in their secured PDFs. It maintains document security while facilitating quick signing. This method is supported by most PDF editors and online platforms, making it widely accessible. By using a pre-saved signature, you enhance productivity and maintain a professional appearance in your secured PDFs. This is particularly beneficial for individuals and businesses requiring frequent document signing. Overall, inserting a pre-saved signature offers a practical and efficient solution for signing secured PDFs.

Step-by-Step Guide Using Adobe Acrobat

Adobe Acrobat offers a user-friendly interface to sign secured PDFs. Open the PDF, navigate to the Sign tool, and follow prompts to add your signature securely.

5.1 Opening the PDF in Adobe Acrobat

Launch Adobe Acrobat and select File > Open to choose your secured PDF. Enter the password to unlock the document. Navigate to the area requiring a signature using Acrobat’s viewer tools. Access the sign tool via the Tools menu or by right-clicking the PDF form and selecting Tools > Protect. Follow the on-screen instructions to create or insert your signature. Ensure to save the document post-signing for all changes to take effect.

5.2 Navigating to the Sign Tool

Once the PDF is open in Adobe Acrobat, locate the Tools menu at the top. Click on Tools > Sign to access the signing features; This will open the Fill & Sign tool, designed for adding electronic signatures. If prompted, select the appropriate option to sign the document yourself. The tool provides options to type, draw, or insert a pre-saved signature, ensuring a secure and efficient signing process for your protected PDF.

5.3 Adding and Customizing Your Signature

After navigating to the Sign tool, click the signature icon in the toolbar. Select Add Signature to create or import your signature. Choose to Draw your signature using your mouse or touchpad, or Type your name to generate a typed signature. For a more personal touch, you can Insert a pre-saved signature image. Customize the size, color, and position of your signature as needed. Once satisfied, click Apply to save your signature and finalize the document.

Signing a Secured PDF Online

Signing a secured PDF online involves uploading the document to a trusted service, adding your digital signature, and downloading the finalized file. It’s quick, secure, and convenient for remote workflows.

6.1 Uploading the PDF to an Online Service

Uploading a secured PDF to an online service typically involves selecting the file from your device or cloud storage. Ensure you have the necessary permissions or password to access the document. Most platforms support drag-and-drop or file browsing options. Once uploaded, the service will process the PDF, allowing you to proceed with adding signatures or other annotations. Always choose a reputable service to maintain document security and privacy throughout the process.

6.2 Adding Your Signature Digitally

After uploading your secured PDF to an online service, locate the signature tool. You can typically type, draw, or upload a pre-saved signature. Select the desired method and customize the appearance, size, and color to match your preferences. Once satisfied, position the signature in the appropriate field within the document. Ensure the signature is clear and professional for legal validity. Most platforms offer preview options to verify placement and appearance before finalizing.

6.3 Downloading the Signed Document

Once your signature is added and positioned correctly, review the document to ensure everything is accurate. Most online services provide a “Download” or “Save” option. Click on this to save the signed PDF to your device. Choose a secure location to store the file, ensuring it is backed up for future reference. Some platforms also offer options to share the document directly via email or cloud storage, maintaining a record of the signed version for legal purposes.

Mobile Solutions for Signing Secured PDFs

Mobile apps like Adobe Acrobat and third-party tools enable users to sign secured PDFs on Android and iOS devices. Open the PDF, add your signature, and sync across devices for easy access.

7.1 Using Android Apps

To sign a secured PDF on Android, open the document in the Files app and select an app like Adobe Acrobat or a third-party PDF signer. Tap the signature tool, draw or type your signature, and save the changes. Some apps may require the document’s password for editing. Ensure the app supports password-protected PDFs for seamless signing. Once signed, share or save the document securely. This method is ideal for on-the-go signing, offering convenience without compromising security.

7.2 Using iOS Apps

On iOS devices, you can sign secured PDFs using apps like Adobe Acrobat Reader or the built-in Markup tool in the Files app. Open the PDF, tap the Markup icon, and select the signature tool. Draw your signature with your finger or Apple Pencil. For password-protected PDFs, enter the password to unlock editing. Save the signed document to your iCloud or share it via email. This method is user-friendly and integrates seamlessly with iOS features, ensuring secure and efficient signing on the go.

7.3 Syncing Across Devices

Syncing signed PDFs across devices ensures accessibility and consistency. Use cloud storage services like iCloud, Google Drive, or Dropbox to store your documents. Enable auto-save features in apps like Adobe Acrobat or signNow to sync your progress. This allows seamless switching between mobile and desktop, maintaining document security and reducing duplication. Additionally, syncing ensures that the latest version of your signed PDF is always available, making collaboration and management more efficient across all platforms.

Troubleshooting Common Issues

Common issues include signature visibility and quality problems. Ensure your software is updated and settings are configured correctly to avoid such troubles.

8.1 Password-Related Problems

Password-related issues are common when signing secured PDFs. If the PDF is user-password protected, entering the correct password is essential to access the document. Forgetting the password or entering it incorrectly can prevent signing. Additionally, some PDFs require a permissions password to allow modifications like adding signatures. Ensure you have the right credentials and permissions. If you encounter repeated errors, verify the password with the document owner or use password recovery tools. Compatibility issues with certain software can also arise when passwords are involved, so using trusted tools like Adobe Acrobat is recommended.

8.2 Compatibility Issues

Compatibility issues arise when software or tools fail to support secured PDFs; Ensure your PDF viewer or editor is updated to handle encryption. Older versions may not support modern security features. Additionally, some online signers may struggle with certain encryption types. Always use trusted tools like Adobe Acrobat for consistency. If issues persist, consider converting the PDF to a standard format or checking for software updates. Testing across different platforms can help identify and resolve compatibility problems effectively.

8.3 Signature Visibility and Quality

Ensuring your signature is visible and of high quality is crucial. Use high-resolution images or clear handwritten scans to avoid blurriness. If typing, choose a readable font size and color that contrasts well with the document. For drawn signatures, ensure proper lighting and pressure when capturing. If the signature appears too small, adjust the size before finalizing; Always preview the signature placement and clarity before saving. For scanned signatures, verify the PDF supports embedded images. Save a backup to avoid quality loss during edits.

Best Practices for Secured PDFs

Maintaining document security and ensuring legal validity are crucial. Always create backups before signing and verify signatures for authenticity. This ensures your secured PDF remains protected and reliable.

9.1 Maintaining Document Security

To maintain document security, always use strong, unique passwords and encrypt sensitive data. Regularly update your PDF software to protect against vulnerabilities. Ensure only authorized individuals have access, and avoid sharing passwords publicly. Encrypting the PDF ensures confidentiality, while backups prevent data loss. Verify signatures for authenticity and use trusted tools to sign documents. By following these practices, you safeguard your secured PDFs from unauthorized access and potential breaches, ensuring your data remains confidential and secure.

9.2 Ensuring Legal Validity of Signatures

To ensure the legal validity of signatures in a secured PDF, use trusted digital tools like Adobe Acrobat, which offer authenticated signing processes. Ensure the signer has explicit consent and authority to sign the document. Verify that the signature meets regional legal requirements, such as eIDAS in Europe or ESIGN in the U.S. Maintain a clear audit trail and timestamp the signature for authenticity. Always keep a record of the signing process to validate the document’s legitimacy in legal proceedings.

9.4 Verifying the Signature

Verifying a signature in a secured PDF ensures its authenticity and integrity. Use tools like Adobe Acrobat to check the signature’s validity. Right-click the signature to view its properties, such as the signer’s identity and the certificate details. Ensure the signature is authenticated and that no changes were made to the document after signing. A valid signature will display a checkmark or “Valid” status, confirming its reliability and compliance with legal standards for digital signatures.

Signing a secured PDF is a straightforward process that ensures document integrity and security. By using tools like Adobe Acrobat or online services, you can easily add digital signatures to password-protected PDFs. Always verify the signature’s authenticity and ensure legal compliance. Protecting sensitive information through encryption and secure signing methods is essential for maintaining confidentiality. Follow best practices to safeguard your documents and streamline workflows efficiently.

liftmaster la500 manual pdf

Welcome to the LiftMaster LA500 Manual, your comprehensive guide to installing, operating, and maintaining the LA500 vehicular swing gate operator. This manual provides essential safety guidelines, installation steps, and operational insights to ensure reliable performance and compliance with UL 325 standards.

1.1 Overview of the LiftMaster LA500 Gate Operator

The LiftMaster LA500 is a high-performance vehicular swing gate operator designed for residential and light commercial use. It offers reliable and quiet operation, making it suitable for various gate types and sizes. The LA500 is UL 325 compliant, ensuring it meets strict safety standards for automated gate systems. With advanced features like MyQ™ Technology, it allows for seamless smartphone control and monitoring. This operator is built to handle heavy-duty applications while maintaining smooth and efficient performance. The LiftMaster LA500 manual provides detailed guidance for installation, programming, and maintenance to ensure optimal functionality and safety. Its robust design and cutting-edge features make it a preferred choice for secure and convenient gate automation.

1.2 Importance of Reading the Manual

Reading the LiftMaster LA500 manual is crucial for safe and proper installation, operation, and maintenance of the gate operator. It provides essential safety guidelines, technical specifications, and step-by-step instructions to ensure compliance with UL 325 standards. Failure to follow the manual can lead to improper installation, safety hazards, or damage to the system; The manual also highlights emergency procedures and troubleshooting tips, which are vital for addressing unexpected issues. By understanding the content, users can maximize the operator’s performance, ensure longevity, and prevent potential risks associated with automated gate systems. Always refer to the manual before attempting any modifications or repairs.

1.3 Safety Precautions Before Installation

Before installing the LiftMaster LA500, ensure all power sources are disconnected to prevent accidental activation. Always follow the manual’s safety guidelines to avoid injuries or fatalities. The gate must be stationary and secured during installation. Wear appropriate safety gear, including gloves and eye protection. Ensure proper grounding and adherence to local electrical codes. Never bypass safety features or disable alarms, as this can lead to entrapment risks. Familiarize yourself with emergency release procedures and test all safety devices post-installation. Failure to comply with these precautions may result in system malfunctions or severe safety hazards, emphasizing the importance of strict adherence to the manual’s instructions. Always prioritize caution when working with automated gate systems.

System Components and Features

The LiftMaster LA500 features a reliable 24VDC linear actuator, designed for security and durability. It includes MyQ technology for smartphone control and is UL 325 compliant.

2.1 Key Components of the LA500 Gate Operator

The LiftMaster LA500 gate operator includes a robust 24VDC linear actuator, control board, and external monitored entrapment protection devices. These components ensure smooth operation and enhanced safety features, meeting UL 325 standards. The actuator provides reliable performance for vehicular gates, while the control board manages all operational functions. Safety devices prevent accidents, ensuring compliance with industry regulations. This design makes the LA500 suitable for both residential and light commercial applications, offering durability and advanced functionality for secure gate operation.

2.2 Advanced Features of the LA500 Model

The LiftMaster LA500 gate operator features advanced MyQ technology, enabling smartphone control and real-time monitoring. It includes external monitored entrapment protection devices, ensuring UL 325 compliance and enhanced safety. The operator supports single or dual gate applications, offering versatility for various setups. With a 24VDC actuator, it provides quiet and efficient operation. Compatibility with LiftMaster accessories like remote controls and keypads adds convenience. These features make the LA500 ideal for residential and light commercial use, combining reliability, security, and innovative technology for seamless gate operation. The manual details how to leverage these features for optimal performance and safety.

2.3 MyQ Technology Integration

The LiftMaster LA500 seamlessly integrates with MyQ technology, allowing users to control and monitor their gates remotely via the MyQ app. This feature enhances convenience, enabling homeowners to open, close, or check gate status from anywhere. The manual guides users through setup, ensuring smooth integration with existing systems. MyQ also offers real-time notifications, providing peace of mind. Compatibility with various accessories, like keypads and remote controls, further streamlines operation. This integration modernizes gate operation, making it user-friendly and efficient while maintaining security and reliability. The LA500’s MyQ compatibility is a standout feature for today’s smart home solutions.

Installation Instructions

The LiftMaster LA500 installation requires careful planning and adherence to the manual. Begin with pre-installation checks, ensuring all components are included and compatible. Mount the operator securely, following bracket placement guidelines. Proceed with wiring, connecting power and accessories as outlined. Test the system thoroughly after installation to ensure smooth operation. Refer to the manual for detailed step-by-step instructions and safety precautions to avoid errors and potential hazards. Proper installation ensures optimal performance and longevity of the gate operator. Always follow manufacturer guidelines for a safe and efficient setup.

3.1 Pre-Installation Checks and Requirements

Before starting the installation of the LiftMaster LA500, ensure all components are included and undamaged. Verify compatibility with your gate type, size, and weight. Check the power supply requirements and ensure the site is prepared, with clear access and proper drainage. Review the manual to understand the installation process and safety guidelines. Ensure all necessary tools and hardware are available. Familiarize yourself with local regulations and ensure compliance with UL 325 standards. Conduct a final inspection of the gate and surrounding area to identify potential hazards or obstructions. Proper preparation is key to a safe and successful installation.

3.2 Step-by-Step Installation Process

Begin by unpacking and inventorying all components. Prepare the gate and surrounding area, ensuring proper alignment and clearance. Attach the operator brackets securely to the gate posts and frame, following the manual’s specifications. Mount the LA500 operator, ensuring it is level and properly aligned. Connect the actuator to the gate and test its movement. Install safety sensors and alarms, then proceed with wiring and electrical connections. Refer to the manual for detailed wiring diagrams and programming instructions. After completing the installation, test the operator thoroughly to ensure smooth operation and compliance with UL 325 standards. Always follow safety guidelines and manufacturer recommendations.

3.3 Mounting the Operator and Attachments

Mounting the LiftMaster LA500 operator and attachments requires precise alignment and secure fastening. Begin by positioning the mounting brackets on the gate posts and frame, ensuring they are level and properly aligned. Attach the operator to the brackets, following the manual’s torque specifications. Secure all connections firmly to prevent movement during operation. Use the provided hardware to ensure compatibility and durability. Double-check the alignment and leveling to guarantee smooth gate movement. Refer to the manual’s diagrams for specific placement and installation details. Proper mounting is critical for reliable performance and safety compliance with UL 325 standards.

3.4 Wiring and Electrical Connections

Electrical connections for the LiftMaster LA500 must be completed by a qualified technician to ensure safety and compliance. Connect the operator to a 24VDC power supply, as specified in the manual. Wire the control box, safety sensors, and any accessories according to the diagram provided. Ensure all connections are secure and meet local electrical codes. Test the system to verify proper functionality. Always turn off power before performing any maintenance or adjustments. Proper wiring ensures reliable operation and prevents potential hazards; Follow the manual’s guidelines for a safe and efficient installation, adhering to UL 325 standards for entrapment protection devices.

Programming and Setup

Program your LiftMaster LA500 by configuring remote controls, safety sensors, and the MyQ app for smart operation. Follow the manual’s step-by-step guide to ensure proper setup and functionality.

4.1 Programming the Remote Controls

Programming the remote controls for your LiftMaster LA500 ensures seamless operation. Start by turning off the gate operator’s power and locating the learn button on the control board. Press and release the learn button, then immediately press the remote control button you wish to program. The indicator light will blink, confirming successful programming. Repeat for additional remotes, ensuring each is programmed individually. Always refer to the manual for specific steps and safety precautions to avoid errors. Proper programming ensures reliable remote functionality and enhanced security for your gate system.

4.2 Configuring Safety Sensors and Alarms

Configuring safety sensors and alarms is crucial for ensuring the safe operation of your LiftMaster LA500 gate operator; Begin by installing sensors according to the manual’s guidelines, ensuring proper alignment and distance. Test the sensors by obstructing their path to confirm they trigger the alarm. Adjust sensitivity as needed to avoid false triggers. Regularly inspect and clean sensors to maintain reliability. Refer to the manual for specific instructions on configuring alarms and troubleshooting common issues. Proper setup ensures compliance with safety standards and prevents accidents, providing peace of mind for users and visitors.

4.3 Setting Up the MyQ Application

To set up the MyQ application for your LiftMaster LA500, download the app from the App Store or Google Play. Create a MyQ account and log in to access smart features. Connect your gate operator to the MyQ hub, following the manual’s instructions. Once connected, test the app’s functionality by opening and closing the gate remotely. Use the app to monitor gate status, receive notifications, and customize settings. Refer to the manual for troubleshooting tips if issues arise during setup. Proper configuration ensures seamless integration and enhances your gate’s functionality with smart technology.

Maintenance and Troubleshooting

Regular maintenance ensures optimal performance of your LiftMaster LA500 gate operator. Lubricate moving parts and inspect sensors monthly. Consult the manual for troubleshooting common issues promptly.

5.1 Regular Maintenance Schedule

Regular maintenance is crucial for the LiftMaster LA500 gate operator to ensure smooth operation. Schedule monthly inspections of all moving parts, sensors, and wiring. Lubricate hinges and gears to prevent wear. Check the battery for remote controls and replace if necessary. Test safety features like entrapment protection devices quarterly. Clean debris from the gate track and ensure proper alignment. Refer to the manual for detailed steps and guidelines to maintain optimal performance and extend the system’s lifespan. Consistent upkeep prevents malfunctions and enhances security.

5.2 Common Issues and Solutions

Common issues with the LiftMaster LA500 include the gate not moving, remote control malfunctions, or sensor misalignment. If the gate won’t open, check the power supply and ensure no obstructions block the gate. For remote issues, replace the batteries or reprogram the remote. Misaligned sensors can cause safety features to fail; adjust them according to the manual. Lubricate moving parts if the gate operates slowly or noisily. Refer to the troubleshooting section for detailed solutions. Addressing these issues promptly ensures reliable operation and safety. Always follow the manual’s guidelines for resolving problems effectively.

5.3 Replacing Parts and Accessories

Replacing parts and accessories for the LiftMaster LA500 requires using genuine LiftMaster components to ensure compatibility and safety. Before starting, turn off power to the operator and consult the manual. Common replacements include the linear actuator, control board, or sensors. Always follow the manual’s instructions for disassembly and reassembly. Use the correct tools to avoid damaging components. For complex replacements, consider hiring a certified technician. Properly dispose of old parts and test the system after installation to ensure functionality. Regular replacement of worn parts prevents malfunctions and extends the system’s lifespan while maintaining UL 325 compliance and safety standards.

Compatibility with LiftMaster Accessories

Explore the wide range of LiftMaster accessories compatible with the LA500, including remote controls, keyless entry, and telephone entry systems. Genuine accessories ensure seamless integration and reliability.

6.1 LiftMaster Remote Controls

LiftMaster remote controls offer convenient and reliable operation for your LA500 gate operator. Available in single-button, multi-button, visor, and keychain designs, these remotes cater to various user preferences. Ensure compatibility by selecting genuine LiftMaster accessories, as they are designed to integrate seamlessly with the LA500 system. Programming your remote is straightforward, with step-by-step instructions provided in the LiftMaster LA500 manual. This ensures secure and efficient control of your gate operator, enhancing overall functionality and user experience. Always use authorized LiftMaster products to maintain system performance and safety.

6.2 Gate Telephone Entry Systems

The LiftMaster LA500 is compatible with advanced gate telephone entry systems, enhancing security and convenience. These systems allow visitors to communicate with residents or security personnel before granting access. Integration with the LA500 operator ensures seamless functionality, while the manual provides detailed instructions for setup and programming. Telephone entry systems can be customized to meet specific access control needs, offering features like voice communication, keypad entry, and remote access capabilities. This integration elevates your gate system’s functionality, ensuring a secure and efficient entry process for all users.

6.3 Keyless Entry and Transmitters

LiftMaster offers a range of keyless entry systems and transmitters designed to work seamlessly with the LA500 gate operator. These systems provide convenient access control without the need for physical keys. The manual details how to program and integrate transmitters, ensuring secure and reliable operation. Keyless entry systems can be customized to fit specific needs, offering features like multi-user access and remote operation. The LA500’s compatibility with LiftMaster’s advanced transmitters enhances security and ease of use, making it a versatile solution for residential and light commercial applications. Refer to the manual for step-by-step guidance on setup and troubleshooting.

Emergency Release and Safety Features

The LA500 includes an emergency release mechanism to ensure safe operation during power outages or malfunctions. Advanced safety features prevent entrapment and ensure compliance with UL 325 standards.

7.1 Emergency Release Procedure

To activate the emergency release on your LiftMaster LA500 gate operator, ensure the gate is stationary. Turn off the power supply to the operator. Locate the emergency release mechanism, typically near the motor. Engage the release by pulling the designated handle or pin, allowing manual operation of the gate. This feature is crucial during power outages or system malfunctions. Always ensure the gate is secure and consult the manual for specific instructions. Safety is paramount; never attempt this procedure while the gate is in motion. Proper use of the emergency release prevents accidents and ensures smooth operation.

7.2 Entrapment Protection Devices

The LiftMaster LA500 gate operator requires entrapment protection devices to ensure safe operation and compliance with UL 325 standards. These devices detect obstacles and prevent gate entrapment, enhancing safety. Install photo eyes or edge sensors as outlined in the manual. Test these devices regularly to ensure proper function. Failure to install or maintain them can lead to accidents. Entrapment protection is non-negotiable for residential and commercial applications. Always follow the manufacturer’s guidelines for installation and testing to guarantee reliable performance and safety. Regular inspections are crucial to maintain optimal functionality and prevent potential hazards. Entrapment protection devices are vital for secure gate operation.

7.3 Monitoring Operator Performance

Monitoring the LiftMaster LA500 gate operator’s performance ensures safe and efficient operation. Regularly inspect the gate’s alignment, sensor functionality, and overall movement. Check for unusual noises or delays, which may indicate wear or misalignment. Test the emergency stop and reversal features periodically to ensure they function correctly. Keep the gate area clean and clear of obstructions to prevent interference. Refer to the manual for specific testing procedures and maintenance schedules. Consistent monitoring helps identify potential issues early, preventing accidents and extending the system’s lifespan. Always follow the manufacturer’s guidelines for performance checks to maintain reliability and safety. Regular maintenance is key to optimal functionality.

UL 325 Compliance and Regulations

The LiftMaster LA500 complies with UL 325 safety standards for gate operators, ensuring reliable performance and user protection. Adherence to these regulations is crucial for legal and safety compliance.

8.1 Understanding UL 325 Standards

UL 325 standards are critical safety regulations for gate operators, ensuring protection against entrapment and accidents. The LiftMaster LA500 adheres to these standards, which mandate the use of monitored entrapment protection devices and regular performance testing. These regulations apply to vehicular gate operators like the LA500, emphasizing safety and reliability. Compliance with UL 325 ensures the operator meets legal and safety requirements, protecting users and preventing potential hazards. Understanding these standards is vital for proper installation and operation, as outlined in the LiftMaster LA500 manual.

8.2 Required Safety Devices

The LiftMaster LA500 manual emphasizes the necessity of safety devices to prevent accidents and ensure compliance with UL 325 standards. Essential safety features include monitored entrapment protection devices, which detect obstructions and halt gate movement. These devices, such as photo eyes or pressure sensors, must be properly installed and tested. Additionally, the manual mandates the use of an emergency release mechanism, allowing manual operation in case of power failure or malfunction. Regular testing of these safety components is crucial to maintain optimal performance and user safety, as outlined in the LiftMaster LA500 installation guidelines.

8.3 Testing and Certification Process

The LiftMaster LA500 undergoes rigorous testing to ensure compliance with UL 325 standards, focusing on safety, reliability, and performance. Certification involves evaluating the operator’s response to entrapment scenarios, emergency release functionality, and electrical safety. Proper testing must be conducted after installation and periodically thereafter to maintain compliance. The manual provides detailed steps for testing safety devices and verifying operator performance. Certification ensures the system meets industry regulations, guaranteeing user safety and operational reliability. Always refer to the LiftMaster LA500 manual for specific testing procedures and documentation requirements.

The LiftMaster LA500 manual provides comprehensive guidance, ensuring safe and efficient installation, operation, and maintenance of your gate operator. Adhering to its instructions guarantees optimal performance and longevity.

By following the manual, you ensure compliance with safety standards, proper functionality, and enhanced security for your property. The LA500 is a reliable choice for durable gate operation.

9.1 Summary of Key Points

The LiftMaster LA500 manual emphasizes safety, proper installation, and regular maintenance for optimal performance. It outlines essential steps for programming, troubleshooting, and compliance with UL 325 standards. Key points include adhering to safety precautions, understanding system components, and leveraging advanced features like MyQ technology. The manual also highlights the importance of compatibility with LiftMaster accessories and ensures emergency release procedures are clearly defined. By following the guidelines, users can achieve reliable operation, enhanced security, and longevity of their gate operator system.

9.2 Importance of Proper Installation and Maintenance

Proper installation and maintenance are critical for the LiftMaster LA500 to function safely and efficiently. Incorrect installation can lead to malfunctions or safety hazards, while neglecting maintenance may reduce the system’s lifespan. Regular checks ensure all components operate smoothly, and timely part replacements prevent major issues. Adhering to the manual’s guidelines helps maintain compliance with safety standards and guarantees optimal performance. Proper care also enhances reliability, providing peace of mind and protecting your investment in the gate operator system.

9.3 Benefits of Using the LiftMaster LA500

The LiftMaster LA500 offers numerous benefits, including enhanced security, reliable performance, and seamless integration with smart home systems. Its advanced features, such as MyQ technology, allow for remote monitoring and control, providing convenience and peace of mind. The operator’s durability and quiet operation make it ideal for both residential and light commercial applications. Compliance with UL 325 standards ensures safety, while easy maintenance and compatibility with LiftMaster accessories further enhance its value. Overall, the LA500 is a robust and user-friendly solution for modern gate automation needs.

13 elliott wave patterns pdf

The Elliott Wave Principle, discovered by Ralph Nelson Elliott, reveals market movements follow predictable patterns. It identifies trends through alternating impulsive (5-wave) and corrective (3-wave) cycles, guided by Fibonacci ratios for precise forecasting.

Overview of Ralph Nelson Elliott’s Theory

Ralph Nelson Elliott introduced the Elliott Wave Principle in 1938, proposing that financial markets move in predictable, repetitive wave patterns. He observed that market prices follow a structured progression of five waves in the direction of the main trend, followed by three corrective waves against it. Elliott’s theory emphasizes the alternation between impulsive and corrective phases, governed by specific rules and Fibonacci ratios. This framework provides traders and analysts with a tool to identify potential market trends, reversals, and price targets. Elliott’s work laid the foundation for modern technical analysis, offering insights into crowd psychology and market behavior.

The Basic Structure of Elliott Wave Patterns

Elliott Wave patterns consist of two primary components: impulsive waves and corrective waves. Impulsive waves, which align with the main trend, are subdivided into five smaller waves, while corrective waves, moving against the trend, typically consist of three waves. The five-wave impulsive pattern (1-2-3-4-5) represents market progress, whereas the three-wave corrective pattern (A-B-C) signifies consolidation or reversal. These patterns adhere to specific rules, such as the alternation between wave types and the proportional relationship defined by Fibonacci ratios. This structured approach allows traders to identify and predict market movements with greater accuracy, making it a cornerstone of technical analysis.

Importance of the 5-Wave Impulsive Pattern

The 5-wave impulsive pattern is a cornerstone of the Elliott Wave Principle, representing a complete market cycle in the direction of the main trend. This pattern signifies a strong, uninterrupted progression, offering traders clear entry and exit points. Each wave within the sequence serves a distinct purpose: Wave 1 initiates the trend, Wave 2 corrects it, Wave 3 confirms the direction, Wave 4 consolidates gains, and Wave 5 finalizes the movement. The adherence to Fibonacci ratios ensures proportional balance, enhancing predictive accuracy. Identifying this pattern allows traders to align with the market’s momentum, making it indispensable for effective trading strategies.

Understanding Corrective Wave Patterns

Corrective wave patterns occur against the primary trend, providing temporary relief before the trend resumes. These patterns, structured in three waves, are essential for market balance. The three main types are zigzags, flats, and triangles. Zigzags are sharp corrections, often in a 5-3-5 wave structure, while flats are sideways movements with a 3-3-5 structure. Triangles, forming in a 3-3-3-3-3 structure, signal indecision before a breakout. Corrective patterns often align with Fibonacci retracement levels, helping traders identify potential reversal points. Recognizing these patterns allows traders to anticipate trend resumptions, making them crucial for strategic planning and risk management in financial markets.

Impulsive Wave Patterns

Impulsive waves drive market trends, forming a five-wave structure. Waves 1, 3, and 5 push in the trend’s direction, while waves 2 and 4 are counter-trend retracements, adhering to Fibonacci ratios for accuracy.

The Five-Wave Structure

The five-wave structure is the cornerstone of the Elliott Wave Principle. It consists of three impulse waves (1, 3, 5) that move in the direction of the trend and two corrective waves (2, 4) that move against it. Wave 3 is typically the strongest, while waves 2 and 4 are retracements. This pattern reflects the natural ebb and flow of market sentiment, with impulsive waves indicating strong investor confidence and corrective waves showing hesitation or profit-taking. Understanding this structure is crucial for identifying potential market turning points and aligning trades with the dominant trend. Proper analysis of the five-wave structure can enhance trading strategies and improve market forecasting accuracy.

Wave 1: The First Impulse

Wave 1 marks the beginning of a new trend and is often the most subtle phase of the Elliott Wave pattern. It represents the initial breakout from a corrective phase, setting the stage for the larger impulse wave. During Wave 1, market participants start to shift their sentiment, either bullish or bearish, aligning with the emerging trend. This wave is crucial as it lays the foundation for the five-wave structure. However, Wave 1 is frequently overlooked or underestimated, as it may appear as a continuation of the previous corrective pattern. Recognizing Wave 1 is essential for capturing early opportunities in the developing trend.

Wave 2: The First Retracement

Wave 2 is the first corrective phase following Wave 1, moving against the primary trend. It is typically weaker than Wave 1 and retraces a portion of the initial impulse. According to Elliott Wave rules, Wave 2 should not retrace more than 100% of Wave 1. Fibonacci retracement levels, such as 38%, 50%, or 78%, often serve as key reference points for Wave 2. This wave provides traders with opportunities to enter positions aligning with the main trend. Wave 2 retraces but does not reverse the trend, setting the stage for the powerful Wave 3 impulse.

Wave 3: The Strongest Impulse

Wave 3 is the most powerful impulse wave, representing the peak of investor confidence and the strongest move in the direction of the trend. It often exceeds the length of Wave 1 and is characterized by high trading volume and momentum. According to the Elliott Wave Principle, Wave 3 cannot be the shortest wave among the three impulsive waves (Waves 1, 3, and 5). This wave typically sees the most significant price movement, driven by broad market participation. Wave 3 sets the foundation for the subsequent corrective phase, Wave 4, and is a key indicator of the trend’s strength and sustainability.

Wave 4: The Second Retracement

Wave 4 is the second corrective phase, occurring after the strong impulse of Wave 3. It represents a pullback against the trend, typically retracing a portion of Wave 3’s gains. According to the Elliott Wave Principle, Wave 4 must remain within the price range established by Waves 2 and 3. Fibonacci ratios often play a role, with Wave 4 commonly retracing 38.2% or 50% of Wave 3. Wave 4 is usually shorter than Wave 2 and must not break below the low of Wave 2. This wave often sees reduced trading volume compared to Wave 3, signaling a temporary consolidation before the final impulse in Wave 5.

Wave 5: The Final Impulse

Wave 5 is the final phase of the impulsive sequence, marking the culmination of the trend. It follows Wave 4’s retracement and typically continues in the direction of the main trend. Wave 5 often shows a weaker momentum compared to Wave 3, but it completes the five-wave structure. According to the Elliott Wave Principle, Wave 5 should not break above the high of Wave 3 in an uptrend or below the low of Wave 3 in a downtrend. Fibonacci ratios, such as the 61.8% extension, often coincide with the end of Wave 5, signaling the transition to a corrective phase. This wave finalizes the pattern, setting the stage for a reversal or consolidation.

Corrective Wave Patterns

Corrective wave patterns, including zigzags, flats, and triangles, occur against the main trend. They are structured as 3-wave sequences, providing trading opportunities during market reversals and consolidations.

Zigzag Patterns (A-B-C Structure)

Zigzag patterns, labeled A-B-C, are sharp corrections against the main trend. Wave A and C move in the same direction, while wave B is a counter-trend bounce. These patterns often form in strong trends, signaling a temporary pause before the trend resumes. Zigzags are common in both impulsive and corrective waves, providing traders with opportunities to identify potential reversals or continuations. They are characterized by their angular, abrupt price movements, making them distinct from other corrective patterns like flats or triangles.

Flat Patterns (3-3-5 Structure)

Flat patterns, also known as sideways corrections, consist of three waves with a 3-3-5 structure. They occur in a sideways direction and are commonly observed during periods of low market volatility. The pattern is characterized by a sequence where wave A and wave B are both corrective, and wave C is a smaller retracement. Flats often form in the middle of larger corrective waves and are crucial for identifying potential trend continuations. They are distinct from zigzags due to their horizontal nature and are often seen as a sign of market consolidation before the main trend resumes.

Triangle Patterns (3-3-3-3-3 Structure)

Triangle patterns, a type of corrective wave, consist of a 3-3-3-3-3 structure, forming a sideways consolidation. They often occur in the fourth wave of an impulsive sequence, signaling a pause before the trend resumes. These patterns are characterized by overlapping waves that create a narrowing range, resembling a triangle shape. Triangles can be either contracting or expanding, depending on whether the upper and lower boundaries converge or diverge. They are crucial for identifying potential trend reversals or continuations, as they often precede a strong breakout. Traders use these patterns to anticipate market direction and plan trades accordingly, leveraging Fibonacci ratios for precise entry and exit points.

Advanced Elliott Wave Patterns

Advanced Elliott Wave Patterns explore complex market movements through combinations, diagonals, and X waves, offering deeper insights into trend dynamics and reversals.

Diagonal Triangle Patterns

Diagonal Triangle Patterns are advanced structures in Elliott Wave Theory, occurring as ending patterns in trends. They are composed of overlapping 5-wave substructures and are typically found in the fifth wave of an impulsive sequence or the final wave of a corrective pattern. Diagonals are characterized by their narrowing price range and overlapping waves, often indicating a strong trend nearing completion. They can be either bullish (ascending) or bearish (descending), providing clear signals for traders to prepare for a potential reversal or significant market shift. Identifying diagonals requires careful analysis of wave proportions and adherence to Elliott’s rules.

Combination Patterns

Combination Patterns are complex corrective structures in Elliott Wave Theory, involving multiple patterns merging into a single correction. These patterns occur when a simple correction (like a zigzag or flat) is insufficient to complete the market’s adjustment. Combination patterns often consist of two or more corrective patterns linked by a connecting wave, labeled as an X wave. They can appear in various forms, such as a zigzag followed by a flat or a triangle. Accurate identification of combination patterns is crucial for traders, as they indicate extended corrections and can precede significant trend resumptions. Mastery of these patterns enhances predictive accuracy in financial markets.

X Waves in Elliott Wave Theory

X Waves in Elliott Wave Theory serve as connectors between different corrective patterns within a combination structure. They are labeled with an “X” and act as transitional waves, linking two separate corrective patterns without altering the overall trend. X waves are particularly common in complex corrections, such as double zigzags or flats, where they bridge the gap between the first and second corrective patterns. Identifying X waves is essential for maintaining accurate wave counts, as they indicate the continuation of a corrective phase rather than the start of a new impulsive wave. Proper analysis of X waves enhances a trader’s ability to navigate complex market structures effectively.

Guidelines for Applying Elliott Wave Patterns

Mastering the Elliott Wave Principle requires strict adherence to wave rules and Fibonacci ratios. These guidelines help traders identify and predict market movements with accuracy;

Rules for Wave Formation

The Elliott Wave Principle outlines specific rules for wave formation. An impulsive wave consists of five sub-waves, with waves 1, 3, and 5 moving in the direction of the trend, and waves 2 and 4 acting as retracements. These retracement waves must adhere to Fibonacci ratios, typically retracing 38.2%, 50%, or 61.8% of the previous wave’s length. Corrective waves, on the other hand, follow a 3-wave structure, often labeled A-B-C, and must not violate the rules of alternation and proportion. Strict adherence to these rules is crucial for accurate wave pattern identification and forecasting market trends effectively.

Fibonacci Ratios in Wave Analysis

Fibonacci ratios play a crucial role in the Elliott Wave Principle, providing a mathematical foundation for wave analysis. Key ratios, such as 38.2%, 50%, and 61.8%, are commonly observed in wave retracements and extensions. These ratios help traders identify potential reversal points and validate wave patterns. For instance, Wave 2 typically retraces 38.2% to 61.8% of Wave 1, while Wave 4 retraces a portion of Wave 3. The alignment of Fibonacci levels with wave counts enhances the accuracy of market predictions. By integrating these ratios, traders can better anticipate market movements and make informed trading decisions, aligning with the natural order of price action described by Elliott.

Practical Application of the Elliott Wave Principle

The Elliott Wave Principle offers traders a structured approach to market analysis, enabling them to identify and capitalize on recurring wave patterns. By analyzing impulsive (5-wave) and corrective (3-wave) cycles, traders can predict potential market movements. Practical application involves identifying wave patterns, using Fibonacci ratios to determine retracement and projection levels, and aligning these with market data. This method helps traders set stop-loss levels, identify entry points, and optimize profit targets. Mastery of the principle requires continuous practice and adherence to its guidelines, making it a powerful tool for informed trading decisions in various financial markets.

The Elliott Wave Principle provides a structured framework for understanding market movements through recurring wave patterns, enhancing trading strategies with predictive insights and practical applications.

The Elliott Wave Principle outlines market behavior through structured wave patterns, emphasizing alternating impulsive (5-wave) and corrective (3-wave) cycles. These patterns, rooted in crowd psychology, follow specific rules and ratios, such as Fibonacci proportions, to predict price movements. The theory categorizes waves into impulsive (1, 3, 5) and corrective (2, 4) phases, with corrective patterns further divided into zigzags, flats, and triangles. Advanced patterns like diagonal triangles and combination structures add complexity. Understanding these concepts enables traders to identify trends, predict reversals, and make informed decisions. Mastery of the Elliott Wave Principle enhances trading strategies by aligning them with market behavior.

Importance of Elliott Wave Patterns in Trading

Elliott Wave patterns are instrumental in trading as they provide a structured approach to understanding market behavior. By identifying impulsive and corrective waves, traders can predict potential price movements and capitalize on emerging trends. These patterns, such as zigzags, flats, and triangles, help in anticipating reversals and continuations, reducing market uncertainty. The integration of Fibonacci ratios enhances accuracy, allowing traders to set precise entry and exit points. Mastery of Elliott Wave patterns enables traders to align their strategies with market psychology, leading to more informed and profitable decisions. This method is widely regarded as a powerful tool for analyzing and forecasting financial markets.

crosley turntable instructions

Welcome to the world of vinyl with Crosley turntables! Discover a wide range of models like Cruiser Plus, Voyager, and Cruiser Deluxe. This guide will help you set up, operate, and maintain your Crosley turntable for optimal performance and enjoyment. Explore detailed instructions, troubleshooting tips, and maintenance advice to ensure your turntable delivers the best sound quality for years to come.

1.1 Overview of Crosley Turntable Models

Crosley offers a diverse range of turntables, catering to both beginners and audiophiles. Popular models include the Cruiser Plus CR8005F, Voyager, and Cruiser Deluxe, each designed with unique features. The Cruiser Plus boasts a portable design with Bluetooth connectivity, while the Voyager combines classic aesthetics with modern functionality. The Cruiser Deluxe stands out with its advanced features and sturdy construction. These models often come with built-in pre-amps, adjustable tonearms, and compatibility with various record sizes. Whether you’re a casual listener or a serious vinyl collector, Crosley provides options to suit every preference and lifestyle, ensuring high-quality sound and durability.

1.2 Importance of Following Instructions

Following the instructions provided in your Crosley turntable manual is essential for proper setup, operation, and maintenance. These guidelines ensure optimal performance, prevent damage, and extend the lifespan of your turntable. Misuse can lead to malfunctions or even safety hazards. By adhering to the instructions, you can enjoy high-quality sound, troubleshoot common issues effectively, and maintain your turntable’s condition. Always read through the manual thoroughly before operating your Crosley turntable to understand its features, controls, and care requirements. This will help you get the most out of your vinyl listening experience while protecting your investment.

Unboxing and Initial Setup

Unboxing your Crosley turntable is an exciting first step. Carefully remove all components, including the turntable, mat, tonearm, and power cable. Place the turntable on a stable surface and connect it to power. Ensure all parts are included and undamaged. Refer to the quick start guide for initial setup instructions. Proper placement and connection are crucial for optimal performance. Follow the manual’s step-by-step directions to ensure everything is ready for your first vinyl playback experience.

2.1 Unpacking the Turntable

When unboxing your Crosley turntable, carefully open the package and inspect all components. Typically included are the turntable unit, platter, mat, tonearm, and power cable. Check for any visible damage or missing parts. Handle the tonearm and stylus with care to avoid damage. Place the turntable on a flat, stable surface to ensure proper balance. Remove any protective packaging materials, such as plastic coverings, from the platter and cabinet. Refer to the included manual for a detailed list of components and initial setup instructions. Ensure all accessories, like the 45 RPM adapter, are accounted for before proceeding.

2.2 Connecting the Turntable to Power

Locate the power cable provided with your Crosley turntable and plug one end into the turntable’s power port. Insert the other end into a nearby electrical outlet. Ensure the outlet is compatible with the turntable’s voltage requirements, as specified in the manual. Avoid using damaged cords or overloaded circuits to prevent electrical issues. Once connected, the turntable is ready for operation. If your model has Bluetooth, this connection also powers the Bluetooth feature. Always refer to the manual for specific voltage and power requirements to ensure safe and proper functionality.

2.3 Bluetooth Pairing Instructions

To pair your Crosley turntable with a Bluetooth device, start by turning on the Bluetooth feature on your audio device, such as wireless headphones or speakers. Ensure the turntable is powered on and in pairing mode—this is usually indicated by a flashing LED or a prompt in the manual. Search for available devices on your audio device and select the Crosley turntable model (e.g., “Crosley CR8005D”). Once connected, a confirmation message or sound will indicate successful pairing. For troubleshooting, refer to your turntable’s manual or reset the connection by turning the devices off and on again. Enjoy wireless audio streaming from your vinyl records!

Operating the Turntable

Place the record on the turntable mat, ensure the speed selector matches the record’s RPM, and gently lower the tonearm. Enjoy smooth, high-quality vinyl playback with precise control over cueing and pitch adjustments for an optimal listening experience.

3.1 Placing the Record on the Turntable

To place a record on your Crosley turntable, start by ensuring the turntable mat is clean and free of debris. Gently remove the record from its sleeve by holding it by the edges, avoiding contact with the vinyl surface. Carefully position the record on the turntable, aligning the center hole with the spindle. Once the record is secure, remove any protective stylus cover if fitted. Use the speed selector to choose the correct RPM (33 or 45) based on the record type. Finally, lift the tonearm and gently place it on the record’s edge using the cueing lever for precise playback.

3.2 Adjusting the Speed Selector

Properly adjusting the speed selector ensures your records play at the correct RPM; Locate the speed selector, typically a knob or switch on the turntable. For LPs (12-inch records), set the selector to 33 RPM. For singles (7-inch records), choose 45 RPM. Some models may require adjusting the belt position underneath the platter for different speeds. Always handle the platter gently to avoid damage. Ensure the speed matches the record type for accurate playback and to prevent damage to your vinyl. Once set, the turntable will spin at the correct speed for optimal sound quality.

3.3 Using the Tonearm and Cueing Controls

Using the tonearm and cueing controls properly ensures smooth record playback. Gently lift the tonearm and place it at the record’s edge to start playback. For precise control, use the cueing lever to lower the stylus onto the record surface. Adjust the counterweight to balance the tonearm, ensuring proper tracking force. The anti-skate control prevents the stylus from skating across the record groove. Always handle the tonearm gently to avoid damaging the stylus or record. Proper use of these controls enhances sound quality and extends the life of your records and turntable.

Maintenance and Cleaning

Regularly clean the turntable platter, mat, and cabinet with a microfiber cloth. Avoid harsh chemicals to prevent damage. Use Crosley-approved cleaning accessories for optimal care.

4.1 Cleaning the Turntable Platter

Regular cleaning of the turntable platter is essential for optimal performance. Use a slightly damp microfiber cloth to gently wipe the platter, removing dust and debris. Avoid using harsh chemicals, alcohol, or benzene, as they may damage the finish. For tougher stains, lightly dampen the cloth with distilled water and clean in a circular motion. Ensure the platter is dry before placing a record. Never use abrasive materials or cleansers that could scratch the surface. Crosley offers specialized cleaning accessories designed for their turntables, ensuring safe and effective maintenance.

4.2 Cleaning the Turntable Mat

Regularly cleaning the turntable mat helps maintain sound quality and prevents dust buildup. Inspect the mat for dirt or debris. Gently remove loose particles with a soft, dry microfiber cloth. For more thorough cleaning, lightly dampen the cloth with distilled water and wipe the mat in a circular motion. Avoid harsh chemicals or abrasive cleaners, as they may damage the mat’s material. Allow the mat to air dry completely before placing a record. For stubborn stains, repeat the process if necessary. Replace the mat if it becomes worn or damaged to ensure proper record support and playback.

4.3 Cleaning the Cabinet and Exterior

Keep your Crosley turntable looking its best by cleaning the cabinet and exterior regularly. Use a soft, dry microfiber cloth to wipe away dust and fingerprints. For tougher stains, lightly dampen the cloth with water or a mild detergent solution. Avoid using harsh chemicals, alcohol, or abrasive cleaners, as they may damage the finish. Gently wipe the entire exterior, paying attention to corners and crevices. Dry the surface with a clean, dry cloth to prevent water spots. Regular cleaning maintains the aesthetic appeal and protects the turntable’s finish. Avoid exposing the unit to excessive moisture or direct sunlight.

Troubleshooting Common Issues

Address common issues like vibration, sound quality problems, and Bluetooth connectivity. Refer to the troubleshooting section for detailed solutions to ensure optimal performance of your Crosley turntable.

5.1 Resolving Vibration Issues

Experiencing vibrations? Ensure your Crosley turntable is placed on a stable, level surface. Use a spirit level to confirm even placement. Avoid unbalanced or soft surfaces, as they can amplify vibrations. If issues persist, check for loose components and tighten them according to the manual. Placing dampening pads or a vibration-reducing mat underneath the turntable can also help minimize unwanted movement. For severe cases, consider isolating the turntable from the speaker system to prevent feedback loops. Always refer to your specific model’s troubleshooting guide for tailored solutions.

5.2 Addressing Sound Quality Problems

If your Crosley turntable is producing poor sound quality, start by ensuring the stylus and record are clean. Dust and debris can cause distortion or skipping. Use a soft-bristle brush or a specialized cleaning solution to gently remove dirt. Check the tracking force and ensure it’s set correctly, as improper alignment can affect sound. Verify that the cartridge is securely attached and properly aligned. If issues persist, consider upgrading the cartridge or stylus for better performance. Finally, ensure all connections to speakers or amplifiers are secure and free from interference.

5.3 Fixing Bluetooth Connectivity Problems

If your Crosley turntable is experiencing Bluetooth connectivity issues, start by ensuring the device is in close proximity to the turntable. Restart both devices and ensure Bluetooth is enabled. Pair the turntable with your device by selecting “Crosley” from the available options. If connection fails, reset the pairing by disconnecting from the current device and re-pairing. Check for firmware updates on the Crosley website, as outdated software may cause connectivity problems. Avoid interference from other electronic devices and ensure no obstacles block the signal path. If issues persist, perform a factory reset according to the manual instructions.

Accessories and Upgrades

Enhance your Crosley turntable experience with compatible accessories like cleaning kits, replacement needles, and 45 RPM adapters. Upgrading the cartridge or stylus can improve sound quality, while optional upgrades like pre-amps or anti-skate adjustments ensure optimal performance.

6.1 Compatible Accessories for Crosley Turntables

Enhance your Crosley turntable setup with a variety of compatible accessories. Replacement mats, belts, and cleaning kits ensure optimal performance and maintenance. Crosley offers specific products like the CR704 platter and C100 headshell for seamless integration. Explore optional upgrades such as USB interfaces for digital recording or pre-amps for improved sound quality. Accessories like 45 RPM adapters and counterweights are also available to tailor your experience. Visit Crosley’s official website or authorized retailers to find genuine accessories designed for your model, ensuring compatibility and longevity for your turntable.

6.2 Upgrading the Cartridge or Stylus

Upgrading your Crosley turntable’s cartridge or stylus can significantly enhance sound quality and performance. Many Crosley models, such as the C6 and C100, allow for easy cartridge upgrades. Consider replacing the stock stylus with a high-quality option like the Audio Technica AT95E for improved audio clarity. Ensure compatibility by checking Crosley’s recommendations or consulting the user manual. When upgrading, carefully follow the instructions to remove the old cartridge and install the new one securely. Proper alignment and balancing of the tonearm are crucial for optimal sound reproduction. Upgrading the stylus can breathe new life into your vinyl listening experience.

6.3 Optional Upgrades for Enhanced Performance

To elevate your Crosley turntable’s performance, consider optional upgrades such as replacing the platter with an acrylic or glass one for improved resonance control. Upgrading the belt to a high-quality alternative can enhance speed stability. Additionally, installing a premium phono preamp or external power supply can refine sound quality. Motor upgrades and external speed controllers are also available for select models. Anti-vibration pads and isolation feet can further minimize external interference. When upgrading, ensure compatibility with your specific Crosley model and follow installation instructions carefully to maintain optimal functionality and sound fidelity.

Safety Instructions

Always keep the turntable away from water and moisture. Avoid using harsh chemicals for cleaning. Place it on a stable, flat surface and keep it out of children’s reach.

7.1 General Safety Precautions

Read this manual thoroughly before using your Crosley turntable. Keep the unit away from water and moisture to avoid damage. Never use harsh chemicals for cleaning, as they may harm the finish. Place the turntable on a stable, flat surface to prevent vibration. Ensure the power cord is protected from damage and avoid overloading electrical outlets. Unplug the turntable when cleaning or when not in use. Keep children away from moving parts. Avoid exposing the turntable to extreme temperatures or humidity. Follow these precautions to ensure safe and optimal performance.

7.2 Avoiding Damage to the Turntable

To prevent damage, handle the turntable with care. Avoid touching the stylus or record surface to prevent scratches or dust buildup. Use a microfiber cloth for cleaning, and never apply harsh chemicals or excessive moisture. Handle the tonearm gently and avoid forcing it. Place records carefully to avoid bending or warping. Store the turntable in a stable, dry environment away from direct sunlight. Use Crosley-approved cleaning products to maintain the finish and functionality. Regular maintenance and proper handling will ensure your turntable continues to perform optimally and lasts for years.

Warranty and Customer Support

Crosley turntables come with a warranty covering manufacturing defects. For assistance, contact customer service at 1-888-CROSLEY or visit www.crosleyradio.com; Keep your manual for warranty details and support.

8.1 Understanding the Warranty

Your Crosley turntable is backed by a warranty that covers manufacturing defects for a specified period, typically one year from the purchase date. This warranty ensures that any faulty parts or issues arising from the manufacturing process will be repaired or replaced free of charge. To make a claim, you must provide proof of purchase, such as a receipt, and contact Crosley’s customer service team. The warranty does not cover damage caused by misuse, normal wear and tear, or unauthorized modifications. Registering your product and retaining the original manual can facilitate the warranty process. For detailed terms, refer to the warranty section in your user manual or visit Crosley’s official website.

8.2 Contacting Crosley Customer Service

For assistance with your Crosley turntable, contact customer service at 1-888-CROSLEY (1-888-276-7539), available Monday through Friday from 8 a.m. to 8 p.m. EST. Visit their official website at www.crosleyradio.com for support resources, including FAQs and downloadable manuals. When reaching out, have your product model number and proof of purchase ready to expedite the process. Crosley’s team is dedicated to addressing inquiries, troubleshooting issues, and providing repair or replacement options under warranty. Ensure to review your manual for specific contact guidelines and additional support channels.

Advanced Features

Discover advanced features like Bluetooth output for wireless connectivity, a built-in pre-amp for enhanced audio quality, and adjustable counterweight and anti-skate controls for optimal vinyl playback.

9.1 Using the Built-in Pre-Amp

The built-in pre-amp on your Crosley turntable enhances audio quality by boosting the phono signal to line level, ensuring compatibility with speakers or amplifiers without a dedicated phono input. To use it, locate the pre-amp switch, typically found near the RCA output jacks. Flip the switch to the “on” position for amplified output. This feature is ideal for connecting to modern sound systems. Always ensure the pre-amp is enabled when using external speakers. For optimal sound, adjust the volume and equalization settings on your connected device. This feature simplifies setup and delivers clear, rich audio.

9.2 Enabling Bluetooth Output

Enable Bluetooth output on your Crosley turntable to stream audio wirelessly to compatible devices like speakers or headphones. First, ensure Bluetooth is activated on both the turntable and your device. On the turntable, press and hold the Bluetooth button until the LED indicator flashes. Search for available devices on your audio device, select the turntable’s name (e.g., “Crosley CR8005D”), and confirm pairing. Once connected, the LED will stabilize, indicating successful pairing. For troubleshooting, restart both devices or reset the turntable’s Bluetooth connection. This feature allows seamless wireless audio streaming, enhancing your vinyl listening experience with modern convenience.

9.3 Adjusting the Counterweight and Anti-Skate

Enable Bluetooth output on your Crosley turntable to stream audio wirelessly to compatible devices like speakers or headphones. First, ensure Bluetooth is activated on both the turntable and your device. On the turntable, press and hold the Bluetooth button until the LED indicator flashes. Search for available devices on your audio device, select the turntable’s name (e.g., “Crosley CR8005D”), and confirm pairing. Once connected, the LED will stabilize, indicating successful pairing. For troubleshooting, restart both devices or reset the turntable’s Bluetooth connection. This feature allows seamless wireless audio streaming, enhancing your vinyl listening experience with modern convenience.

Thank you for choosing Crosley! With proper setup, maintenance, and care, your turntable will provide years of enjoyment. Happy listening and vinyl collecting!

10.1 Summary of Key Instructions

This guide has provided essential steps for setting up, operating, and maintaining your Crosley turntable. From unboxing to troubleshooting, each section ensures optimal performance. Always refer to your specific model’s manual for tailored instructions. Regular cleaning and proper handling of the needle and records are crucial for longevity. Experiment with accessories and upgrades to enhance your listening experience. Remember to follow safety guidelines to prevent damage. Enjoy your Crosley turntable and the timeless joy of listening to vinyl records with clarity and precision.

10.2 Final Tips for Enjoying Your Crosley Turntable

To fully enjoy your Crosley turntable, experiment with different accessories like high-quality needles or mats for enhanced sound. Explore various record genres and take care to handle vinyl with clean, dry hands to prevent scratches. Regularly clean the turntable and store records upright to maintain their condition. Consider upgrading to a better cartridge or pre-amp for improved audio quality. Finally, create a quiet, vibration-free listening space to immerse yourself in the rich, warm sound of vinyl. Happy spinning and enjoy the timeless experience of listening to your favorite records!

indoor plant care guide pdf

Welcome to the ultimate indoor plant care guide! Discover how to transform your space with vibrant plants, improve air quality, and enhance aesthetics. Perfect for beginners and experts alike, this guide provides essential tips and insights to help you keep your plants thriving year-round.

Selecting the Right Plants

Selecting the right plants is crucial for a thriving indoor garden. Popular species like houseplants require specific lighting and care. Choose low-maintenance plants like snake plants or pothos for beginners.

2.1. Low-Maintenance Indoor Plants

Low-maintenance indoor plants are perfect for busy individuals or newcomers to plant parenthood. Species like snake plants and pothos thrive in a variety of conditions. These plants are known for their ability to survive with minimal watering and low light, making them ideal for indoor spaces. They are also great air purifiers and add a touch of natural beauty to any room. Their hardiness ensures they remain healthy with basic care, making them a top choice for many plant enthusiasts.

2.2. Popular Indoor Plant Species

Some of the most popular indoor plants include spider plants, ZZ plants, and dracaena. These species are favored for their adaptability and aesthetic appeal. Philodendron and ivy are also widely loved for their versatility in styling. Many of these plants are known for their ability to purify the air and thrive in low-light conditions, making them perfect for modern indoor spaces. Their popularity stems from their ease of care and the variety of shapes, sizes, and textures they offer, adding life and beauty to any room.

Understanding Plant Needs

Plants require balanced light, water, and nutrients to thrive. Factors like temperature, humidity, and soil type play crucial roles in their health. Learn to tailor care to their specific needs for optimal growth and vitality.

3.1. Lighting Requirements

Most houseplants thrive with 12-14 hours of indirect sunlight daily. East- or west-facing windows are ideal, while south-facing windows may require sheer curtains to prevent scorching. Low-light plants, like snake plants or pothos, can tolerate north-facing windows. Avoid placing plants in direct sunlight for extended periods, as it can damage leaves. Adjust lighting based on the species and season to ensure optimal growth and health. Proper light exposure is crucial for photosynthesis and overall plant well-being.

3.2. Watering Techniques

Watering is a critical aspect of indoor plant care. Overwatering can lead to root rot, while underwatering may cause stress. Check soil moisture by inserting a finger or chopstick. Water thoroughly until it drains from the pot, ensuring the soil is evenly moist. Use room-temperature water to prevent shocking the roots. Avoid getting water on leaves to minimize fungal growth. Adjust frequency based on season, humidity, and light exposure. Proper watering balances plant health and prevents common issues.

Pro-Tip: Gently break up hardened soil before watering to improve absorption.

3.3. Humidity and Temperature

Most indoor plants thrive in humidity levels between 40-60% and temperatures of 65-75°F (18-24°C). Low humidity can cause leaf drop, while high humidity may lead to fungal issues. To maintain ideal conditions, use a humidifier or place plants on trays filled with water and pebbles. Avoid placing plants near heating vents or drafty windows, as sudden temperature changes can stress them. Grouping plants together can naturally increase humidity around them. Monitor conditions regularly to ensure a stable environment for healthy growth.

Pro-Tip: Use a hygrometer to measure humidity levels accurately.

3.4. Soil and Fertilization

Using well-draining soil is essential for indoor plants to prevent waterlogged roots. Avoid using garden soil, as it can compact and suffocate roots. Fertilize during the growing season (spring-fall) with a balanced, water-soluble fertilizer. Dilute the fertilizer to half the recommended strength to avoid burning roots. Over-fertilizing can harm plants, so apply sparingly. Repot plants annually with fresh soil to replenish nutrients. Avoid fertilizing during winter or when plants are stressed. Choose potting mixes designed for indoor plants to ensure optimal drainage and nutrient retention.

Pro-Tip: Always repot plants in the spring when they become pot-bound for best results.

Potting and Repotting

Choose pots with drainage holes to prevent waterlogging. Use fresh, well-draining soil when repotting, typically in spring. Avoid oversized pots to prevent root decay.

4.1. Choosing the Right Pot and Soil

Selecting the appropriate pot and soil is crucial for healthy plant growth. Opt for pots made of ceramic, plastic, or terracotta, ensuring they have drainage holes to prevent waterlogging. Use high-quality, well-draining soil designed for indoor plants, as it retains moisture without causing root rot. Avoid using garden soil, as it can compact and hinder root development. For specific plants, consider specialized soil mixes, such as those for cacti or ferns. Always repot plants in spring with fresh soil for optimal health.

Pro Tip: Gently break up hardened soil with a fork before watering to ensure even moisture distribution.

Propagation and Pruning

Mastering propagation and pruning is key to multiplying and maintaining your indoor plants. These techniques ensure healthy growth, encourage new blooms, and help shape your plants beautifully for any space.

5.1. Methods of Propagation

Successful propagation involves techniques like stem cuttings, leaf division, and layering. Choose healthy, mature plants for cuttings, ensuring they’re disease-free. Use clean tools to minimize risks. For stem cuttings, trim below nodes and plant in moist soil. Leaf division works for plants with multiple growth points. Layering involves bending stems to touch soil, rooting before cutting. Pro tip: Break up hardened soil with a fork before watering for even moisture distribution. Ideal for spring and summer when plants are most active.

5.2. Pruning Tips

Pruning is essential for maintaining plant health and aesthetics. Remove dead or dying leaves to prevent disease spread and encourage growth. Use clean, sharp tools to avoid damaging stems. Prune during the growing season for optimal recovery. Shape plants to maintain desired form or size. Avoid over-pruning, as this can stress the plant. Regular trimming promotes air circulation and light penetration. Pro tip: Inspect plants monthly to catch issues early and prune accordingly for a lush, thriving appearance.

Pest Control and Common Problems

Identify and address pests like spider mites, mealybugs, and aphids early to prevent infestations. Common issues include overwatering, nutrient deficiencies, and inadequate light, affecting plant health negatively.

6.1. Identifying Common Pests

Common pests like spider mites, mealybugs, and aphids can harm indoor plants. Spider mites cause yellowing leaves and fine webbing, while mealybugs appear as white, cottony patches. Aphids are small, soft-bodied insects found on stems and leaves. Scale insects look like brown or white bumps on plant surfaces. Regular inspection and isolation of infested plants are key to preventing the spread of these pests. Early detection ensures timely treatment, protecting your plants from severe damage.

6.2. Troubleshooting Common Issues

Yellowing leaves may indicate overwatering or nutrient deficiencies, while droopy stems suggest underwatering. Brown leaf tips often result from dry air or excessive fertilizer. Pests like spider mites or mealybugs can cause stippling or white patches. To address these issues, adjust watering schedules, ensure proper humidity, and treat infestations with neem oil or insecticidal soap. Regular monitoring and prompt action are essential to restore plant health and prevent further damage. Refer to the printable guide for detailed solutions.

Seasonal Care

Adapt your plant care routines to match the seasons. In winter, reduce watering and protect plants from cold drafts. In summer, increase hydration and ensure bright, indirect light for healthy growth.

7.1. Winter Care

During winter, indoor plants require adjusted care due to shorter daylight and colder temperatures. Reduce watering as plants grow slower, and protect them from drafts. Move plants away from harsh window light, especially in west-facing windows. Use grow lights if natural light is scarce. Fertilize sparingly, as most plants are dormant. Monitor humidity levels, as dry air can stress plants. Repotting and pruning should be minimized during this period. Keep your plants cozy and hydrated to ensure they thrive until spring arrives. Spider plants, for instance, may still produce new growth with proper care.

7.2. Summer Care

Summer is the perfect time to maximize your plants’ growth. Place them in bright, indirect light, such as east or west-facing windows, avoiding direct sunlight. Water thoroughly, ensuring soil moisture is consistent. Fertilize regularly with a balanced fertilizer to promote healthy growth. Maintain humidity levels to prevent stress, and ensure good air circulation. Prune actively growing plants to maintain shape and encourage new growth. Summer is also ideal for propagating cuttings. Keep your plants thriving by adjusting care routines to suit warmer conditions and longer daylight hours.

Air-Purifying Plants

Certain plants, like Snake Plants and Pothos, naturally purify the air by removing harmful pollutants. Incorporate these into your home to improve indoor air quality and aesthetics.

8.1. Top Air-Purifying Indoor Plants

Some of the most effective air-purifying plants include Snake Plants, Pothos, and Spider Plants. These natural air cleaners remove harmful pollutants like formaldehyde and benzene. Peace Lilies are also potent, though they require cautious handling due to toxicity. By incorporating these plants into your space, you can significantly improve indoor air quality while adding aesthetic charm. Their low-maintenance nature makes them perfect for enhancing both health and beauty in your home.

Printable Guide

Create a printable reference chart to track watering schedules, lighting needs, and fertilization for your indoor plants. This handy guide ensures consistent care and healthy growth for all your plants.

9.1. Creating a Printable Reference Chart

A printable reference chart simplifies plant care by organizing essential details. Include columns for plant names, watering schedules, lighting requirements, and fertilization needs. Add visual icons for quick reference. You can also note propagation methods and pruning tips. This chart serves as a handy reminder, ensuring your plants receive the right care. Print it and place it near your plants for easy access. Customize the chart to fit your specific needs and the types of plants you own.

Advanced Care Techniques

Elevate your plant care game with mulching and soil conditioning. These techniques enhance soil health, retain moisture, and promote robust growth. Learn how to implement them effectively for thriving plants.

10.1. Mulching and Soil Conditioning

Mulching and soil conditioning are advanced techniques to boost plant health. Mulch retains moisture, suppresses weeds, and regulates soil temperature, while conditioning enhances fertility and structure. Use organic mulch like bark or coconut husk. Avoid over-mulching to prevent root rot. Soil conditioning involves adding compost or fertilizers to improve nutrient availability. Regularly test soil pH and adjust as needed. These practices ensure optimal growth and resilience, especially for demanding species. Start with small adjustments and monitor plant responses to refine your approach effectively.

10.2; Plant Rotation and Orientation

Regular plant rotation ensures even growth and prevents leaning. Rotate plants every 1-2 weeks to maintain balanced form and light exposure. East- or west-facing windows provide ideal natural light. Adjust orientation seasonally to adapt to changing sunlight patterns. For example, rotate plants toward brighter windows in winter. This technique promotes healthy development and prevents lopsided growth. Use a rotating potting system for ease. Observe plant cues, like leaning, to determine rotation frequency. Proper orientation enhances aesthetics and plant health, ensuring your indoor space remains vibrant year-round.

Health Benefits

Indoor plants improve air quality, reduce stress, and boost mental well-being. They purify the air and create a calming environment, enhancing overall health and happiness in your home.

11.1. Indoor Plants and Air Quality

Indoor plants are natural air purifiers, removing harmful pollutants like formaldehyde and benzene from the air. Studies show species like Spider Plants, Pothos, and Snake Plants excel at improving indoor air quality. By reducing airborne toxins, they promote healthier breathing and a cleaner living environment. This natural filtration system not only enhances air purity but also contributes to better overall well-being and productivity, making plants a vital addition to any home or workspace.

Automatization and Technology

Smart watering devices and sensors simplify plant care by monitoring soil moisture, light, and temperature, ensuring optimal conditions. Apps provide tailored recommendations for your plants’ needs.

12.1. Smart Watering Devices

Smart watering devices revolutionize indoor plant care by automating the process. These devices use sensors to monitor soil moisture, temperature, and light levels, ensuring plants receive the perfect amount of water. Some systems connect to apps, sending notifications when your plants need attention. They also adjust watering schedules based on environmental conditions, reducing overwatering and underwatering. This technology is especially useful for busy individuals or those new to plant care, providing peace of mind and healthier plants.

DIY Projects

Bring creativity to your space with DIY projects like terrariums, macramé plant hangers, and self-watering planters. These fun, budget-friendly ideas enhance your indoor garden’s beauty and functionality.

13.1. Making a Terrarium

Create a stunning mini indoor garden with a terrarium. Start by selecting a clear glass container and add a layer of small rocks for drainage. Next, include sphagnum moss to prevent soil washaway. Choose low-maintenance plants like succulents or ferns, then fill the container with potting soil. Add decorative elements like pebbles or shells. Finish by lightly watering and sealing the container. This self-sustaining ecosystem requires minimal care, making it a perfect DIY project for plant enthusiasts.

Pet-Friendly Plants

Ensure your furry friends’ safety with pet-friendly plants. Opt for non-toxic species like Spider Plants or Pothos. Avoid toxic plants to keep your pets healthy and safe.

14.1. Non-Toxic Plants for Homes with Pets

Creating a pet-friendly indoor space is easy with non-toxic plants. Spider plants, Pothos, and Parlor Palms are safe choices. Avoid toxic plants like Snake Plants or Philodendrons. Always check the ASPCA list for pet-safe options to ensure your furry friends stay healthy and happy. These plants add beauty to your home without posing risks, making them perfect for pet owners who love greenery. Keep your space lush and your pets safe with thoughtful plant selections.

Low-Light Plants

Chinese Evergreen, Pothos, and ZZ Plant thrive in low-light conditions. These plants are perfect for rooms with limited natural light, adding beauty without high maintenance needs.

15.1. Best Plants for Low-Light Conditions

For spaces with limited natural light, low-light plants like Chinese Evergreen, Pothos, and ZZ Plant are ideal. These plants thrive in dim environments, requiring minimal direct sunlight. Snake Plant and Peperomia also excel in low-light settings, adding greenery without fuss. They are perfect for rooms with north-facing windows or areas with artificial lighting. These plants are not only aesthetically pleasing but also low-maintenance, making them a great choice for busy individuals or those new to indoor gardening.

Design and Decor

Indoor plants are a great design element! Use stylish planters and pots to match your interior. Arrange them to enhance your space’s character and beauty.

16.1. Styling Your Space with Plants

Styling your space with plants enhances beauty and character. Choose planters that match your decor and arrange plants to create a balanced, inviting atmosphere. Consider layering with greenery and adding texture for visual interest. Plants can also define different areas within a room, creating a cozy and welcoming environment for relaxation and enjoyment.

Common Mistakes to Avoid

Overwatering is a common mistake that can harm plants. Check soil moisture before watering, and avoid letting plants sit in water to prevent root rot.

17.1. Overwatering and Its Effects

Overwatering is a common mistake that can lead to root rot and kill plants. It causes yellowing leaves, droopy stems, and waterlogged soil. To prevent this, always check soil moisture by sticking a finger into the soil up to the knuckle. If it’s damp, wait a day or two before watering again. Using well-draining soil and pots with drainage holes also helps prevent water from pooling. Remember, most plants prefer slightly dry soil between waterings.

Community and Resources

Join online forums and indoor plant communities to connect with enthusiasts, share experiences, and access expert advice, care guides, and troubleshooting tips for thriving plants.

18.1. Online Forums and Communities

Engage with online forums and communities to connect with fellow plant enthusiasts. Platforms like Reddit, Facebook groups, and specialized forums offer invaluable resources, tips, and advice. Share experiences, ask questions, and learn from experts and hobbyists alike. These spaces often host discussions on troubleshooting, care guides, and trending plant species. Many communities also provide access to downloadable guides, webinars, and workshops. Joining these groups can help you stay updated on the latest trends and best practices in indoor plant care, fostering a supportive environment for all plant lovers.

Caring for indoor plants is a rewarding journey that enhances your space and well-being. By following the tips and insights in this guide, you can create a thriving environment for your plants. Remember, every plant is unique, and understanding its needs is key to success. With patience and practice, you’ll master the art of indoor plant care, enjoying the beauty and health benefits they bring. Happy planting!

2019 subaru forester owners manual

Congratulations on purchasing your 2019 Subaru Forester! This manual provides essential information to help you understand and maintain your vehicle. It covers safety features, driving tips, and maintenance schedules to ensure optimal performance and longevity. Read carefully to maximize your driving experience and preserve your Subaru’s condition.

1.1 Congratulations on Purchasing Your 2019 Subaru Forester

Congratulations on acquiring your 2019 Subaru Forester! This vehicle represents innovation, reliability, and performance. The Owners Manual is your comprehensive guide to understanding and maintaining your Forester. It provides detailed information on safety features, driving tips, and maintenance schedules to ensure optimal performance. Familiarize yourself with the manual to explore your vehicle’s capabilities and enjoy a safe, enjoyable driving experience. Refer to the PDF manual available for download to access all necessary details and guidelines for your Subaru Forester.

1.2 Purpose of the Owners Manual

The purpose of the 2019 Subaru Forester Owners Manual is to provide owners with essential information for safe and efficient operation of their vehicle. This guide covers key features, maintenance requirements, and troubleshooting tips to ensure optimal performance. It also outlines safety precautions and recommended practices to protect both the vehicle and its occupants. By following the manual, owners can maximize their driving experience and maintain their Subaru Forester in excellent condition. Refer to the manual for detailed instructions and guidelines tailored to your vehicle.

1.3 Important Safety Precautions

Always read and follow the safety guidelines in this manual to ensure safe operation of your 2019 Subaru Forester. Wear seatbelts at all times, and ensure proper use of child restraints. Avoid distractions while driving and never modify your vehicle in ways not approved by Subaru. Familiarize yourself with warning lights and system indicators. Keep loose objects secure in the vehicle to prevent injury. Follow recommended maintenance schedules to maintain safety and performance. Never attempt DIY repairs on critical systems without proper knowledge or tools. Adhere to all safety precautions to protect yourself and your passengers.

Vehicle Identification and Specifications

This section provides key details about your 2019 Subaru Forester, including the Vehicle Identification Number (VIN) location, engine specifications, and fuel requirements for optimal performance.

2.1 Vehicle Identification Number (VIN) Location

The Vehicle Identification Number (VIN) for your 2019 Subaru Forester can be found on the driver’s side dashboard near the windshield or on the certification label on the driver’s doorjamb. This unique 17-digit number is essential for vehicle identification, registration, and maintenance records. It provides detailed information about your vehicle, including its make, model, and production details. Always record and store the VIN securely for insurance and ownership verification purposes. This information is crucial for any official documentation or service-related inquiries;

2.2 Engine and Transmission Specifications

The 2019 Subaru Forester features a 2.5-liter 4-cylinder BOXER engine, producing 182 horsepower and 176 lb-ft of torque. It is paired with a Lineartronic continuously variable transmission (CVT) for smooth and efficient gear shifting. The engine’s horizontally opposed design enhances balance and reduces vibration, while the Symmetrical All-Wheel Drive system provides improved traction and control. This combination ensures reliable performance, efficiency, and capability in various driving conditions. Proper maintenance of these components is essential for optimal vehicle operation and longevity.

2.3 Fuel Requirements and Capacities

The 2019 Subaru Forester requires regular unleaded gasoline with an octane rating of 87 or higher for optimal performance. The fuel tank capacity is approximately 13.2 gallons. Using fuel with a lower octane rating may result in reduced engine performance and efficiency. It is essential to adhere to these fuel specifications to maintain the vehicle’s condition and ensure proper operation. Always refer to the fuel doorjamb for confirmation of the recommended fuel type and capacity.

Instrument Panel and Controls

The 2019 Subaru Forester features a modern instrument panel with intuitive controls, including the STARLINK multimedia system, steering wheel-mounted controls, and EyeSight Driver Assist Technology for enhanced safety and convenience.

3.1 Dashboard Overview

The 2019 Subaru Forester’s dashboard is designed for simplicity and functionality. It features a central touchscreen for the STARLINK Multimedia System, providing access to navigation, Bluetooth, and apps. The instrument cluster includes a digital odometer, speedometer, and tachometer, while warning lights indicate system statuses. Controls for heating, ventilation, and air conditioning are conveniently located below the touchscreen. The steering wheel houses buttons for cruise control and audio adjustments, ensuring ease of operation while driving. This layout enhances driver comfort and reduces distractions.

3.2 Gauges and Warning Lights

The 2019 Subaru Forester features a comprehensive instrument cluster with gauges for speed, engine RPM, fuel level, and temperature. Warning lights indicate system statuses, such as seatbelt reminders, low fuel, or engine issues. Colors differentiate severity: red for critical alerts, yellow for cautions, and blue for system activations. Familiarize yourself with these indicators to ensure safe operation. Refer to the manual for detailed explanations of each light and gauge to understand their functions and address issues promptly. Proper monitoring enhances driving safety and vehicle longevity.

3.3 Steering Wheel Controls

The 2019 Subaru Forester features intuitive steering wheel controls, allowing you to manage audio, Bluetooth, and cruise control functions without distractions. Located on the left and right spokes, these buttons enable easy adjustments to volume, track selection, and phone calls. Additional controls regulate the adaptive cruise control and EyeSight Driver Assist settings. Familiarize yourself with these buttons to enhance your driving experience. Refer to the manual for detailed instructions on optimizing their use for comfort and safety on the road.

Driving Tips and Guidelines

Understand safe practices for operating your Subaru Forester, including tips for various driving conditions and load capacity guidelines to ensure optimal performance and safety on the road.

4.1 Before Driving

Before driving your Subaru Forester, ensure all occupants are properly restrained using seatbelts. Check the parking brake is fully released and adjust mirrors and seats for comfort. Verify all gauges are within normal ranges and no warning lights are illuminated. Familiarize yourself with controls and settings. Ensure the vehicle is in a safe location before starting the engine. Always follow proper starting procedures and be mindful of surroundings to ensure a safe driving experience.

4.2 Driving in Various Conditions

Adapt your driving to weather and road conditions. In rain or snow, reduce speed and increase following distance. Use fog lights in low visibility. Avoid sudden maneuvers and ensure tires are properly maintained. For off-road driving, use appropriate modes and maintain a steady speed. Always engage Hill Descent Control on steep inclines. Monitor battery and fluid levels in extreme temperatures. Use EyeSight technology for enhanced safety in adverse conditions. Keep emergency supplies in the vehicle for unexpected situations.

4.3 Towing and Load Capacity

The 2019 Subaru Forester has a maximum towing capacity of 1,500 lbs for the base model and up to 3,000 lbs with proper equipment. Always use a genuine Subaru towing kit to ensure safety and maintain warranty coverage. Never exceed the vehicle’s load capacity, as stated in the manual. Distribute weight evenly and secure loads properly to avoid damage or instability. Refer to the manual for specific towing guidelines and safety precautions to ensure safe and efficient towing operations. Always follow Subaru’s recommendations for optimal performance and vehicle longevity.

Maintenance and Servicing

Regular maintenance is crucial for optimal performance. Check oil and fluid levels, adhere to scheduled intervals, and ensure proper tire pressure. Address any issues promptly to maintain reliability and durability.

5.1 Scheduled Maintenance Intervals

Regular maintenance is essential to ensure your Subaru Forester performs optimally. Follow the recommended intervals for oil changes, tire rotations, and fluid checks. Synthetic oil should be changed every 7,500 miles, while tire rotations occur at the same interval. Inspect air filters, belts, and brakes as specified. Adhering to these schedules prevents potential issues and keeps your vehicle running efficiently.

Consult your owner’s manual or visit a Subaru service center for precise recommendations tailored to your driving conditions. Proper maintenance ensures longevity and reliability, keeping your Forester in prime condition for years to come.

5.2 Oil Change and Fluid Levels

The 2019 Subaru Forester requires regular oil changes using synthetic oil for optimal performance. Use 0W-20 viscosity for most conditions. Locate the oil filler cap under the hood and refill as needed. Check fluid levels, including coolant, windshield washer, and brake fluid, during routine maintenance. Use a dipstick to verify oil levels in models equipped with one. Always refer to the manual for specific guidelines and ensure the engine is turned off before starting any maintenance. Proper fluid management ensures engine longevity and prevents damage.

For accurate measurements, use genuine Subaru products and consult recommended specifications to avoid overfilling or underfilling. Maintain your vehicle’s health by adhering to these practices regularly.

5.3 Tire Pressure and Rotation

Check tire pressure monthly and before long trips, using the recommended levels listed on the tire information label. Proper pressure ensures optimal fuel efficiency and safety. Rotate tires every 12,000 to 15,000 miles to maintain even tread wear. Use the pattern specified in the manual, such as the rearward cross pattern, to ensure balanced handling. Improper rotation can lead to uneven wear and unsafe driving conditions. Always refer to the manual for precise guidelines to extend tire life and maintain performance.

Regular tire checks and rotations are crucial for maintaining your Subaru’s safety and efficiency on the road.

Safety Features and Systems

The 2019 Subaru Forester features advanced safety systems, including the EyeSight Driver Assist Technology and Subaru Safety Sense, designed to enhance accident prevention and driver alerts.

6.1 Airbag System

The 2019 Subaru Forester is equipped with a comprehensive airbag system, including front, side, and curtain airbags, designed to provide enhanced protection for occupants during collisions. The system works in conjunction with seatbelts to minimize injury risk. Sensors detect collision severity and deploy airbags accordingly. A Supplemental Restraint System (SRS) warning light on the dashboard indicates system status. Proper maintenance and adherence to usage guidelines are crucial for optimal functionality. Always refer to the manual for detailed instructions and safety precautions.

6.2 EyeSight Driver Assist Technology

The 2019 Subaru Forester features EyeSight Driver Assist Technology, an advanced system enhancing safety and driving confidence. Equipped with adaptive cruise control, lane-keeping assist, and pre-collision braking, it monitors road conditions using dual cameras. EyeSight helps reduce driver fatigue on long drives and improves safety in various traffic situations. While it enhances safety, it does not replace driver attention. Always refer to the manual for proper system operation and limitations to ensure optimal functionality and safe driving practices.

6.3 Subaru Safety Sense

Subaru Safety Sense is a comprehensive suite of active safety features designed to protect you and your passengers. It includes technologies like automatic emergency steering, blind-spot detection, and rear cross-traffic alert. These systems work together to prevent collisions and enhance overall vehicle safety. Regular updates and maintenance are essential for optimal performance. Always follow the recommendations outlined in the owner’s manual to ensure Subaru Safety Sense operates effectively and provides maximum protection on the road.

Multimedia and Navigation Systems

The STARLINK Multimedia System offers an 8-inch touchscreen, Bluetooth, and smartphone integration. Navigate effortlessly with voice commands and real-time updates, enhancing your driving experience.

7.1 STARLINK Multimedia System

The STARLINK Multimedia System in your 2019 Subaru Forester features an 8-inch high-resolution touchscreen. It supports Apple CarPlay and Android Auto, allowing seamless smartphone integration. Enjoy voice command navigation, Bluetooth connectivity, and access to SiriusXM Radio. The system also includes dual USB ports for charging and media playback; With its intuitive interface, you can easily manage maps, apps, and entertainment, ensuring a connected and enjoyable driving experience.

7.2 Bluetooth and Smartphone Integration

Pair your smartphone with the STARLINK system via Bluetooth for hands-free calls and audio streaming. Compatible with both iOS and Android devices, this feature enhances safety and convenience while driving. Once paired, you can access your phonebook, stream music, and manage calls using voice commands or steering wheel controls. Ensure your phone is compatible with Subaru’s Bluetooth technology for optimal functionality; This integration promotes distraction-free driving, keeping you connected without compromising focus on the road.

7.3 Navigation System Operation

The 2019 Subaru Forester’s navigation system, part of the STARLINK Multimedia System, provides turn-by-turn directions and real-time traffic updates. Use voice commands or the touchscreen to enter destinations, view maps, and plan routes. The system also allows you to save favorite locations and access settings for unit preferences. Ensure your smartphone is connected for enhanced functionality. Regular updates may be required for the most accurate navigation data. Use this feature safely to enhance your driving experience;

Battery and Electrical System

The 2019 Subaru Forester’s battery is located in the engine compartment. Regular maintenance ensures optimal performance. Follow proper jump-starting procedures and avoid electrical system damage to maintain reliability.

8.1 Battery Location and Maintenance

The battery in your 2019 Subaru Forester is located in the engine compartment. Regular maintenance ensures reliability. Check terminals for corrosion and clean them as needed. Avoid overcharging, as it can reduce battery life. Replace the battery every 5 years or when capacity drops below 75%. Always disconnect the negative terminal first when working on the electrical system. Follow the manual’s guidelines for proper handling and installation.

Ensure the battery is securely fastened to prevent movement. Consult a professional if you notice swelling or leakage. Proper care extends the battery’s lifespan and ensures your Forester’s electrical systems function optimally.

8.2 Jump-Starting the Vehicle

To jump-start your 2019 Subaru Forester, locate the jumper terminals under the hood. Connect the positive (red) cable to the positive terminal of the dead battery, then to the working vehicle’s positive terminal. Attach the negative (black) cable to the working battery’s negative terminal and ground it on a metal surface of the dead vehicle. Start the working car, then the dead one; Allow the engine to run for a few minutes before disconnecting the cables in reverse order. Avoid smoking and ensure vehicles do not touch. If unsure, consult a Subaru dealer or professional mechanic.

Never jump-start a frozen battery. If the battery is old or damaged, consider replacing it. Always refer to the manual for specific instructions to avoid electrical system damage.

8.3 Electrical System Precautions

Prevent electrical system damage by avoiding overload from high-power accessories. Use only genuine Subaru parts to ensure compatibility and safety. Keep the battery terminals clean and secure to maintain proper connections. Avoid exposing electrical components to excessive moisture or extreme temperatures. Never attempt to modify or repair the electrical system yourself, as this could cause irreversible damage. Always disconnect the battery before performing any electrical work. Consult the manual or a certified Subaru technician for any complex electrical issues to ensure system integrity and functionality.

Regular inspections and timely replacements of worn or faulty components are crucial for maintaining your Subaru’s electrical health.

Troubleshooting and Diagnostics

This section helps identify and resolve common issues with your Subaru Forester. Use the manual to diagnose warning lights, address system alerts, and reset maintenance reminders effectively.

9.1 Common Issues and Solutions

This section addresses frequent concerns and provides practical solutions for your 2019 Subaru Forester. Common issues include connectivity problems with the STARLINK system, unresponsive touchscreen displays, and unexpected warning lights. Solutions often involve resetting the multimedia system, checking Bluetooth connections, or addressing software updates. For persistent issues, consult the troubleshooting guide or contact Subaru customer support for assistance. Always refer to the manual for detailed instructions to resolve problems effectively and maintain your vehicle’s optimal performance.

9.2 Warning Light Indications

The 2019 Subaru Forester features various warning lights to alert you of potential issues. The check engine light indicates engine problems, while the oil level light signals low oil. The tire pressure warning illuminates when tire pressure is incorrect. Other lights include the brake system warning, airbag system indicator, and EyeSight driver-assist alerts. Consult the manual for detailed explanations of each light and recommended actions. Addressing these warnings promptly ensures safety and prevents further damage to your vehicle. Always refer to the manual for guidance.

9.3 Resetting the Maintenance Reminder

To reset the maintenance reminder on your 2019 Subaru Forester, navigate to the settings menu on the STARLINK multimedia screen. Select “Maintenance Reminder” and choose “Reset.” Confirm the reset, and the system will clear the reminder. Ensure all maintenance tasks are completed by a certified technician to avoid damage. If issues persist, consult your Subaru dealership or service center for assistance. Always follow the recommended maintenance schedule for optimal vehicle performance and longevity.

Warranty and Customer Support

Congratulations on your 2019 Subaru Forester purchase! This vehicle is backed by a comprehensive warranty program. For detailed information, refer to the New Vehicle Limited Warranty section. Subaru Roadside Assistance is available for emergencies. Contact Subaru Customer Service for inquiries or support. Ensure all maintenance is documented to maintain warranty validity. Visit Subaru’s official website for additional resources and assistance options.

10.1 New Vehicle Limited Warranty

The 2019 Subaru Forester is covered by a New Vehicle Limited Warranty, which ensures repairs or replacements for defects in materials or workmanship. This warranty is valid for three years or 36,000 miles, whichever comes first. It applies to all parts and components installed by Subaru. The warranty is transferable to subsequent owners, enhancing resale value. For detailed coverage, exclusions, and conditions, refer to the warranty section in your owner’s manual. Proper maintenance is essential to uphold warranty validity.

10.2 Subaru Roadside Assistance

The 2019 Subaru Forester comes with a comprehensive roadside assistance program designed to provide peace of mind. This service is available 24/7 for three years or 36,000 miles, covering towing, battery jumps, fuel delivery, and lockout service. It ensures prompt help in case of emergencies, keeping you safe and mobile. This program enhances your ownership experience by offering reliable support whenever unexpected situations arise, reflecting Subaru’s commitment to customer satisfaction and vehicle reliability.

10.4 Contacting Subaru Customer Service

For any inquiries or assistance, Subaru Customer Service is readily available to support you. You can contact them via phone, email, or through the Subaru website. Their dedicated team provides help with warranty questions, service scheduling, and general vehicle inquiries. Visit the official Subaru website for contact details and additional resources. This service ensures you receive prompt and reliable assistance, enhancing your ownership experience with personalized support tailored to your needs.

Accessories and Customization

This section covers approved accessories and customization options for your 2019 Subaru Forester. It provides guidance on installing aftermarket components and maintaining your vehicle’s warranty with modifications. Always consult Subaru-approved guidelines to ensure safety and compatibility.

11.1 Approved Accessories

Approved accessories for your 2019 Subaru Forester are designed to enhance functionality and style while maintaining safety and performance. Subaru-approved accessories, such as roof racks, cargo carriers, and alloy wheels, ensure compatibility and durability. These accessories are rigorously tested to meet Subaru’s quality standards. Always consult the manual or Subaru dealerships for a list of recommended accessories; Using genuine Subaru parts ensures your vehicle retains its warranty and optimal performance. Customize your Forester with confidence using approved products tailored to your needs.

11.2 Installing Aftermarket Components

When installing aftermarket components on your 2019 Subaru Forester, ensure they meet Subaru’s compatibility and safety standards. Always consult the owner’s manual or contact Subaru customer service for approval. Non-approved modifications may void your warranty or compromise vehicle performance. Follow proper installation procedures and consider professional assistance for complex modifications. Electrical system alterations should be done with caution to avoid damage. Maintain all receipts and documentation for warranty purposes. Aftermarket upgrades should enhance functionality while preserving your vehicle’s integrity and safety features.

11.3 Maintaining Warranty with Modifications

To maintain your 2019 Subaru Forester’s warranty when installing modifications, ensure all changes comply with Subaru’s guidelines. Only use approved accessories and follow installation recommendations. Document all modifications and keep receipts. Unauthorized alterations may void your warranty. Subaru-approved modifications ensure safety and performance standards are upheld. Always consult the owner’s manual or contact Subaru customer service for clarification. Non-compliant changes may result in denied warranty claims. Proper documentation and compliance are essential to preserve your vehicle’s warranty coverage.