Welcome to the world of vinyl with Crosley turntables! Discover a wide range of models like Cruiser Plus, Voyager, and Cruiser Deluxe. This guide will help you set up, operate, and maintain your Crosley turntable for optimal performance and enjoyment. Explore detailed instructions, troubleshooting tips, and maintenance advice to ensure your turntable delivers the best sound quality for years to come.
1.1 Overview of Crosley Turntable Models
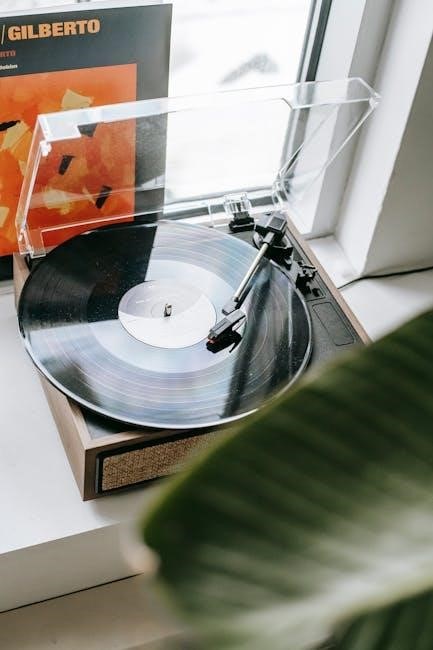
Crosley offers a diverse range of turntables, catering to both beginners and audiophiles. Popular models include the Cruiser Plus CR8005F, Voyager, and Cruiser Deluxe, each designed with unique features. The Cruiser Plus boasts a portable design with Bluetooth connectivity, while the Voyager combines classic aesthetics with modern functionality. The Cruiser Deluxe stands out with its advanced features and sturdy construction. These models often come with built-in pre-amps, adjustable tonearms, and compatibility with various record sizes. Whether you’re a casual listener or a serious vinyl collector, Crosley provides options to suit every preference and lifestyle, ensuring high-quality sound and durability.
1.2 Importance of Following Instructions
Following the instructions provided in your Crosley turntable manual is essential for proper setup, operation, and maintenance. These guidelines ensure optimal performance, prevent damage, and extend the lifespan of your turntable. Misuse can lead to malfunctions or even safety hazards. By adhering to the instructions, you can enjoy high-quality sound, troubleshoot common issues effectively, and maintain your turntable’s condition. Always read through the manual thoroughly before operating your Crosley turntable to understand its features, controls, and care requirements. This will help you get the most out of your vinyl listening experience while protecting your investment.
Unboxing and Initial Setup
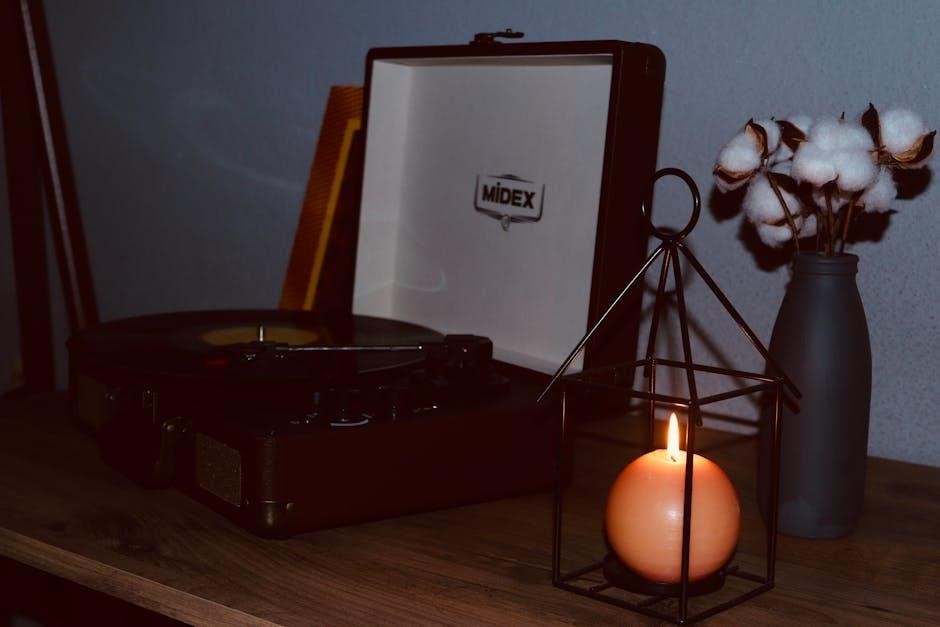
Unboxing your Crosley turntable is an exciting first step. Carefully remove all components, including the turntable, mat, tonearm, and power cable. Place the turntable on a stable surface and connect it to power. Ensure all parts are included and undamaged. Refer to the quick start guide for initial setup instructions. Proper placement and connection are crucial for optimal performance. Follow the manual’s step-by-step directions to ensure everything is ready for your first vinyl playback experience.
2.1 Unpacking the Turntable
When unboxing your Crosley turntable, carefully open the package and inspect all components. Typically included are the turntable unit, platter, mat, tonearm, and power cable. Check for any visible damage or missing parts. Handle the tonearm and stylus with care to avoid damage. Place the turntable on a flat, stable surface to ensure proper balance. Remove any protective packaging materials, such as plastic coverings, from the platter and cabinet. Refer to the included manual for a detailed list of components and initial setup instructions. Ensure all accessories, like the 45 RPM adapter, are accounted for before proceeding.
2.2 Connecting the Turntable to Power
Locate the power cable provided with your Crosley turntable and plug one end into the turntable’s power port. Insert the other end into a nearby electrical outlet. Ensure the outlet is compatible with the turntable’s voltage requirements, as specified in the manual. Avoid using damaged cords or overloaded circuits to prevent electrical issues. Once connected, the turntable is ready for operation. If your model has Bluetooth, this connection also powers the Bluetooth feature. Always refer to the manual for specific voltage and power requirements to ensure safe and proper functionality.
2.3 Bluetooth Pairing Instructions
To pair your Crosley turntable with a Bluetooth device, start by turning on the Bluetooth feature on your audio device, such as wireless headphones or speakers. Ensure the turntable is powered on and in pairing mode—this is usually indicated by a flashing LED or a prompt in the manual. Search for available devices on your audio device and select the Crosley turntable model (e.g., “Crosley CR8005D”). Once connected, a confirmation message or sound will indicate successful pairing. For troubleshooting, refer to your turntable’s manual or reset the connection by turning the devices off and on again. Enjoy wireless audio streaming from your vinyl records!

Operating the Turntable
Place the record on the turntable mat, ensure the speed selector matches the record’s RPM, and gently lower the tonearm. Enjoy smooth, high-quality vinyl playback with precise control over cueing and pitch adjustments for an optimal listening experience.
3.1 Placing the Record on the Turntable
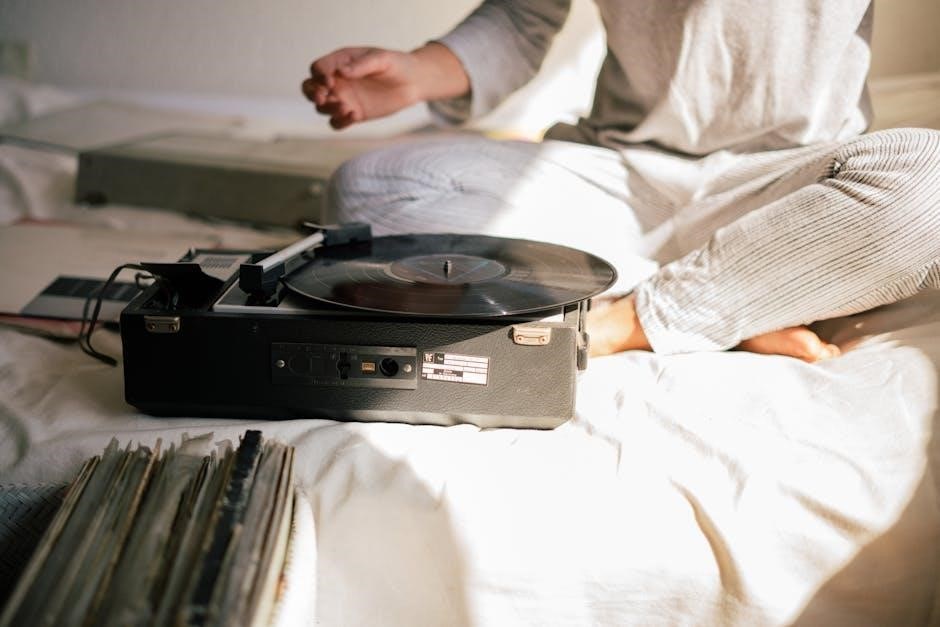
To place a record on your Crosley turntable, start by ensuring the turntable mat is clean and free of debris. Gently remove the record from its sleeve by holding it by the edges, avoiding contact with the vinyl surface. Carefully position the record on the turntable, aligning the center hole with the spindle. Once the record is secure, remove any protective stylus cover if fitted. Use the speed selector to choose the correct RPM (33 or 45) based on the record type. Finally, lift the tonearm and gently place it on the record’s edge using the cueing lever for precise playback.
3.2 Adjusting the Speed Selector
Properly adjusting the speed selector ensures your records play at the correct RPM; Locate the speed selector, typically a knob or switch on the turntable. For LPs (12-inch records), set the selector to 33 RPM. For singles (7-inch records), choose 45 RPM. Some models may require adjusting the belt position underneath the platter for different speeds. Always handle the platter gently to avoid damage. Ensure the speed matches the record type for accurate playback and to prevent damage to your vinyl. Once set, the turntable will spin at the correct speed for optimal sound quality.
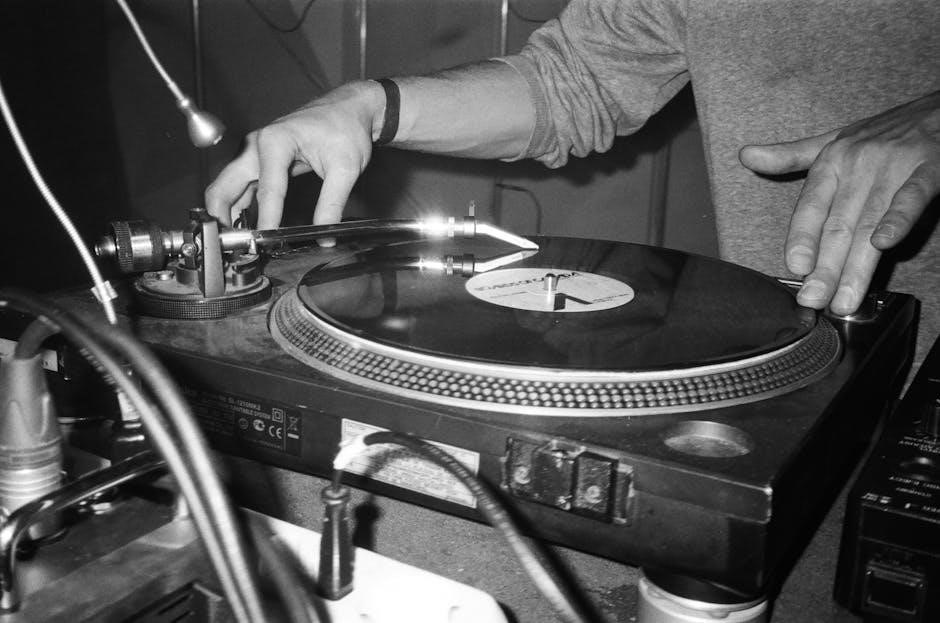
3.3 Using the Tonearm and Cueing Controls
Using the tonearm and cueing controls properly ensures smooth record playback. Gently lift the tonearm and place it at the record’s edge to start playback. For precise control, use the cueing lever to lower the stylus onto the record surface. Adjust the counterweight to balance the tonearm, ensuring proper tracking force. The anti-skate control prevents the stylus from skating across the record groove. Always handle the tonearm gently to avoid damaging the stylus or record. Proper use of these controls enhances sound quality and extends the life of your records and turntable.
Maintenance and Cleaning
Regularly clean the turntable platter, mat, and cabinet with a microfiber cloth. Avoid harsh chemicals to prevent damage. Use Crosley-approved cleaning accessories for optimal care.
4.1 Cleaning the Turntable Platter
Regular cleaning of the turntable platter is essential for optimal performance. Use a slightly damp microfiber cloth to gently wipe the platter, removing dust and debris. Avoid using harsh chemicals, alcohol, or benzene, as they may damage the finish. For tougher stains, lightly dampen the cloth with distilled water and clean in a circular motion. Ensure the platter is dry before placing a record. Never use abrasive materials or cleansers that could scratch the surface. Crosley offers specialized cleaning accessories designed for their turntables, ensuring safe and effective maintenance.
4.2 Cleaning the Turntable Mat
Regularly cleaning the turntable mat helps maintain sound quality and prevents dust buildup. Inspect the mat for dirt or debris. Gently remove loose particles with a soft, dry microfiber cloth. For more thorough cleaning, lightly dampen the cloth with distilled water and wipe the mat in a circular motion. Avoid harsh chemicals or abrasive cleaners, as they may damage the mat’s material. Allow the mat to air dry completely before placing a record. For stubborn stains, repeat the process if necessary. Replace the mat if it becomes worn or damaged to ensure proper record support and playback.
4.3 Cleaning the Cabinet and Exterior
Keep your Crosley turntable looking its best by cleaning the cabinet and exterior regularly. Use a soft, dry microfiber cloth to wipe away dust and fingerprints. For tougher stains, lightly dampen the cloth with water or a mild detergent solution. Avoid using harsh chemicals, alcohol, or abrasive cleaners, as they may damage the finish. Gently wipe the entire exterior, paying attention to corners and crevices. Dry the surface with a clean, dry cloth to prevent water spots. Regular cleaning maintains the aesthetic appeal and protects the turntable’s finish. Avoid exposing the unit to excessive moisture or direct sunlight.
Troubleshooting Common Issues
Address common issues like vibration, sound quality problems, and Bluetooth connectivity. Refer to the troubleshooting section for detailed solutions to ensure optimal performance of your Crosley turntable.
5.1 Resolving Vibration Issues
Experiencing vibrations? Ensure your Crosley turntable is placed on a stable, level surface. Use a spirit level to confirm even placement. Avoid unbalanced or soft surfaces, as they can amplify vibrations. If issues persist, check for loose components and tighten them according to the manual. Placing dampening pads or a vibration-reducing mat underneath the turntable can also help minimize unwanted movement. For severe cases, consider isolating the turntable from the speaker system to prevent feedback loops. Always refer to your specific model’s troubleshooting guide for tailored solutions.
5.2 Addressing Sound Quality Problems
If your Crosley turntable is producing poor sound quality, start by ensuring the stylus and record are clean. Dust and debris can cause distortion or skipping. Use a soft-bristle brush or a specialized cleaning solution to gently remove dirt. Check the tracking force and ensure it’s set correctly, as improper alignment can affect sound. Verify that the cartridge is securely attached and properly aligned. If issues persist, consider upgrading the cartridge or stylus for better performance. Finally, ensure all connections to speakers or amplifiers are secure and free from interference.
5.3 Fixing Bluetooth Connectivity Problems
If your Crosley turntable is experiencing Bluetooth connectivity issues, start by ensuring the device is in close proximity to the turntable. Restart both devices and ensure Bluetooth is enabled. Pair the turntable with your device by selecting “Crosley” from the available options. If connection fails, reset the pairing by disconnecting from the current device and re-pairing. Check for firmware updates on the Crosley website, as outdated software may cause connectivity problems. Avoid interference from other electronic devices and ensure no obstacles block the signal path. If issues persist, perform a factory reset according to the manual instructions.
Accessories and Upgrades
Enhance your Crosley turntable experience with compatible accessories like cleaning kits, replacement needles, and 45 RPM adapters. Upgrading the cartridge or stylus can improve sound quality, while optional upgrades like pre-amps or anti-skate adjustments ensure optimal performance.
6.1 Compatible Accessories for Crosley Turntables
Enhance your Crosley turntable setup with a variety of compatible accessories. Replacement mats, belts, and cleaning kits ensure optimal performance and maintenance. Crosley offers specific products like the CR704 platter and C100 headshell for seamless integration. Explore optional upgrades such as USB interfaces for digital recording or pre-amps for improved sound quality. Accessories like 45 RPM adapters and counterweights are also available to tailor your experience. Visit Crosley’s official website or authorized retailers to find genuine accessories designed for your model, ensuring compatibility and longevity for your turntable.
6.2 Upgrading the Cartridge or Stylus
Upgrading your Crosley turntable’s cartridge or stylus can significantly enhance sound quality and performance. Many Crosley models, such as the C6 and C100, allow for easy cartridge upgrades. Consider replacing the stock stylus with a high-quality option like the Audio Technica AT95E for improved audio clarity. Ensure compatibility by checking Crosley’s recommendations or consulting the user manual. When upgrading, carefully follow the instructions to remove the old cartridge and install the new one securely. Proper alignment and balancing of the tonearm are crucial for optimal sound reproduction. Upgrading the stylus can breathe new life into your vinyl listening experience.
6.3 Optional Upgrades for Enhanced Performance
To elevate your Crosley turntable’s performance, consider optional upgrades such as replacing the platter with an acrylic or glass one for improved resonance control. Upgrading the belt to a high-quality alternative can enhance speed stability. Additionally, installing a premium phono preamp or external power supply can refine sound quality. Motor upgrades and external speed controllers are also available for select models. Anti-vibration pads and isolation feet can further minimize external interference. When upgrading, ensure compatibility with your specific Crosley model and follow installation instructions carefully to maintain optimal functionality and sound fidelity.
Safety Instructions
Always keep the turntable away from water and moisture. Avoid using harsh chemicals for cleaning. Place it on a stable, flat surface and keep it out of children’s reach.
7.1 General Safety Precautions
Read this manual thoroughly before using your Crosley turntable. Keep the unit away from water and moisture to avoid damage. Never use harsh chemicals for cleaning, as they may harm the finish. Place the turntable on a stable, flat surface to prevent vibration. Ensure the power cord is protected from damage and avoid overloading electrical outlets. Unplug the turntable when cleaning or when not in use. Keep children away from moving parts. Avoid exposing the turntable to extreme temperatures or humidity. Follow these precautions to ensure safe and optimal performance.
7.2 Avoiding Damage to the Turntable
To prevent damage, handle the turntable with care. Avoid touching the stylus or record surface to prevent scratches or dust buildup. Use a microfiber cloth for cleaning, and never apply harsh chemicals or excessive moisture. Handle the tonearm gently and avoid forcing it. Place records carefully to avoid bending or warping. Store the turntable in a stable, dry environment away from direct sunlight. Use Crosley-approved cleaning products to maintain the finish and functionality. Regular maintenance and proper handling will ensure your turntable continues to perform optimally and lasts for years.
Warranty and Customer Support
Crosley turntables come with a warranty covering manufacturing defects. For assistance, contact customer service at 1-888-CROSLEY or visit www.crosleyradio.com; Keep your manual for warranty details and support.
8.1 Understanding the Warranty
Your Crosley turntable is backed by a warranty that covers manufacturing defects for a specified period, typically one year from the purchase date. This warranty ensures that any faulty parts or issues arising from the manufacturing process will be repaired or replaced free of charge. To make a claim, you must provide proof of purchase, such as a receipt, and contact Crosley’s customer service team. The warranty does not cover damage caused by misuse, normal wear and tear, or unauthorized modifications. Registering your product and retaining the original manual can facilitate the warranty process. For detailed terms, refer to the warranty section in your user manual or visit Crosley’s official website.
8.2 Contacting Crosley Customer Service
For assistance with your Crosley turntable, contact customer service at 1-888-CROSLEY (1-888-276-7539), available Monday through Friday from 8 a.m. to 8 p.m. EST. Visit their official website at www.crosleyradio.com for support resources, including FAQs and downloadable manuals. When reaching out, have your product model number and proof of purchase ready to expedite the process. Crosley’s team is dedicated to addressing inquiries, troubleshooting issues, and providing repair or replacement options under warranty. Ensure to review your manual for specific contact guidelines and additional support channels.

Advanced Features
Discover advanced features like Bluetooth output for wireless connectivity, a built-in pre-amp for enhanced audio quality, and adjustable counterweight and anti-skate controls for optimal vinyl playback.
9.1 Using the Built-in Pre-Amp
The built-in pre-amp on your Crosley turntable enhances audio quality by boosting the phono signal to line level, ensuring compatibility with speakers or amplifiers without a dedicated phono input. To use it, locate the pre-amp switch, typically found near the RCA output jacks. Flip the switch to the “on” position for amplified output. This feature is ideal for connecting to modern sound systems. Always ensure the pre-amp is enabled when using external speakers. For optimal sound, adjust the volume and equalization settings on your connected device. This feature simplifies setup and delivers clear, rich audio.
9.2 Enabling Bluetooth Output
Enable Bluetooth output on your Crosley turntable to stream audio wirelessly to compatible devices like speakers or headphones. First, ensure Bluetooth is activated on both the turntable and your device. On the turntable, press and hold the Bluetooth button until the LED indicator flashes. Search for available devices on your audio device, select the turntable’s name (e.g., “Crosley CR8005D”), and confirm pairing. Once connected, the LED will stabilize, indicating successful pairing. For troubleshooting, restart both devices or reset the turntable’s Bluetooth connection. This feature allows seamless wireless audio streaming, enhancing your vinyl listening experience with modern convenience.
9.3 Adjusting the Counterweight and Anti-Skate
Enable Bluetooth output on your Crosley turntable to stream audio wirelessly to compatible devices like speakers or headphones. First, ensure Bluetooth is activated on both the turntable and your device. On the turntable, press and hold the Bluetooth button until the LED indicator flashes. Search for available devices on your audio device, select the turntable’s name (e.g., “Crosley CR8005D”), and confirm pairing. Once connected, the LED will stabilize, indicating successful pairing. For troubleshooting, restart both devices or reset the turntable’s Bluetooth connection. This feature allows seamless wireless audio streaming, enhancing your vinyl listening experience with modern convenience.
Thank you for choosing Crosley! With proper setup, maintenance, and care, your turntable will provide years of enjoyment. Happy listening and vinyl collecting!
10.1 Summary of Key Instructions
This guide has provided essential steps for setting up, operating, and maintaining your Crosley turntable. From unboxing to troubleshooting, each section ensures optimal performance. Always refer to your specific model’s manual for tailored instructions. Regular cleaning and proper handling of the needle and records are crucial for longevity. Experiment with accessories and upgrades to enhance your listening experience. Remember to follow safety guidelines to prevent damage. Enjoy your Crosley turntable and the timeless joy of listening to vinyl records with clarity and precision.
10.2 Final Tips for Enjoying Your Crosley Turntable
To fully enjoy your Crosley turntable, experiment with different accessories like high-quality needles or mats for enhanced sound. Explore various record genres and take care to handle vinyl with clean, dry hands to prevent scratches. Regularly clean the turntable and store records upright to maintain their condition. Consider upgrading to a better cartridge or pre-amp for improved audio quality. Finally, create a quiet, vibration-free listening space to immerse yourself in the rich, warm sound of vinyl. Happy spinning and enjoy the timeless experience of listening to your favorite records!