
Aurus mini split systems are energy-efficient, space-saving solutions for heating and cooling. They offer versatile installation options, ideal for homes and businesses, ensuring optimal comfort with minimal effort.
1.1 Overview of Aurus Mini Split AC Systems
Aurus mini split AC systems are ductless, energy-efficient solutions designed for versatile heating and cooling. Available in various capacities, they cater to different spaces, from 750 to 1,500 sq.ft. These systems combine sleek designs with advanced technology, offering both cooling and heating functionalities. Their pre-charged installation kits simplify setup, while high SEER ratings ensure energy savings. Ideal for homes, offices, and spaces without ductwork, Aurus mini splits provide quiet operation, precise temperature control, and eco-friendly performance, making them a popular choice for modern comfort needs.
1.2 Benefits of Ductless Mini Split Systems
Ductless mini split systems offer numerous advantages, including energy efficiency, space-saving design, and easy installation without ductwork. They provide precise temperature control, reducing energy bills and minimizing waste. These systems are ideal for rooms without existing ducts, offering flexibility in zoning. Quiet operation, eco-friendly performance, and minimalist aesthetics make them a popular choice for modern homes and offices. Their ability to heat and cool individual spaces independently enhances comfort and convenience, making them a versatile solution for various environments.
1.3 Importance of Proper Installation
Proper installation of Aurus mini split systems is crucial for optimal performance and longevity. It ensures efficient energy use, proper airflow, and system functionality. Incorrect installation can lead to reduced efficiency, increased energy bills, and potential system damage. A well-installed system minimizes risks of leaks, electrical issues, and premature wear. Additionally, correct setup ensures warranty validity and safety standards are met. Professional installation is recommended to guarantee a seamless and reliable operation, maximizing the benefits of the system while maintaining its durability and efficiency over time.
Understanding the Aurus Mini Split Components
Aurus mini split systems include an indoor unit, outdoor unit, refrigerant lines, and drainage system. These components work together to provide efficient heating and cooling solutions seamlessly.
2.1 Indoor Unit Components
The indoor unit of an Aurus mini split system includes essential components such as the evaporator coil, fan, and air filters. These elements work together to provide efficient air distribution and filtration. The unit also features a sleek design, often wall-mounted, and includes a remote control for easy operation. Proper installation and maintenance of these components are crucial for optimal performance and energy efficiency.
2.2 Outdoor Unit Components
The outdoor unit of an Aurus mini split system contains the compressor, condenser coil, fan, and refrigerant lines. The compressor drives the refrigerant cycle, while the condenser coil dissipates heat. The fan ensures proper airflow for cooling. Additionally, the unit includes an electrical box for wiring connections and a protective cabinet to house components. Proper installation and placement are crucial for efficiency and performance, requiring a level surface, adequate airflow, and protection from direct sunlight and moisture.
2.3 Installation Kit and Accessories
The installation kit for Aurus mini split systems includes essential components like a pre-charged 10ft refrigerant line set, insulation, and mounting brackets. These accessories simplify the installation process, ensuring compatibility and efficiency. The kit also contains necessary fittings and connectors to secure the refrigerant lines between indoor and outdoor units. Proper use of these accessories ensures a leak-free and efficient system operation, adhering to manufacturer specifications for optimal performance and longevity.

Pre-Installation Requirements
Ensure the site is prepared with proper space, tools, and materials. Verify compatibility of electrical and structural requirements for smooth installation of the Aurus mini split system.
3.1 Tools and Materials Needed
For a successful installation, gather essential tools like drills, screwdrivers, wrenches, and cable ties. Materials include the installation kit, refrigerant lines, insulation, and electrical supplies. Ensure all items are compatible with the Aurus mini split system specifications. Proper tools and materials are crucial for a safe and efficient installation process, preventing potential leaks or electrical issues. Always follow the manufacturer’s guidelines for recommended tools and materials to ensure compliance with safety standards and optimal system performance.
3.2 Site Preparation and Space Considerations
Ensure the installation area is clear and accessible. Measure the space for both indoor and outdoor units to guarantee proper fitment. The indoor unit should be mounted at least 8 feet above the floor for optimal airflow. The outdoor unit requires adequate clearance from walls and obstacles to prevent restricted airflow. Verify that the drainage system has a suitable location, and ensure the power supply is nearby. Proper site preparation ensures efficient installation and system performance, avoiding future operational issues.
3.3 Safety Precautions and Guidelines
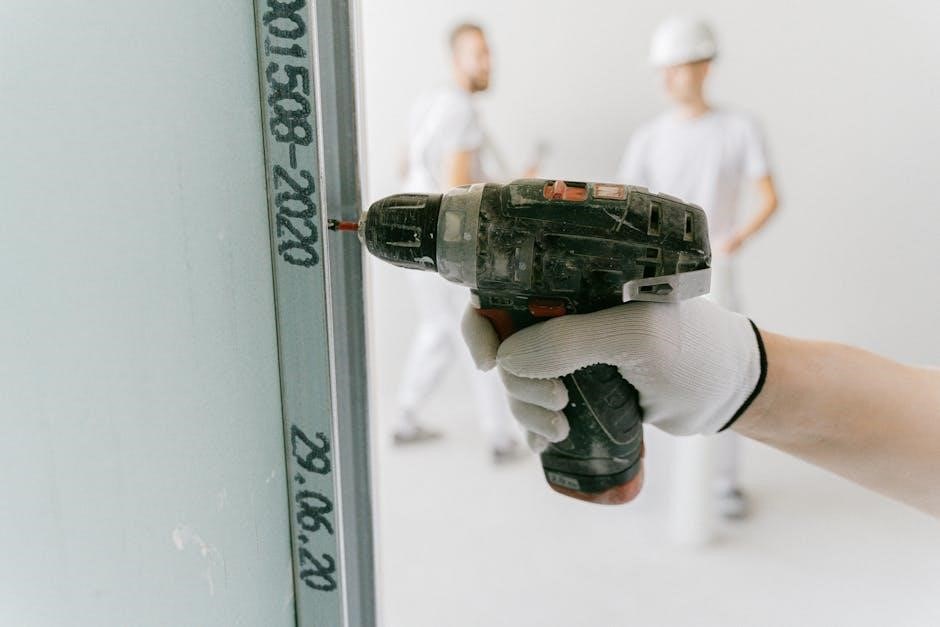
Always wear protective gear, including gloves and safety glasses, during installation. Ensure the power supply is turned off before handling electrical components. Use a ladder safely and maintain three points of contact when mounting units. Avoid over-tightening connections to prevent system damage. Keep the work area clean and well-ventilated. Follow all local electrical codes and manufacturer guidelines; Proper safety measures ensure a risk-free installation process and prevent potential hazards, safeguarding both the installer and the system’s integrity. Adhering to these precautions is essential for a successful and secure setup.
Step-by-Step Installation Process
This section provides a comprehensive guide to installing Aurus mini split systems, covering mounting, wiring, and connecting components for a seamless setup.
4.1 Mounting the Indoor Unit
Mounting the indoor unit is a critical step in the installation process. Ensure the unit is installed on a sturdy wall, ideally 8-10 feet above the floor for optimal airflow. Use the provided installation kit to secure the unit firmly. Make sure the surface is level and stable to prevent vibration or noise. If necessary, add additional support to ensure the unit remains firmly in place. Proper mounting ensures efficient operation and minimizes potential issues during use. Always follow the manufacturer’s guidelines for precise installation.
4.2 Installing the Outdoor Unit
Installing the outdoor unit requires careful planning and execution. Position the unit on a level surface, ensuring it is at least 12 inches away from any walls or obstructions to allow proper airflow. Use the provided installation kit to secure the unit firmly to the ground or a suitable base. Ensure the refrigerant lines are properly connected and insulated. The outdoor unit should be placed in a shaded area if possible to improve efficiency; Follow the manufacturer’s guidelines to ensure optimal performance and longevity of the system. Proper installation is essential for reliable operation.
4.3 Connecting the Drainage System
Connecting the drainage system is crucial to prevent water damage and ensure efficient operation. Attach the drain line to the indoor unit and secure it properly. Route the line to a suitable drainage point, ensuring no kinks or blockages. Use the provided fittings to connect the line securely. Test the system to check for leaks and ensure proper water flow. Regularly inspect the drainage system to maintain efficiency and prevent issues. Always follow the manufacturer’s guidelines for optimal performance. Proper drainage ensures the system operates smoothly and effectively. Consult the manual for specific instructions if needed. Ensure all connections are tight and secure. Maintain the drainage system regularly to avoid clogs and ensure proper functionality.
4.4 Running the Refrigerant Lines
Running the refrigerant lines requires precision to ensure proper system performance. Insulate the lines to prevent energy loss and moisture buildup. Measure and cut the lines to the correct length, avoiding unnecessary bends or kinks. Secure the lines with clips or straps to prevent damage. Connect the lines to the indoor and outdoor units, ensuring tight fittings to avoid leaks. Use the pre-charged lines provided in the installation kit to simplify the process. Double-check the connections and routing to ensure optimal system operation. Properly insulate and protect the lines from environmental factors. Follow the manual’s guidelines for correct installation. Ensure the lines are properly secured and insulated for efficient cooling and heating. Always handle refrigerant lines with care to avoid damage or leaks. Verify the lines are correctly routed and connected before proceeding. This step is critical for the system’s efficiency and longevity. Insulate the lines thoroughly to maintain performance; Ensure all connections are secure and leak-free. Proper installation of the refrigerant lines is essential for the system to function effectively. Follow the manufacturer’s instructions carefully. Insulate the lines well to prevent energy loss and ensure reliable operation. Secure the lines firmly to avoid movement or damage. Test the connections to ensure there are no leaks. Properly installed refrigerant lines are vital for optimal system performance. Always follow safety guidelines when handling refrigerant lines. Ensure the lines are correctly routed and insulated for maximum efficiency. This step is crucial for the overall functionality of the mini split system. Insulate the lines to prevent moisture buildup and energy loss. Secure the lines properly to avoid damage. Follow the installation manual for specific instructions. Ensure the refrigerant lines are correctly connected and insulated. Proper installation ensures efficient cooling and heating. Insulate the lines to maintain performance. Secure the lines firmly to prevent movement. Follow the manufacturer’s guidelines for correct installation. Ensure the refrigerant lines are properly routed and connected. This step is essential for the system’s efficiency and longevity. Insulate the lines thoroughly to prevent energy loss. Secure the lines firmly to avoid damage. Ensure all connections are tight and leak-free. Proper installation of the refrigerant lines is critical for optimal system performance. Follow the manual’s instructions carefully. Insulate the lines well to maintain efficiency. Secure the lines properly to prevent movement or damage. Test the connections to ensure there are no leaks. Properly installed refrigerant lines ensure the system functions effectively. Always handle refrigerant lines with care to avoid damage or leaks. Ensure the lines are correctly routed and connected before proceeding. This step is vital for the system’s efficiency and longevity. Insulate the lines thoroughly to maintain performance. Ensure all connections are secure and leak-free. Proper installation of the refrigerant lines is essential for the system to function effectively. Follow the manufacturer’s instructions carefully. Insulate the lines well to prevent energy loss and ensure reliable operation. Secure the lines firmly to avoid movement or damage. Test the connections to ensure there are no leaks. Properly installed refrigerant lines are vital for optimal system performance. Always follow safety guidelines when handling refrigerant lines. Ensure the lines are correctly routed and insulated for maximum efficiency. This step is crucial for the overall functionality of the mini split system. Insulate the lines to prevent moisture buildup and energy loss; Secure the lines properly to avoid damage. Follow the installation manual for specific instructions. Ensure the refrigerant lines are correctly connected and insulated. Proper installation ensures efficient cooling and heating. Insulate the lines to maintain performance. Secure the lines firmly to prevent movement. Follow the manufacturer’s guidelines for correct installation. Ensure the refrigerant lines are properly routed and connected. This step is essential for the system’s efficiency and longevity. Insulate the lines thoroughly to prevent energy loss. Secure the lines firmly to avoid damage. Ensure all connections are tight and leak-free. Proper installation of the refrigerant lines is critical for optimal system performance. Follow the manual’s instructions carefully. Insulate the lines well to maintain efficiency. Secure the lines properly to prevent movement or damage. Test the connections to ensure there are no leaks. Properly installed refrigerant lines ensure the system functions effectively. Always handle refrigerant lines with care to avoid damage or leaks. Ensure the lines are correctly routed and connected before proceeding. This step is vital for the system’s efficiency and longevity. Insulate the lines thoroughly to maintain performance. Ensure all connections are secure and leak-free. Proper installation of the refrigerant lines is essential for the system to function effectively. Follow the manufacturer’s instructions carefully. Insulate the lines well to prevent energy loss and ensure reliable operation. Secure the lines firmly to avoid movement or damage. Test the connections to ensure there are no leaks. Properly installed refrigerant lines are vital for optimal system performance. Always follow safety guidelines when handling refrigerant lines. Ensure the lines are correctly routed and insulated for maximum efficiency. This step is crucial for the overall functionality of the mini split system. Insulate the lines to prevent moisture buildup and energy loss. Secure the lines properly to avoid damage. Follow the installation manual for specific instructions. Ensure the refrigerant lines are correctly connected and insulated. Proper installation ensures efficient cooling and heating. Insulate the lines to maintain performance. Secure the lines firmly to prevent movement. Follow the manufacturer’s guidelines for correct installation. Ensure the refrigerant lines are properly routed and connected. This step is essential for the system’s efficiency and longevity. Insulate the lines thoroughly to prevent energy loss. Secure the lines firmly to avoid damage. Ensure all connections are tight and leak-free. Proper installation of the refrigerant lines is critical for optimal system performance. Follow the manual’s instructions carefully. Insulate the lines well to maintain efficiency. Secure the lines properly to prevent movement or damage. Test the connections to ensure there are no leaks. Properly installed refrigerant lines ensure the system functions effectively. Always handle refrigerant lines with care to avoid damage or leaks. Ensure the lines are correctly routed and connected before proceeding; This step is vital for the system’s efficiency and longevity. Insulate the lines thoroughly to maintain performance. Ensure all connections are secure and leak-free. Proper installation of the refrigerant lines is essential for the system to function effectively. Follow the manufacturer’s instructions carefully. Insulate the lines well to prevent energy loss and ensure reliable operation. Secure the lines firmly to avoid movement or damage. Test the connections to ensure there are no leaks. Properly installed refrigerant lines are vital for optimal system performance. Always follow safety guidelines when handling refrigerant lines. Ensure the lines are correctly routed and insulated for maximum efficiency. This step is crucial for the overall functionality of the mini split system. Insulate the lines to prevent moisture buildup and energy loss. Secure the lines properly to avoid damage. Follow the installation manual for specific instructions. Ensure the refrigerant lines are correctly connected and insulated. Proper installation ensures efficient cooling and heating. Insulate the lines to maintain performance. Secure the lines firmly to prevent movement. Follow the manufacturer’s guidelines for correct installation. Ensure the refrigerant lines are properly routed and connected. This step is essential for the system’s efficiency and longevity. Insulate the lines thoroughly to prevent energy loss. Secure the lines firmly to avoid damage. Ensure all connections are tight and leak-free. Proper installation of the refrigerant lines is critical for optimal system performance. Follow the manual’s instructions carefully. Insulate the lines well to maintain efficiency. Secure the lines properly to prevent movement or damage. Test the connections to ensure there are no leaks. Properly installed refrigerant lines ensure the system functions effectively. Always handle refrigerant lines with care to avoid damage or leaks. Ensure the lines are correctly routed and connected before proceeding. This step is vital for the system’s efficiency and longevity. Insulate the lines thoroughly to maintain performance. Ensure all connections are secure and leak-free. Proper installation of the refrigerant lines is essential for the system to function effectively. Follow the manufacturer’s instructions carefully. Insulate the lines well to prevent energy loss and ensure reliable operation. Secure the lines firmly to avoid movement or damage. Test the connections to ensure there are no leaks. Properly installed refrigerant lines are vital for optimal system performance. Always follow safety guidelines when handling refrigerant lines. Ensure the lines are correctly routed and insulated for maximum efficiency. This step is crucial for the overall functionality of the mini split system. Insulate the lines to prevent moisture buildup and energy loss. Secure the
4.5 Electrical Connections and Wiring
Connect the electrical wires between the indoor and outdoor units carefully, ensuring all terminals match the manual’s instructions. Secure the wires to prevent damage. Use the correct gauge wire for the system’s power requirements. Verify that all connections are tight and insulated. Plug in the units and test the electrical connections to ensure proper operation. Follow local electrical codes and safety guidelines. If unsure, consult a licensed electrician. Proper wiring ensures safe and efficient system operation. Double-check all connections before powering up the system.

System Setup and Configuration
Configure the Aurus mini split system by initializing settings, connecting the remote, and setting the thermostat for optimal performance and energy efficiency.
5.1 Initializing the System
Initializing the Aurus mini split system involves powering it on and ensuring all components are operational. Turn on the main power supply, then press the power button on the remote. Allow the system to run a self-test cycle to verify proper functionality. Check for any error codes or unusual noises. If the system operates smoothly, it is ready for configuration. Ensure the thermostat is set correctly and test heating and cooling modes to confirm performance. Proper initialization ensures efficient energy use and optimal comfort. Follow the manual for precise steps.
5.2 Connecting the Remote Control
Connecting the remote control to your Aurus mini split system is straightforward. Insert the batteries into the remote and ensure it is paired with the indoor unit. Press and hold the “SET” button on the remote until the LED light flashes, indicating successful pairing. Test the remote by adjusting settings like temperature and mode. Ensure the remote has a clear line of sight to the indoor unit for optimal signal reception. If issues arise, reset the remote or consult the manual for troubleshooting steps. Proper connection ensures seamless system control. Always refer to the manual for specific pairing instructions.
5.3 Setting Up the Thermostat
Setting up the thermostat for your Aurus mini split system involves installing it in a central location, away from direct sunlight or drafts. Connect the thermostat to the indoor unit following the manual’s wiring diagram. Set your desired temperature and choose between cooling, heating, or fan modes. Use the remote or wall-mounted control to adjust settings. Some models offer programmable timers and energy-saving modes. Ensure the thermostat is calibrated correctly for accurate temperature readings. Proper setup ensures efficient operation and optimal comfort. Always refer to the manual for specific thermostat configuration instructions. This step is crucial for system performance.
5.4 Testing the System for Proper Functionality
After setup, test the Aurus mini split system by running a full cycle. Check cooling, heating, and fan modes to ensure smooth operation. Verify airflow direction and strength. Inspect the drainage system for proper water flow. Test the remote control for responsiveness and accuracy. Ensure no refrigerant leaks are present and electrical connections are secure. Monitor temperature changes to confirm heating and cooling efficiency. Perform a visual inspection of indoor and outdoor units for damage or issues. Proper functionality ensures optimal performance and energy efficiency. Always refer to the manual for specific testing procedures. This step guarantees reliable operation.
Post-Installation Checks
Post-installation checks ensure all connections are secure, airflow is proper, and the drainage system functions correctly. Verify no leaks or electrical issues exist. Consult the manual for detailed procedures to confirm everything operates efficiently and safely.
6.1 Final Inspection of Connections
After installation, inspect all connections, including refrigerant lines, electrical wiring, and drain hoses. Ensure they are securely fastened and sealed to prevent leaks. Verify that all components are properly aligned and installed according to the manufacturer’s guidelines. Check for any signs of damage or wear. Proper connections are crucial for optimal system performance and energy efficiency. Refer to the Aurus mini split installation manual for specific inspection criteria.
6.2 Ensuring Proper Airflow
Proper airflow is essential for optimal system performance. Ensure the indoor unit is installed in a location with unobstructed air circulation. Check that air filters are clean and free from debris. Maintain sufficient clearance around the unit to allow air to flow freely. Verify that vents and grilles are not blocked by furniture or other items. Proper airflow ensures efficient cooling and heating, maintaining consistent comfort levels throughout the space. Refer to the Aurus mini split installation manual for specific airflow recommendations.
6.3 Verifying Drainage System Functionality
After installation, it’s crucial to verify that the drainage system of your Aurus mini split is functioning properly. Inspect the drain line for any kinks or blockages and ensure it’s correctly routed. Check the drain pan for proper connection and alignment. Run the system to observe if water flows smoothly and doesn’t accumulate, which could indicate a drainage issue. Refer to the Aurus mini split installation manual for detailed instructions on testing and maintaining the drainage system for optimal performance and to prevent any potential water-related damage.

Maintenance and Upkeep
Regular maintenance is essential for optimal performance. Clean filters monthly, inspect drain lines, and schedule professional servicing annually to ensure efficiency and longevity of the system.
7.1 Regular Cleaning and Filter Maintenance
Regular cleaning and filter maintenance are crucial for the efficiency of Aurus mini split systems. Dust and debris can accumulate, reducing airflow and energy efficiency. Clean or replace the air filters monthly, as specified in the installation manual. Additionally, wipe down the indoor unit’s surfaces with a damp cloth to prevent dust buildup. Ensure the outdoor unit is free from obstructions like leaves or dirt to maintain proper airflow and prevent damage. These simple steps ensure optimal performance and extend the system’s lifespan.
7.2 Scheduling Professional Servicing
Regular professional servicing is essential to maintain the efficiency and longevity of Aurus mini split systems. Schedule annual inspections to ensure all components function optimally. Technicians can identify potential issues early, preventing costly repairs. Professional servicing includes deep cleaning, refrigerant level checks, and electrical system inspections. This ensures the system operates at peak performance, maintains energy efficiency, and adheres to warranty requirements. Always use certified professionals familiar with Aurus systems for reliable and high-quality service.
Troubleshooting Common Issues
Troubleshooting Aurus mini split systems helps identify and resolve common problems like leaks, noise, or remote malfunctions, ensuring optimal performance and longevity of the unit.
8.1 Identifying and Resolving Leaks
Leaks in Aurus mini split systems often occur due to improper installation or refrigerant line issues. Inspect connections and hoses for damage or loose fittings. Ensure the drain system is clear, as clogs can cause water leaks. If refrigerant leaks are suspected, turn off the system and contact a professional. Regular maintenance, such as checking for condensate leaks, can prevent issues. Always follow manufacturer guidelines for sealing and tightening connections to maintain system integrity and efficiency.
8.2 Addressing Noise Issues
Noise issues with Aurus mini split systems can stem from improper installation, loose components, or debris in the units. Ensure the indoor and outdoor units are securely mounted and balanced. Check for loose screws or vibrating parts, which can cause operational noise. Clean or replace air filters to improve airflow and reduce strain on the system. If noise persists, consider relocating the outdoor unit to a less noise-sensitive area or using noise-reducing pads. Regular maintenance, like cleaning fan blades, can also minimize operational noise effectively.
8.3 Fixing Remote Control Malfunctions
Remote control issues with Aurus mini split systems often arise from dead batteries, signal interference, or syncing problems. Replace batteries with new ones, ensuring correct polarity. Check for obstructions between the remote and indoor unit. Reset the system by turning it off, waiting 30 seconds, and turning it back on. If issues persist, re-sync the remote by pressing and holding the “SET” button for 3-5 seconds. For unresolved problems, consult the user manual or contact Aurus customer support for assistance.
Warranty and Support Information
Aurus mini split systems come with a comprehensive warranty, ensuring coverage for parts and labor. Dedicated customer support is available for troubleshooting and maintenance inquiries.
9.1 Understanding the Warranty Coverage
Aurus mini split systems are backed by a comprehensive warranty, covering parts and labor for a specified period. This ensures protection against manufacturing defects and faulty components. The warranty typically includes coverage for the compressor, fan motors, and other essential parts, providing peace of mind for users. Terms and conditions vary by model, so it’s essential to review the warranty documentation provided with your system. Proper installation by certified professionals is often required to maintain warranty validity.
9.2 Contacting Aurus Customer Support
Aurus provides dedicated customer support to assist with inquiries, troubleshooting, and warranty-related matters. Users can contact support via phone, email, or live chat through the official Aurus website. The support team is available to address installation questions, system malfunctions, and maintenance tips. For specific issues, customers are encouraged to have their model number and installation details ready. Aurus customer support is committed to resolving issues promptly and ensuring a seamless experience for all mini split system users. Visit the Aurus website for contact information and additional resources.
Additional Considerations
Consider energy-saving settings, space-efficient layouts, and future system upgrades. These tips enhance functionality and adaptability, ensuring long-term satisfaction with your Aurus mini split installation.
10.1 Energy Efficiency Tips
Maximize energy efficiency by adjusting thermostat settings seasonally and maintaining a consistent temperature. Regularly clean filters and ensure proper installation to optimize performance. Use smart thermostats to regulate energy use and consider programmable settings for idle periods. Proper insulation and sealing of rooms enhance system efficiency. Additionally, operating the system in energy-saving modes reduces consumption without compromising comfort. These practices ensure your Aurus mini split operates at peak efficiency, lowering energy bills and environmental impact while maintaining reliable performance year-round.
10.2 Space-Saving Installation Ideas
Aurus mini splits are ideal for space-saving installations due to their compact design. Consider wall-mounted indoor units to save floor space, or opt for ceiling cassette models in larger areas. Outdoor units can be installed in tight spaces, such as balconies or narrow alleys, with proper clearance. For smaller rooms, use a single-zone system to avoid unnecessary ductwork. Additionally, install the unit high on walls to maximize floor space and improve airflow efficiency. These strategies ensure optimal performance without compromising room aesthetics or functionality.
10.3 Future Upgrades and Modifications
Aurus mini split systems are designed to adapt to future upgrades, allowing for seamless integration of new technologies. Consider expanding your system by adding more indoor units for multi-zone coverage or upgrading to smart thermostats for enhanced control. Additionally, you can improve energy efficiency by installing advanced air purification systems or upgrading to higher SEER-rated models. These modifications ensure your system remains cutting-edge, providing long-term comfort and efficiency. Always consult the official Aurus installation manual for compatibility and best practices when making changes to your system;

Resources and References
Completing the Aurus mini split installation guide ensures a seamless setup process. This system offers exceptional efficiency and performance, providing optimal comfort for various spaces. Proper installation and maintenance are key to its long-term functionality, making it a reliable choice for heating and cooling needs.