Welcome to the Kenmore Elite Top Load Washer guide. This manual helps you understand your appliance’s features, operation, and maintenance for optimal performance and longevity.
1.1 Overview of the Kenmore Elite Series
The Kenmore Elite Series represents a line of high-performance, innovative appliances designed for modern households. Known for advanced features, energy efficiency, and sleek designs, these appliances are built to deliver exceptional performance. The series includes top-load washers, dryers, and other home essentials, offering smart home integration and user-friendly controls. With a focus on durability and reliability, the Kenmore Elite Series is a trusted choice for consumers seeking long-lasting, high-quality appliances that simplify daily tasks and enhance home comfort.
1.2 Importance of Reading the Owner’s Manual
Reading the owner’s manual is essential for the safe and effective use of your Kenmore Elite Top Load Washer. It provides detailed instructions on installation, operation, and maintenance, ensuring optimal performance. The manual also highlights safety precautions, warranty information, and troubleshooting tips. By understanding the features and settings, you can customize wash cycles and maintain your appliance properly. Referencing the manual helps prevent errors and extends the lifespan of your washer. Always keep it handy for quick guidance and to maximize your appliance’s efficiency and reliability.

Key Features of the Kenmore Elite Top Load Washer
The Kenmore Elite Top Load Washer features advanced washing technology, smart home integration, and energy-efficient design, ensuring superior cleaning performance while saving water and energy.
2.1 Advanced Washing Technology
The Kenmore Elite Top Load Washer utilizes advanced washing technology to deliver exceptional cleaning results. Features like the RollerJets system enhance wash performance, while the tilted drum design allows for easier loading and unloading of laundry. Additionally, the washer incorporates smart sensors to detect load size and fabric type, optimizing water and detergent usage; These innovations ensure a more efficient and gentle washing process, protecting your clothes while providing a deeper clean. The technology also reduces noise and vibration, making it ideal for home use.
2.2 Smart Home Integration
The Kenmore Elite Top Load Washer offers seamless smart home integration, allowing users to monitor and control their laundry remotely via a compatible app. This feature enables you to start or stop cycles, receive notifications, and customize settings from your smartphone. The washer is designed to work with popular smart home systems, enhancing convenience and efficiency. By connecting your washer to your home network, you can enjoy a more streamlined laundry experience and integrate it with other smart devices for a connected home environment. Refer to the manual for specific setup instructions.
2.3 Energy Efficiency and Eco-Friendly Design
The Kenmore Elite Top Load Washer is designed with energy efficiency in mind, featuring advanced technology to reduce water and energy consumption. It is ENERGY STAR certified, ensuring it meets strict environmental standards. The washer includes an eco-friendly mode that optimizes water usage while maintaining cleaning performance. Additionally, its eco-conscious design minimizes environmental impact without compromising on reliability or effectiveness. By choosing this washer, you contribute to energy savings and a more sustainable future while enjoying superior laundry results. Refer to the manual for details on eco-mode operation.
Unpacking and Installation
Unpack and inspect the washer for damage. Carefully remove packaging materials and transport bolts. Ensure the installation site is level and meets electrical requirements for proper operation.
3.1 Preparing the Installation Site
Before installing your Kenmore Elite Top Load Washer, ensure the installation site is clear of obstacles and debris. The floor must be level, stable, and able to support the washer’s weight. Check that the area is well-ventilated and protected from extreme temperatures. Ensure the electrical outlet and water supply lines are within reach and meets the specifications outlined in the manual. Proper preparation ensures safe and efficient operation of your washer.
3.2 Unpacking and Inspecting the Washer
Carefully unpack your Kenmore Elite Top Load Washer, ensuring all components are included. Inspect for any damage or defects, such as dents or scratches. Check the exterior, interior, and accessories like the power cord and hoses. Remove all packaging materials and transport bolts, following the manual’s instructions. If any damage is found, contact customer support immediately. A thorough inspection ensures your washer is ready for safe and proper installation.
3.3 Leveling the Washer for Proper Operation
Proper leveling is crucial for stable operation and to prevent vibrations. Place the washer on a firm, level surface. Use the adjustable feet to balance the unit, ensuring it doesn’t wobble. Check the level with a spirit level, adjusting front-to-back and side-to-side as needed. Once balanced, tighten the feet securely. Plug in the washer and test for stability. Proper leveling ensures efficient performance, reduces noise, and prevents potential damage during operation. Always refer to the manual for specific leveling instructions.

Understanding the Control Panel
The Kenmore Elite Top Load Washer’s control panel features intuitive buttons, a clear digital display, and customizable options for selecting cycles and adjusting settings easily.
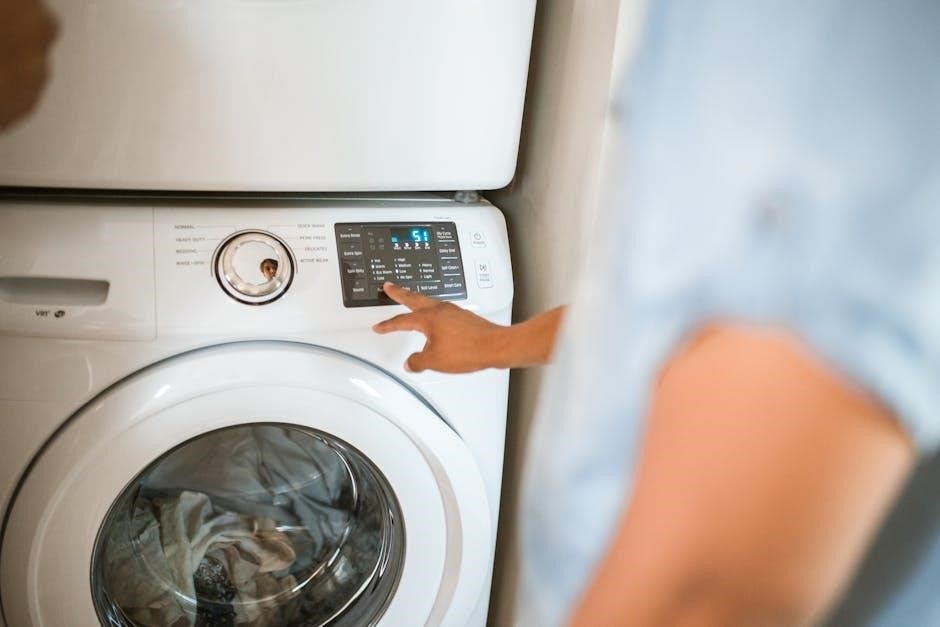
4.1 Overview of the Control Panel Layout
The control panel of the Kenmore Elite Top Load Washer is designed for ease of use, featuring a clear digital display, cycle selection buttons, and option adjusters. The layout is organized with primary functions like start/stop, power, and cycle selection prominently placed. Additional buttons allow customization of temperature, spin speed, and soil level. The digital display provides real-time updates on cycle progress, ensuring users stay informed throughout the wash process. This intuitive design makes operation straightforward and efficient.
4.2 Navigating the Cycle Selection Menu
Navigating the cycle selection menu on the Kenmore Elite Top Load Washer is straightforward. Press the cycle button to scroll through options like Normal, Heavy Duty, and Delicates. The digital display shows the selected cycle, allowing easy confirmation; Use the adjacent buttons to customize settings such as temperature and spin speed. Once satisfied with your choices, press Start to begin the cycle. The display will show the remaining time, keeping you informed throughout the process. This intuitive system ensures efficient and tailored washing experiences.
4.3 Customizing Wash Options and Settings
Customizing wash options on the Kenmore Elite Top Load Washer is designed to be intuitive. Start by selecting a cycle using the cycle button, which scrolls through options like Normal, Heavy Duty, and Delicates. Use the temperature button to choose between hot, warm, or cold water. Adjust spin speed with the spin selector, opting for higher speeds for thicker fabrics or lower for delicates. The soil level button allows you to select from light, normal, or heavy soil settings to tailor the wash intensity. For added convenience, the delay start button (clock symbol) lets you schedule the wash cycle. Engage the child lock (lock symbol) to prevent accidental changes. Some models offer a steam button for enhanced cleaning. Save your preferred settings for quick access in future cycles. Experiment with these settings to optimize your laundry experience.
Loading the Washer
Load laundry evenly, avoiding overfilling. Separate delicates from heavier items. Place larger items at the bottom and smaller ones on top for balanced washing.
5.1 Guidelines for Proper Loading
Load laundry evenly to ensure balanced washing. Avoid overloading, as this can reduce cleaning efficiency and damage clothes. Place larger or bulkier items at the bottom and smaller, delicate fabrics on top. Leave enough space for water to circulate freely. Separate heavily soiled items from lighter fabrics to prevent cross-staining. Check fabric care labels for special instructions. Ensure the washer is not overloaded, as this can lead to poor wash performance and potential damage to the machine. Proper loading ensures optimal cleaning and extends the life of your washer.
5.2 Sorting and Preparing Laundry
Sort clothes by fabric type, color, and soil level to ensure effective washing. Separate whites from colors to prevent dye bleeding. Check fabric care labels for special instructions. Empty pockets of loose items like coins or keys to avoid damage. Button shirts and zip zippers to protect fabrics. Place delicate or fragile items in mesh laundry bags. Avoid mixing bulky items like towels with lightweight fabrics. Proper sorting ensures better fabric care and prevents damage during washing.
5.3 Adding Detergent and Fabric Softener
Add the recommended dose of high-efficiency (HE) detergent directly into the washer drum before loading clothes. Avoid overfilling, as this can leave residue. For fabric softener, use the dispenser if available or add it directly during the rinse cycle. Ensure the detergent and softener are compatible with the washer’s design and your laundry needs. Always follow the manufacturer’s guidelines for proper usage amounts to maintain optimal performance and prevent buildup in the washer over time.

Wash Cycles and Options
The Kenmore Elite Top Load Washer offers a variety of wash cycles, including normal, heavy-duty, and delicate options. Smart features allow customization for optimal cleaning results.
6.1 Standard Wash Cycles
The Kenmore Elite Top Load Washer features a range of standard wash cycles designed for everyday use. These cycles include Normal, Heavy Duty, and Delicate options, catering to different fabric types and soil levels. The Normal cycle is ideal for regular laundry, while Heavy Duty tackles tougher stains and bulky items. The Delicate cycle ensures gentle care for sensitive fabrics. Each cycle offers customizable settings, such as water temperature and spin speed, allowing users to tailor the wash to their specific needs. This versatility ensures efficient and effective cleaning for a variety of loads.
6.2 Specialized Wash Cycles
The Kenmore Elite Top Load Washer offers specialized cycles for specific needs. The Sanitize cycle uses high heat to eliminate bacteria and odors, ideal for heavily soiled items. The Steam Treat cycle gently removes stains using steam, reducing the need for pre-treatment. Additionally, the Bulk/Comfort cycle is designed for large or bulky items, ensuring thorough cleaning and rinsing. These specialized options provide tailored care for various laundry requirements, enhancing cleaning effectiveness while protecting fabrics. They are perfect for addressing tough stains, delicate materials, or oversized loads with precision and efficiency.
6.3 Advanced Wash Options
The Kenmore Elite Top Load Washer includes advanced wash options for enhanced cleaning. The Steam Treat feature uses steam to deeply penetrate fabrics and remove stubborn stains. Delay Start allows scheduling wash cycles up to 12 hours in advance for convenience. Deep Clean mode provides an extended wash cycle for heavily soiled loads. Additionally, the Oxi Boost option enhances stain removal by adding oxygen-based cleaning agents. These advanced features offer tailored solutions for various laundry needs, ensuring optimal results while maintaining fabric care and extending the life of your garments.
Maintenance and Care
Regular maintenance ensures your Kenmore Elite Top Load Washer performs optimally. Clean the interior, check hoses, and ensure proper detergent use for longevity.
7.1 Cleaning the Washer Interior
Regular cleaning of the Kenmore Elite Top Load Washer’s interior is essential to prevent residue buildup and odors. Run a cleaning cycle with hot water and a washer cleaner or vinegar. Leave the lid open after cycles to dry the interior. Wipe down the gasket and dispensers monthly. For tough odors, mix baking soda and vinegar before running a hot water cycle. Cleaning ensures fresh laundry and optimal performance. Always refer to the manual for specific cleaning instructions tailored to your model.
7.2 Checking and Replacing Hoses
Regularly inspect the water supply hoses for cracks, bulges, or signs of wear. Replace them every 5 years or immediately if damage is detected. Turn off the water supply before inspecting or replacing hoses. Use a wrench to securely connect new hoses, ensuring no leaks. For optimal performance, use genuine Kenmore replacement parts. Proper hose maintenance prevents water damage and ensures reliable washing machine operation. Always consult the manual for specific instructions and diagrams to guide you through the process safely and effectively.
7.3 Managing Lint and Debris Buildup
Regularly clean the lint filter after each use to prevent buildup and improve washing efficiency. Check the drain pump filter monthly to remove debris like coins or fabric scraps. Run a cleaning cycle with a washer cleaner to eliminate residue. Leave the lid open after use to dry the interior and reduce mold growth. Proper maintenance prevents clogs, ensures smooth operation, and extends the lifespan of your Kenmore Elite Top Load Washer.

Troubleshooting Common Issues
Identify common problems like error codes or poor performance. Refer to the manual for diagnostics and solutions. Resetting the washer or checking connections often resolves issues quickly.
8.1 Identifying and Resolving Common Problems
Common issues with the Kenmore Elite Top Load Washer include error codes, unusual noises, or improper washing. Start by checking the power supply and ensuring the washer is properly installed. For noise or vibration, verify the machine is level and balanced. If the washer doesn’t start, check the lid switch and ensure the door is closed tightly. Refer to the manual for specific error codes and their solutions. Regular cleaning of the interior and drain pump can prevent buildup and odors. If issues persist, consult the troubleshooting section or contact customer support.
8.2 Understanding Error Codes
The Kenmore Elite Top Load Washer displays error codes to indicate specific issues. Codes like “E1” or “E2” typically relate to sensor problems or imbalances. Others, such as “E3” or “E4,” may signal issues with water supply or temperature. Always refer to the manual for a full list of codes and their meanings. To resolve errors, restart the washer, check connections, or address the specific issue indicated. If problems persist, contact Kenmore support for assistance or repair. Understanding these codes helps diagnose and fix issues quickly.
8.3 Resetting the Washer
To reset your Kenmore Elite Top Load Washer, unplug it from the power source and wait for 30 minutes. This allows the control board to reset. Plug it back in and run a test cycle to ensure proper function. If issues persist, check for error codes or consult the manual. Resetting clears minor glitches and restores default settings. Regular resets can help maintain optimal performance and address unexpected operational issues effectively.

Safety Precautions
Always follow the manual’s guidelines to ensure safe operation. Avoid overloading the washer and keep children away during operation. Proper installation and regular maintenance are essential for safety.
9.1 General Safety Guidelines
Always follow the safety guidelines outlined in this manual to ensure safe operation of your Kenmore Elite Top Load Washer. Proper installation is crucial to prevent accidents. Never overload the washer, as this can cause imbalance and damage. Keep children away from the washer during operation, and ensure they do not play near or inside the machine. Regular maintenance, such as cleaning the interior and checking hoses, is essential for safe and efficient performance. Adhere to all safety precautions to avoid potential hazards and ensure longevity of your appliance.
9.2 Installation Safety Tips
Ensure the installation site is level, stable, and clear of obstacles to prevent accidents. Properly secure the washer to avoid vibration or movement during operation. Always follow the manufacturer’s installation instructions and consult a professional if unsure. Keep the area around the washer dry and free from water splashes to reduce slipping hazards. Never overload the washer, as this can lead to imbalance and potential damage. Regularly inspect and maintain the hoses and connections to prevent leaks or malfunctions. Always adhere to the installation guidelines provided in the manual for a safe and efficient setup.
9.3 Electrical Safety Considerations
Ensure the washer is plugged into a properly grounded electrical outlet to prevent shock hazards. Avoid overloading circuits, as this can cause electrical fires or damage. Keep the power cord away from water and heat sources to prevent degradation. Never operate the washer with damaged cords or plugs. If unsure about electrical connections, consult a licensed electrician. Always follow the manufacturer’s guidelines for electrical setup to ensure safe operation and comply with safety standards. This will help protect both the appliance and your home from potential electrical risks.
Warranty and Support
Your Kenmore Elite Top Load Washer is backed by a comprehensive warranty. For details, visit the Sears website or contact customer support. Online resources and manuals are also available for troubleshooting and maintenance guidance.
10.1 Understanding the Warranty Coverage
Your Kenmore Elite Top Load Washer is protected by a comprehensive warranty program. The warranty typically covers parts and labor for defects in materials and workmanship. The standard warranty period varies by model, but most include a one-year limited warranty for parts and labor, with extended coverage for key components like the motor and tub. To understand your specific coverage, refer to the warranty section in your owner’s manual or visit the Sears website. Always keep your proof of purchase for warranty validation. Specific models like the 796.3142, 796.41583, and 796.41583410 are covered under these terms, ensuring peace of mind for your investment.
10.2 Contacting Customer Support
To address any questions or concerns, Kenmore provides dedicated customer support. Visit the Sears website or call their customer service hotline for assistance. Ensure you have your model number, such as 796.3142 or 796.41583, ready for faster service. Sears Parts Direct also offers online support for parts and repair inquiries. For troubleshooting or maintenance guidance, refer to your owner’s manual or contact support directly. Representatives are available to help with warranty claims, technical issues, or general inquiries about your Kenmore Elite Top Load Washer.
10.3 Accessing Online Resources
Kenmore Elite Top Load Washer owners can access comprehensive online resources through Sears’ official website. Visit Sears Parts Direct for downloadable PDF manuals, parts diagrams, and troubleshooting guides specific to your model, such as 796.3142 or 796.41583. These resources provide detailed instructions, maintenance tips, and repair assistance. Additionally, the website offers interactive tools to help identify and purchase replacement parts. For convenience, all manuals and guides are available 24/7, ensuring you can resolve issues or find information effortlessly.
Eco-Friendly Benefits
The Kenmore Elite Top Load Washer promotes sustainability through energy and water efficiency, reducing environmental impact while maintaining superior cleaning performance.
11.1 Energy and Water Efficiency
The Kenmore Elite Top Load Washer is designed with advanced technology to minimize energy and water consumption. It features an Eco Cycle that optimizes water usage while delivering thorough cleaning. The washer’s smart sensors detect load size and adjust water levels and detergent dispersion accordingly, ensuring efficiency. This not only reduces utility bills but also contributes to environmental conservation. By meeting ENERGY STAR® standards, the Kenmore Elite Top Load Washer offers a cost-effective and eco-friendly solution for your laundry needs.
11.2 Environmentally Responsible Design
The Kenmore Elite Top Load Washer features an eco-friendly design that minimizes environmental impact. Built with recycled materials, it promotes sustainability while maintaining high performance. The washer’s energy-efficient motor and water-saving technology reduce resource consumption. Additionally, the durable stainless steel tub is recyclable, further enhancing its environmental benefits. By incorporating these eco-conscious elements, the Kenmore Elite Top Load Washer supports efforts to reduce carbon footprints and promote greener households.
11.3 Reducing Carbon Footprint
The Kenmore Elite Top Load Washer is designed to help reduce your carbon footprint through energy-efficient technology and water conservation. Its advanced sensors optimize water and energy usage, ensuring minimal waste during cycles. The washer’s eco-friendly materials and recyclable components further support sustainability. By choosing energy-saving cycles and maintaining proper usage habits, you contribute to a greener lifestyle. This appliance aligns with modern environmental goals, making it a responsible choice for eco-conscious households aiming to lower their energy consumption and reduce their overall impact on the planet.
Enjoy your Kenmore Elite Top Load Washer, designed for reliability and efficiency. Proper usage and maintenance ensure lasting performance and satisfaction with your investment.
12.1 Final Tips for Optimal Performance
For the best results with your Kenmore Elite Top Load Washer, ensure regular cleaning of the interior, check hoses for wear, and balance loads properly. Always use the recommended detergent and fabric softener amounts to prevent buildup. Additionally, leaving the lid open after use can help dry the interior and reduce odors. Regular maintenance and following the owner’s manual guidelines will extend the life of your washer and maintain its efficiency.
12.2 Long-Term Maintenance
Regularly clean the washer interior to remove detergent residue and debris. Check and replace hoses every 5 years or as needed. Ensure proper ventilation to prevent mold and mildew buildup. Run a cleaning cycle monthly to maintain freshness and efficiency. Always follow the owner’s manual for specific maintenance recommendations tailored to your Kenmore Elite Top Load Washer. Proper care ensures reliable performance and extends the appliance’s lifespan.
12.3 Enjoying Your Kenmore Elite Top Load Washer
With its advanced features and reliable performance, the Kenmore Elite Top Load Washer is designed to make laundry day effortless and efficient. Enjoy the convenience of smart home integration, eco-friendly energy savings, and powerful cleaning capabilities. The intuitive control panel and customizable options ensure a tailored washing experience for every load. By following the guidelines in this manual, you can maximize your washer’s potential and enjoy years of trouble-free service while keeping your clothes clean and fresh.