2012 ram 1500 owners manual

General Information

Welcome to the 2012 RAM 1500 Owners Manual, your essential guide for understanding vehicle features, operation, and maintenance․ This manual ensures optimal performance and safety, helping you maximize your driving experience and keep your truck in top condition․ Always refer to this manual for proper usage and care instructions․

The 2012 RAM 1500 Owners Manual is a comprehensive guide designed to help you understand and operate your vehicle effectively․ It contains detailed information about the truck’s features, maintenance requirements, and safety guidelines․ Whether you’re a new owner or familiar with the RAM 1500, this manual provides essential insights to ensure optimal performance and longevity․ It covers topics such as vehicle operation, troubleshooting, and customization options, helping you make the most of your driving experience․ The manual is structured to be user-friendly, with clear instructions and diagrams to guide you through various aspects of ownership․ By reading this manual, you’ll gain a deeper understanding of your vehicle’s capabilities and how to maintain it properly․

1․2 Key Features of the 2012 RAM 1500

The 2012 RAM 1500 is equipped with a range of impressive features that enhance performance, comfort, and convenience․ It offers powerful engine options, including a 5․7L V8 HEMI® engine, delivering robust towing and hauling capabilities․ The truck features a durable design with advanced safety systems, such as Electronic Stability Control and multiple airbags․ Inside, you’ll find a spacious cabin with premium materials, optional heated and ventilated seats, and a user-friendly infotainment system․ Additional highlights include a versatile cargo bed, exterior accessories like a locking tailgate, and innovative technology such as the Uconnect™ system for seamless connectivity․ These features make the RAM 1500 a reliable and versatile choice for both work and leisure․

1․3 Importance of Reading the Owners Manual

Reading the 2012 RAM 1500 Owners Manual is essential for understanding your vehicle’s operation, safety features, and maintenance requirements․ It provides detailed information on how to use advanced technology, optimize performance, and avoid potential issues․ The manual covers critical topics like safety precautions, diagnostic tools, and troubleshooting, ensuring you can address problems promptly․ By familiarizing yourself with the manual, you can customize settings, understand warning lights, and perform routine maintenance to extend the life of your truck․ It also highlights proper driving practices and load limits, helping you operate the vehicle safely and efficiently․ Referencing the manual regularly ensures you get the most out of your RAM 1500 and maintain its value over time․

Safety Guidelines

The 2012 RAM 1500 Owners Manual emphasizes safe driving practices, proper use of safety features, and adherence to precautions to minimize risks and protect occupants․ Regular inspections and understanding warning systems are crucial for maintaining safety and preventing accidents․ Always follow guidelines for securing cargo and towing to ensure optimal vehicle control and passenger protection․

2․1 Safety Precautions While Driving

The 2012 RAM 1500 Owners Manual highlights critical safety precautions for drivers to ensure safe vehicle operation․ Always wear a seatbelt and ensure all passengers do the same․ Avoid distractions like texting or using electronic devices while driving․ Maintain a safe speed according to road conditions and reduce speed in adverse weather․ Keep a safe following distance to allow time for sudden stops․ Use headlights appropriately to enhance visibility and be cautious when driving in low-light conditions․ Never drive under the influence of alcohol or drugs․ Familiarize yourself with vehicle controls before driving and ensure all cargo is properly secured to prevent shifting during transit․ Regularly inspect tires, brakes, and suspension to maintain optimal vehicle performance and safety on the road․

2․2 Understanding Safety Features

The 2012 RAM 1500 is equipped with advanced safety features designed to protect occupants and enhance driving confidence․ Key features include dual front airbags, side curtain airbags, and a robust body structure to absorb impact․ The Anti-lock Braking System (ABS) prevents wheel lockup during hard braking, while electronic stability control helps maintain traction and stability․ A rearview camera is available to improve visibility when reversing․ The manual emphasizes the importance of understanding and properly using these features for maximum safety․ Familiarize yourself with the location and operation of airbags, seatbelts, and braking systems․ Regularly check the condition of tires and brakes to ensure optimal performance․ Always consult the manual for detailed information on how to use these safety features effectively․

Maintenance and Servicing

Regular maintenance ensures optimal performance and longevity of your 2012 RAM 1500․ Follow the recommended schedule for oil changes, tire rotations, and fluid checks․ Refer to the manual for detailed guidelines․

3․1 Recommended Maintenance Schedule

Regular maintenance is crucial for the longevity and performance of your 2012 RAM 1500․ The recommended schedule includes oil changes every 5,000 to 7,500 miles, depending on driving conditions․ Tire rotations should be performed every 7,500 to 10,000 miles to ensure even wear․ Fluid checks, including coolant, transmission, and brake fluids, should be done at each service interval․ The air filter should be replaced every 15,000 to 30,000 miles, while the spark plugs need attention every 100,000 miles․ Adhering to this schedule ensures optimal engine performance, prevents premature wear, and maintains the overall health of your vehicle․ Always consult the manual for detailed guidelines and specific recommendations․

3․2 Oil Change and Fluid Check Guidelines

Regular oil changes are essential for maintaining the health of your 2012 RAM 1500․ Use synthetic oil meeting Chrysler specifications for optimal performance․ Oil should be changed every 5,000 to 7,500 miles, depending on driving conditions․ Always check the oil level using the dipstick located under the hood․ Additionally, inspect coolant, transmission, and brake fluids regularly․ Coolant levels should be between the minimum and maximum marks on the reservoir․ Transmission fluid should be checked when the engine is warm, while brake fluid levels should be inspected monthly․ Proper fluid maintenance ensures smooth operation and prevents potential damage․ Refer to the manual for specific guidelines and recommendations tailored to your vehicle․

3․3 Tire Pressure and Rotation Tips

Maintaining proper tire pressure and rotation is crucial for your 2012 RAM 1500․ Check tire pressure monthly and before long trips, using the specifications found on the Tire Information placard on the driver’s side doorjamb․ Under-inflation can reduce fuel efficiency and increase wear․ Rotate tires every 8,000 to 10,000 miles, following the rear-to-front pattern recommended in the manual․ Uneven wear can lead to premature tire replacement․ Inspect tires for signs of damage or uneven wear during rotations․ Proper tire maintenance enhances safety, improves handling, and extends tire life․ Always refer to the manual for specific guidelines tailored to your vehicle’s configuration and driving conditions․

Vehicle Features

The 2012 RAM 1500 offers a range of features, including a comfortable interior, durable exterior design, and advanced technology systems․ Explore its customization options for enhanced functionality and personalization․

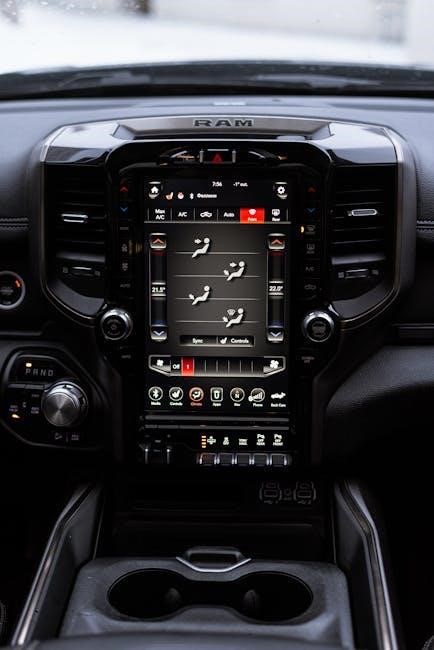
4․1 Interior Features and Controls

The 2012 RAM 1500 features a well-designed interior with premium materials, ensuring comfort and durability; Key controls include an intuitive dashboard layout, adjustable seating options, and convenient storage compartments․ The Media Center with UConnect® system provides advanced infotainment capabilities, while optional upgrades like heated seats and a leather-wrapped steering wheel enhance comfort․ Drivers can easily navigate climate controls, audio settings, and vehicle information through user-friendly interfaces․ The interior is tailored to meet both practical and aesthetic needs, offering a blend of functionality and sophistication for a seamless driving experience․

4․2 Exterior Features and Accessories

The 2012 RAM 1500 boasts a robust exterior design with a focus on durability and functionality․ Its high-strength steel frame and aerodynamic lines enhance both performance and visual appeal․ Available exterior features include chrome accents, optional 20-inch wheels, and a range of paint colors․ The truck also offers practical accessories like bed liners, tonneau covers, and towing packages for added versatility․ Key exterior elements include halogen headlamps, fog lamps, and a locking tailgate for secure cargo storage․ Optional packages, such as the Sport or Big Horn/Lone Star, add unique styling cues․ These features ensure the RAM 1500 stands out while delivering exceptional utility and rugged capability․

4․3 Technology and Infotainment System

The 2012 RAM 1500 features a modern infotainment system designed for convenience and entertainment․ Equipped with the UConnect system, it offers a user-friendly interface with a high-resolution touchscreen display․ Drivers can enjoy AM/FM radio, a CD player, and USB ports for connecting devices․ SiriusXM Satellite Radio is available, providing access to a wide range of channels․ The system also supports auxiliary inputs for seamless integration of external audio devices; Steering wheel-mounted controls allow for hands-free operation, enhancing safety and ease of use․ Optional upgrades include a premium sound system and navigation for added functionality․ These technologies ensure a connected and enjoyable driving experience, blending entertainment with practicality on the road․

4․4 Customization Options

The 2012 RAM 1500 offers a variety of customization options to tailor the truck to your preferences․ Owners can choose from multiple exterior add-ons, such as chrome grilles, wheel designs, and bed liners, to enhance both style and functionality․ Interior personalization includes options for premium seat materials, stitching, and trim levels, allowing for a more luxurious or rugged cabin experience․ Technology upgrades, like additional infotainment features or navigation systems, can also be integrated․ Furthermore, the RamBox cargo management system provides customizable storage solutions, while Mopar accessories offer even more ways to personalize the vehicle․ These options enable owners to create a truck that perfectly matches their lifestyle and needs․

Diagnostic and Troubleshooting

Identify issues using dashboard warning lights and refer to the manual for solutions․ Address common problems promptly to maintain performance and safety․ Consult a technician if unresolved․

5․1 Understanding Dashboard Warning Lights

Your 2012 RAM 1500 dashboard features various warning lights to indicate vehicle status․ Familiarize yourself with these indicators to ensure timely responses․ The Oil Pressure Light illuminates when engine oil levels are low, signaling the need for immediate attention․ The Battery Alert indicates charging system issues, while the Temperature Warning signals overheating․ The ABS Light points to anti-lock braking system malfunctions, and the Check Engine Light suggests emissions or engine problems․ Consult the manual or a technician if these lights appear, as ignoring them could lead to serious damage․ Regular checks and prompt action ensure your truck runs smoothly and safely․

5․2 Common Issues and Solutions

Owners of the 2012 RAM 1500 may encounter specific issues that require attention․ One common problem is reduced fuel efficiency, often due to improper tire pressure or air filter clogging․ Regular tire pressure checks and air filter replacements can resolve this․ Another issue is unusual engine noises, which may indicate worn belts or hoses․ Inspecting and replacing these components promptly can prevent further damage․ Additionally, some owners report malfunctioning ABS lights, which can be caused by sensor issues or system glitches․ In such cases, it’s advisable to avoid driving and consult a certified technician․ Lastly, infotainment system glitches can be resolved by restarting the system or updating its software․ Always refer to the manual for troubleshooting guidance or contact RAM customer support for assistance․

Performance and Handling

The 2012 RAM 1500 delivers robust performance with its powerful engine and responsive suspension, ensuring a smooth ride and precise control․ Regular maintenance enhances handling and efficiency․

6․1 Engine Performance and Capabilities

The 2012 RAM 1500 is equipped with a powerful 5․7L V8 engine, delivering exceptional performance and capability․ This engine produces 390 horsepower and 407 lb-ft of torque, making it ideal for towing and hauling․ The V8 engine features Variable Valve Timing (VVT) for improved efficiency and responsiveness․ With a 4-speed automatic transmission, the truck ensures smooth shifting and optimal power delivery․ The engine also includes a multipoint fuel injection system for better fuel distribution and combustion efficiency․ The 2012 RAM 1500 offers impressive capabilities, including a maximum towing capacity of up to 10,450 pounds and a payload capacity of 1,820 pounds․ Regular maintenance, as outlined in the owners manual, is crucial to maintaining peak engine performance and longevity․

6․2 Suspension and Steering System

The 2012 RAM 1500 features a robust suspension system designed for both comfort and durability․ It includes a multi-link coil suspension in the front and a five-link coil suspension in the rear, providing a smooth ride and excellent load-leveling capabilities․ The truck is equipped with power rack-and-pinion steering, ensuring precise control and responsive handling․ The suspension system is calibrated to handle heavy payloads and towing demands while maintaining stability and ride quality․ Regular inspection and maintenance of suspension components, as outlined in the owners manual, are essential to uphold performance and safety․ This system enhances overall driving confidence, making the RAM 1500 a versatile choice for both on-road and off-road scenarios․

6․3 Towing and Payload Capacity

The 2012 RAM 1500 is designed for heavy-duty tasks, offering a maximum towing capacity of up to 10,450 pounds and a payload capacity of approximately 1,920 pounds․ Properly equipping your truck with the correct hitch and following the guidelines in the owners manual ensures safe and efficient towing․ Always verify the Gross Vehicle Weight Rating (GVWR) and Gross Combined Weight Rating (GCWR) to avoid overloading․ Features like Trailer Sway Control and an integrated trailer hitch enhance towing stability and convenience․ Adhering to these specifications ensures optimal performance and safety while hauling heavy loads or towing trailers․

6․4 Fuel Efficiency and Driving Tips

The 2012 RAM 1500 achieves an EPA-estimated 14 MPG city and 20 MPG highway, depending on the engine and drivetrain configuration․ To maximize fuel efficiency, maintain proper tire pressure, drive at moderate speeds, and avoid aggressive acceleration․ Using cruise control on highways can also improve fuel economy․ Regular maintenance, such as oil changes and air filter inspections, ensures optimal engine performance․ Additionally, reducing unnecessary weight in the vehicle and planning routes efficiently can further enhance fuel savings․ By following these driving tips and maintaining your truck as outlined in the owners manual, you can achieve better fuel economy and lower operating costs while minimizing environmental impact․

Technical Specifications

The 2012 RAM 1500 features a 5․7L V8 engine, producing 390 horsepower and 407 lb-ft torque, paired with a 6-speed automatic transmission․ The truck offers RWD and 4WD options, with a 120-inch wheelbase and 231․0-inch overall length for optimal performance and versatility․

7․1 Engine and Transmission Details

The 2012 RAM 1500 is equipped with a powerful 5․7L V8 HEMI® engine, delivering 390 horsepower and 407 lb-ft of torque․ Paired with a 6-speed automatic transmission, it offers smooth shifting and responsive acceleration․ Available drivetrains include rear-wheel drive (RWD) and four-wheel drive (4WD) systems․ The engine features variable valve timing (VVT) for improved efficiency and performance․ A multi-link coil suspension enhances ride comfort and handling․ The truck also includes a heavy-duty transmission cooler for towing and hauling․ With a maximum towing capacity of up to 10,450 lbs, the RAM 1500 is built for power and reliability․ Fuel efficiency is rated at 14 MPG city and 20 MPG highway, making it versatile for both work and daily use․

7․2 Dimensions and Weight Specifications

The 2012 RAM 1500 has a overall length of 231․0 inches and a wheelbase of 140․5 inches․ Its width is 79․7 inches, and the height ranges from 76․0 to 78․6 inches depending on the trim․ The curb weight varies between 4,618 and 5,451 lbs․ The Gross Vehicle Weight Rating (GVWR) is up to 6,800 lbs, with a maximum payload capacity of 1,920 lbs․ The truck offers a 5․7-foot bed length or an optional 6․4-foot bed․ These dimensions ensure ample space for passengers and cargo, while the weight specifications support its robust towing and hauling capabilities, making it a versatile choice for both work and daily use․

Legal and Warranty Information

The 2012 RAM 1500 is covered under a comprehensive warranty․ For details, contact RAM Customer Service at 1-866-726-4636․ Adhere to the manual’s guidelines for proper usage and compliance․

8․1 Warranty Coverage and Terms

The 2012 RAM 1500 is backed by a comprehensive warranty program designed to protect your investment․ The basic warranty covers parts and labor for 3 years or 36,000 miles, while the powertrain warranty extends to 5 years or 60,000 miles․ These warranties are transferable to subsequent owners, enhancing the vehicle’s resale value․ For specific details, refer to the warranty section in your owner’s manual or contact RAM Customer Service at 1-866-726-4636 (U․S․) or 1-800-387-1143 (Canada)․ Warranty coverage does not apply to normal wear and tear or improper maintenance․ Always follow the recommended maintenance schedule to ensure warranty validity․ For additional information, consult your local RAM dealer or the official RAM website․

Additional Resources

Access the digital 2012 RAM 1500 owners manual online or download it for free․ Visit RAM’s official website or contact customer service for support and additional resources․

9․1 Downloading the Digital Owners Manual

The 2012 RAM 1500 digital owners manual is readily available online․ Visit the official RAM website or platforms like ManualsLib to download the PDF․ This digital version provides easy access to all the information you need, including maintenance schedules, troubleshooting guides, and feature explanations․ The manual is searchable and can be saved to your device for convenience․ Ensure you download from trusted sources to avoid unauthorized content․ This resource is essential for keeping your truck well-maintained and understanding its full capabilities․ By having the digital manual, you can reference it anytime, anywhere, ensuring optimal vehicle performance and safety․ Regular updates may also be available to keep your manual current․ Always verify the source for authenticity to protect your vehicle and personal data․ Utilize this resource to enhance your ownership experience and stay informed about your RAM 1500’s specifics․ The digital format offers portability and ease of use, making it a valuable tool for all owners․ Whether you’re at home, in the garage, or on the go, the manual is just a click away․ Take advantage of this convenient option to maintain your vehicle effectively and address any questions or concerns promptly․ The digital manual is a reliable companion for your 2012 RAM 1500, providing comprehensive guidance whenever you need it․ Ensure you take full advantage of this resource to enjoy a seamless and informed ownership experience․ The digital format ensures you always have the latest information at your fingertips, helping you keep your truck in peak condition․ By downloading the manual, you can access detailed instructions, diagrams, and specifications tailored to your vehicle․ This resource is indispensable for both routine maintenance and addressing unexpected issues․ Make the most of this digital tool to enhance your understanding and care of your 2012 RAM 1500․ With the manual downloaded, you’re equipped to handle various aspects of vehicle ownership with confidence and precision․ The digital owners manual is a testament to RAM’s commitment to providing owners with the resources they need to maximize their vehicle’s potential․ Embrace this convenient solution and enjoy a hassle-free ownership experience․ The digital manual is your go-to guide for all things related to your 2012 RAM 1500, ensuring you’re always informed and prepared․ By utilizing this resource, you can maintain your truck’s performance, safety, and longevity, aligning with RAM’s high standards․ The digital owners manual is a vital asset for every RAM 1500 owner, offering unparalleled accessibility and comprehensive information․ Harness its benefits to elevate your ownership experience and keep your vehicle running smoothly for years to come․ The digital manual is a powerful tool designed to empower owners with knowledge, ensuring they can tackle any situation with confidence․ Download it today and discover a smarter way to care for your 2012 RAM 1500․ With the digital manual, you’re not just owning a vehicle—you’re owning a comprehensive guide to unlocking its full potential․ Seize the opportunity to enhance your ownership journey with this invaluable resource․ The digital owners manual is more than just a document; it’s your key to a better understanding and maintenance of your RAM 1500․ Make it your trusted companion and enjoy a worry-free driving experience․ The convenience and accessibility of the digital manual ensure that you’re always prepared, no matter where your journey takes you․ Embrace this modern solution and take your vehicle care to the next level․ The digital manual is a forward-thinking approach to vehicle ownership, providing you with the flexibility and information you need in today’s fast-paced world․ By downloading it, you’re investing in a future of informed and confident driving․ The digital owners manual represents RAM’s dedication to innovation and customer satisfaction, offering a user-friendly experience that complements your vehicle’s capabilities․ Take full advantage of this resource and enjoy the peace of mind that comes with being well-informed․ The digital manual is a cornerstone of responsible vehicle ownership, ensuring that you have the knowledge and tools necessary to maintain and enhance your 2012 RAM 1500․ With this resource by your side, you can navigate the world of vehicle ownership with ease and assurance․ The digital manual is a testament to the evolving nature of automotive support, providing owners with a dynamic and accessible guide․ Utilize it to its full potential and experience the difference it makes in your ownership journey․ By integrating the digital manual into your routine, you’re not only maintaining your vehicle but also upholding its value and performance․ The digital owners manual is a bridge between tradition and innovation, offering a modern solution to timeless vehicle care needs․ Embrace it as an essential part of your ownership experience and reap the benefits of a well-informed approach․ The digital manual is a powerful ally in your quest to keep your RAM 1500 in pristine condition, ensuring that every aspect of its maintenance and operation is addressed with precision․ With the digital manual downloaded, you’re equipped to handle the challenges of vehicle ownership with confidence and expertise․ The digital owners manual is a shining example of how technology can enhance our relationship with our vehicles, providing instant access to vital information․ By leveraging this resource, you can ensure that your 2012 RAM 1500 remains a reliable and high-performing vehicle for years to come․ The digital manual is more than just a digital document; it’s a gateway to a community of informed and engaged vehicle owners․ Join this community by downloading the manual and become part of a network dedicated to optimal vehicle care․ The digital owners manual is a celebration of innovation and user-centric design, offering a seamless experience that enhances your interaction with your vehicle․ By adopting this resource, you’re embracing a future where vehicle ownership is both intuitive and rewarding․ The digital manual is a testament to the importance of clear communication and accessible information in the automotive world․ It serves as a beacon of clarity, guiding you through the intricacies of your RAM 1500 with ease․ The digital owners manual is a reflection of RAM’s commitment to excellence, providing owners with a tool that is both functional and user-friendly․ By utilizing this resource, you’re aligning yourself with a brand that values its customers and their experiences․ The digital manual is a powerful statement of how technology can simplify and enrich our lives, offering a convenient solution to traditional manual ownership․ Embrace this advancement and experience the transformative impact it can have on your vehicle care routine․ The digital owners manual is a stepping stone toward a more connected and informed driving experience, ensuring that you’re always in tune with your vehicle’s needs․ By downloading it, you’re taking a proactive approach to ownership, one that prioritizes knowledge and preparedness․ The digital manual is a catalyst for a better understanding of your 2012 RAM 1500, enabling you to unlock its full potential and enjoy a more satisfying ownership experience․ With the digital manual as your guide, you’re empowered to take control of your vehicle’s maintenance and operation, ensuring that every mile is driven with confidence․ The digital owners manual is a trusted companion on your automotive journey, offering insights and guidance whenever you need it․ By integrating it into your daily routine, you’re not just maintaining your vehicle—you’re enhancing your overall driving experience․ The digital manual is a symbol of progress in automotive support, providing a modern and efficient way to access essential information․ Embrace it as a vital part of your toolkit and enjoy the benefits of a well-maintained and understood vehicle․ The digital owners manual is a bridge to a brighter future of vehicle ownership, where knowledge and accessibility go hand in hand․ By downloading it, you’re paving the way for a more informed and enjoyable driving experience․ The digital manual is a testament to the enduring importance of clear and concise communication in the automotive industry․ It stands as a reliable source of information, helping you navigate the complexities of your RAM 1500 with ease․ The digital owners manual is a beacon of innovation, guiding you through the ever-evolving landscape of vehicle ownership with precision and clarity․ By utilizing this resource, you’re ensuring that you’re always ahead of the curve, equipped with the latest information and insights․ The digital manual is a celebration of the fusion between technology and tradition, offering a contemporary solution to the age-old need for vehicle guidance․ Embrace it as an essential part of your ownership experience and reap the rewards of a more informed approach․ The digital owners manual is a powerful tool designed to empower you with knowledge, ensuring that you’re always in control of your vehicle’s care and maintenance․ By downloading it, you’re taking a significant step toward a more confident and capable ownership experience․ The digital manual is a shining example of how technology can enhance our relationship with our vehicles, providing instant access to vital information whenever and wherever we need it․ With the digital manual by your side, you’re equipped to handle the challenges of vehicle ownership with ease and assurance․ The digital owners manual is a cornerstone of responsible and informed vehicle care, offering a comprehensive guide to maintaining and enhancing your 2012 RAM 1500․ By integrating it into your routine, you’re ensuring that your vehicle remains in optimal condition for years to come․ The digital manual is a testament to the importance of adaptability and innovation in the automotive industry, providing a dynamic and accessible resource for owners․ Embrace it as a trusted companion on your journey as a RAM 1500 owner and experience the difference it makes․ The digital owners manual is a powerful ally in your quest to keep your vehicle running smoothly, offering a wealth of information and guidance at your fingertips․ By utilizing this resource, you’re ensuring that you’re always prepared to address any situation that arises․ The digital manual is a celebration of the synergy between technology and automotive excellence, providing a user-friendly experience that complements your vehicle’s capabilities․ By downloading it, you’re investing in a future of informed and confident driving, where every mile is a testament to your vehicle’s potential․ The digital owners manual is a beacon of clarity and accessibility, guiding you through the intricacies of your RAM 1500 with precision and ease․ It serves as a reliable source of information, helping you maintain your vehicle and address any issues that may arise․ The digital manual is a reflection of RAM’s

9․3 Contacting RAM Customer Service

9․2 Accessing Online Support and Forums

For additional support, visit the official RAM website or forums like RAM Truck Forum․ These platforms offer extensive resources, including troubleshooting guides, repair tips, and discussions with experienced owners․ Social media groups and specialized automotive forums also provide valuable insights and real-world advice․ Many online communities are dedicated to RAM trucks, allowing you to connect with other 2012 RAM 1500 owners, share experiences, and gain practical knowledge․ To access these resources, simply search for “RAM 1500 forums” or “RAM truck support groups․” Signing up for these communities often requires a free account, giving you access to a wealth of information tailored to your vehicle․ These forums are a great way to stay informed and address specific questions or concerns about your truck․ By engaging with these online resources, you can enhance your ownership experience and ensure your RAM 1500 continues to perform at its best․ Regularly visiting these sites keeps you updated on the latest tips, recalls, and maintenance advice, ensuring your vehicle remains in optimal condition․ The collective knowledge of the RAM community is a valuable tool for troubleshooting and customization ideas, helping you make the most of your truck․ Use these forums to ask questions, share your own experiences, and learn from others who own or have owned a 2012 RAM 1500․ This online support network is a powerful resource for maintaining and enjoying your vehicle․ By actively participating in these communities, you can gain a deeper understanding of your truck and stay connected with fellow enthusiasts․ The online support ecosystem is designed to empower owners with the knowledge and confidence to handle various aspects of vehicle ownership․ Make the most of these resources to ensure your RAM 1500 continues to deliver the performance and reliability you expect․ The availability of online forums and support groups underscores the strong community behind the RAM brand, offering a wealth of shared knowledge and expertise․ Engaging with these platforms is a smart way to maximize your ownership experience and keep your truck in top shape․ The combination of official support and community-driven forums ensures that you have access to a comprehensive range of resources tailored to your needs․ By leveraging these online tools, you can address challenges, explore customization options, and stay informed about the latest developments related to your 2012 RAM 1500․ The online support network is a testament to the active and supportive RAM community, providing a platform for collaboration and knowledge sharing․ Embrace these resources to enhance your understanding and care of your vehicle, ensuring it remains a reliable and high-performing truck for years to come․ The availability of online forums and support groups is a valuable asset for any RAM 1500 owner, offering a dynamic and interactive way to stay informed and connected․ By participating in these communities, you can tap into a wealth of collective knowledge and experiences, empowering you to make informed decisions about your truck’s maintenance and customization; The online support ecosystem is a key component of the RAM ownership experience, ensuring that you have the tools and information needed to enjoy your vehicle to the fullest․ Make the most of these resources to maintain your truck’s performance, address any issues promptly, and explore new ways to enhance your driving experience․ The combination of official support and community-driven forums creates a robust network of knowledge and assistance, tailored to the unique needs of RAM 1500 owners․ By engaging with these platforms, you can ensure that your truck continues to deliver the power, reliability, and comfort you expect from the RAM brand․ The online support and forums are a vital part of the RAM community, offering a wealth of information and guidance to help you navigate the world of vehicle ownership with confidence․ By staying connected through these resources, you can stay informed, address challenges effectively, and enjoy a more satisfying ownership experience․ The digital age has made it easier than ever to access support and connect with fellow owners, ensuring that your 2012 RAM 1500 remains a trusted companion on the road․ The online support network is a powerful tool in your arsenal as a RAM owner, providing the insights and assistance you need to keep your truck in peak condition․ By actively participating in these forums and communities, you can gain a deeper understanding of your vehicle and stay up-to-date on the latest tips and trends․ The collective expertise of the RAM community is a valuable resource, offering practical advice and solutions to common issues․ Use these forums to ask questions, share your experiences, and learn from others who have firsthand experience with the 2012 RAM 1500․ The online support ecosystem is a testament to the strength and dedication of the RAM community, providing a platform for collaboration and mutual support․ By embracing these resources, you can enhance your ownership experience and ensure your truck continues to perform at its best․ The availability of online forums and support groups is a key advantage for RAM 1500 owners, offering a dynamic and interactive way to stay informed and connected․ By engaging with these communities, you can tap into a wealth of collective knowledge and experiences, empowering you to make informed decisions about your truck’s maintenance and customization․ The online support network is a key component of the RAM ownership experience, ensuring that you have the tools and information needed to enjoy your vehicle to the fullest; Make the most of these resources to maintain your truck’s performance, address any issues promptly, and explore new ways to enhance your driving experience․ The combination of official support and community-driven forums creates a robust network of knowledge and assistance, tailored to the unique needs of RAM 1500 owners․ By engaging with these platforms, you can ensure that your truck continues to deliver the power, reliability, and comfort you expect from the RAM brand․ The online support and forums are a vital part of the RAM community, offering a wealth of information and guidance to help you navigate the world of vehicle ownership with confidence․ By staying connected through these resources, you can stay informed, address challenges effectively, and enjoy a more satisfying ownership experience․ The digital age has made it easier than ever to access support and connect with fellow owners, ensuring that your 2012 RAM 1500 remains a trusted companion on the road․ The online support network is a powerful tool in your arsenal as a RAM owner, providing the insights and assistance you need to keep your truck in peak condition․ By actively participating in these forums and communities, you can gain a deeper understanding of your vehicle and stay up-to-date on the latest tips and trends․ The collective expertise of the RAM community is a valuable resource, offering practical advice and solutions to common issues․ Use these forums to ask questions, share your experiences, and learn from others who have firsthand experience with the 2012 RAM 1500․ The online support ecosystem is a testament to the strength and dedication of the RAM community, providing a platform for collaboration and mutual support․ By embracing these resources, you can enhance your ownership experience and ensure your truck continues to perform at its best․ The availability of online forums and support groups is a key advantage for RAM 1500 owners, offering a dynamic and interactive way to stay informed and connected․ By engaging with these communities, you can tap into a wealth of collective knowledge and experiences, empowering you to make informed decisions about your truck’s maintenance and customization․ The online support network is a key component of the RAM ownership experience, ensuring that you have the tools and information needed to enjoy your vehicle

brother mfc-l2690dw manual

The Brother MFC-L2690DW is a monochrome laser all-in-one printer designed for home or small offices‚ offering wireless connectivity‚ mobile printing‚ and automatic duplex capabilities‚ ideal for efficient document management.

1.1 Overview of the Printer

The Brother MFC-L2690DW is a monochrome laser all-in-one printer designed for home and small office use. It offers wireless printing‚ scanning‚ copying‚ and faxing. With mobile printing via iPrint&Scan and AirPrint‚ users can print directly from smartphones and tablets. The automatic duplex feature allows for two-sided printing‚ enhancing efficiency. A 250-sheet paper tray and manual feed slot accommodate various paper types. Compatible with Amazon Alexa‚ it supports voice commands for hands-free operation. Energy-saving features reduce power consumption‚ making it an eco-friendly choice for versatile printing needs. This printer is ideal for businesses requiring reliable‚ high-quality output with advanced connectivity options.

1.2 Key Features of the MFC-L2690DW

The Brother MFC-L2690DW features wireless and mobile printing via iPrint&Scan and AirPrint‚ enabling seamless connectivity. It includes a 250-sheet paper tray and a manual feed slot for special media. Fax functionality with a 30-page automatic document feeder enhances productivity. The printer supports automatic duplex printing for two-sided documents. A 2.7-inch touchscreen display provides easy navigation. Energy-efficient design reduces power consumption. Compatible with Amazon Alexa for voice-activated printing. High-speed printing up to 26 ppm ensures quick output. Compact design suits small workspaces while delivering professional-grade performance. These features make it a versatile solution for home and office printing needs‚ combining functionality and convenience.

Installation and Setup

Installation involves unboxing‚ connecting cables‚ and using the wireless installer. Follow on-screen instructions to set up wireless connectivity and ensure the printer is network-ready for operation.

2.1 Unboxing and Physical Setup

Begin by carefully unboxing the Brother MFC-L2690DW printer‚ ensuring all components are included‚ such as the printer‚ power cord‚ and documentation. Place the printer on a sturdy‚ flat surface. Connect the power cord to both the printer and a nearby electrical outlet. Next‚ install the toner cartridge by following the instructions provided in the setup guide. Finally‚ load the paper tray with standard-sized paper‚ ensuring it is aligned properly. This completes the physical setup‚ preparing the printer for driver installation and wireless configuration. Always refer to the manual for specific unboxing and setup instructions.

2.2 Downloading and Installing Drivers

To ensure proper functionality‚ download the latest drivers for the Brother MFC-L2690DW from the official Brother support website. Visit support.brother.com‚ enter your printer model‚ and select your operating system. Follow the on-screen instructions to download and install the driver package. Once installed‚ restart your computer to complete the setup. If you encounter issues‚ refer to the troubleshooting section in the manual or reinstall the drivers. Proper driver installation is crucial for optimal printer performance and connectivity.

2.3 Wireless Network Setup

To set up the Brother MFC-L2690DW on a wireless network‚ press the WiFi button on the control panel and launch the wireless installer on your computer. Follow the on-screen instructions to select your printer from the list of available devices. Enter your network password when prompted to establish the connection. Once connected‚ the WiFi light on the printer will illuminate; To confirm the setup‚ print the Network Configuration report to verify that the printer has acquired an IP address from your router. This ensures seamless wireless printing and connectivity across your network.

2.4 Connecting to Wi-Fi Direct

To connect to Wi-Fi Direct on the Brother MFC-L2690DW‚ enable Wi-Fi Direct mode via the printer’s control panel. Install the Brother iPrint&Scan app on your mobile device and select the printer from the app’s device list. Once connected‚ you can print or scan directly without requiring a router. The printer will display a unique SSID‚ allowing devices to connect securely. Ensure the printer’s WiFi Direct light is on to confirm the connection. This feature simplifies mobile printing and scanning‚ offering a convenient wireless solution for direct device-to-printer communication.

Printer Features and Capabilities

The Brother MFC-L2690DW offers versatile functionality‚ including print‚ scan‚ copy‚ and fax capabilities. It supports automatic duplex printing‚ a manual feed slot for special media‚ and handles various paper types and sizes efficiently.

3.1 Print‚ Scan‚ Copy‚ and Fax Functions

The Brother MFC-L2690DW is a versatile all-in-one printer offering robust print‚ scan‚ copy‚ and fax capabilities. It delivers high-quality monochrome printing at up to 26 pages per minute. The scanner supports multiple destinations‚ including email‚ cloud services‚ and file storage. Copying is efficient‚ with options for resizing‚ duplex copying‚ and custom settings. Fax functionality includes high-speed transmission and a generous memory capacity for storing faxes. These features make it an ideal solution for small offices needing reliable‚ multifunctional performance to streamline document workflows efficiently.

3.2 Automatic Duplex (2-Sided) Printing

The Brother MFC-L2690DW features automatic duplex printing‚ allowing users to print on both sides of the paper effortlessly. This function enhances productivity by reducing paper usage and streamlining document creation. The printer automatically flips the page‚ ensuring professional-grade double-sided prints without manual intervention. Users can enable this feature through the printer driver settings. It is particularly useful for printing reports‚ brochures‚ and other materials requiring dual-sided output. The duplex capability supports various paper types‚ including plain paper and card stock‚ making it versatile for diverse printing needs. This feature significantly contributes to eco-friendly and efficient printing practices.

3.4 Manual Feed Slot for Special Media

The Brother MFC-L2690DW is equipped with a manual feed slot‚ enabling users to print on special media such as envelopes‚ labels‚ and card stock. This feature allows for precise control over printing on unique or thicker materials that may not be suitable for the standard paper tray; The manual feed slot ensures professional-quality output for custom projects or one-off prints. Simply insert the media into the slot‚ select the appropriate settings in the printer driver‚ and the printer will handle the rest. This versatility makes the MFC-L2690DW ideal for businesses and individuals requiring flexible printing solutions.

3.5 Compatible Paper Types and Sizes

The Brother MFC-L2690DW supports a wide range of paper types‚ including plain‚ recycled‚ envelopes‚ labels‚ card stock‚ and thin paper. It accommodates standard sizes like A4‚ A5‚ and letter‚ as well as custom sizes. The printer handles paper weights from 60 to 105 g/m²‚ ensuring versatility for various printing needs. For optimal results‚ use paper designed for laser printers to avoid jams and maintain print quality. The manual feed slot is ideal for special media‚ while the main tray handles standard documents. This flexibility makes the MFC-L2690DW suitable for both everyday printing and specialized projects‚ enhancing productivity and convenience.

Printing and Scanning

The Brother MFC-L2690DW offers efficient monochrome laser printing and scanning capabilities‚ supporting wireless connectivity and a 50-sheet document feeder for quick processing of multi-page documents and duplex printing.

4.1 Printing from Mobile Devices

Printing from mobile devices with the Brother MFC-L2690DW is seamless using Brother’s iPrint&Scan app‚ available for iOS and Android. Users can print and scan directly from their smartphones or tablets. Ensure the printer and mobile device are connected to the same Wi-Fi network. Download and install the iPrint&Scan app to access various print and scan settings. The app allows users to print documents‚ photos‚ and web pages‚ as well as scan documents to their mobile devices. AirPrint compatibility is also supported for Apple devices‚ enabling effortless wireless printing without additional setup. This feature enhances productivity for mobile users.

4.2 Using AirPrint and iPrint&Scan

The Brother MFC-L2690DW supports AirPrint and iPrint&Scan for convenient mobile printing. AirPrint allows Apple devices to print wirelessly without additional drivers. For Android and iOS‚ the iPrint&Scan app enables direct printing and scanning. To use these features‚ ensure the printer and device are connected to the same Wi-Fi network. With iPrint&Scan‚ users can print documents‚ photos‚ and web pages‚ as well as scan documents to their mobile devices. AirPrint integration simplifies printing from Apple devices‚ while iPrint&Scan offers advanced customization options. These tools enhance mobile productivity and streamline wireless printing and scanning tasks effortlessly.

4.3 Scanning to File or Cloud Services

The Brother MFC-L2690DW allows seamless scanning to files or cloud services. Using the iPrint&Scan app‚ users can scan documents directly to their mobile devices or cloud storage. On a computer‚ launch ControlCenter4 to configure scan settings‚ selecting destinations like email‚ file‚ or cloud services. Choose your preferred format (PDF‚ JPEG‚ or TIFF) and adjust quality settings as needed. After configuring‚ place the document on the scanner‚ select the scan option‚ and the file will be saved or uploaded to the designated location. This feature enhances productivity by enabling quick and efficient document sharing and storage solutions.

Faxing and Copying

The Brother MFC-L2690DW supports faxing with a 33.6 Kbps modem and stores up to 200 pages. It also offers copying with adjustable settings for quality and quantity.

5;1 Setting Up Fax Functionality

To set up fax functionality on the Brother MFC-L2690DW‚ ensure the machine is connected to a telephone line. Use the control panel to configure fax settings‚ such as setting the fax number and enabling the fax receive mode. You can also set up speed dial and group dial for frequently used numbers. Additionally‚ you can adjust fax quality and resolution through the printer’s menu. For detailed instructions‚ refer to the official Brother manual or online support resources. Proper setup ensures reliable fax transmission and reception for efficient document sharing.

5.2 Copying Documents with Custom Settings

For copying documents with custom settings on the Brother MFC-L2690DW‚ use the control panel to adjust settings such as copy quality‚ zoom‚ and the number of copies. You can also enable features like double-sided copying or reduce/enlarge documents using preset ratios. To access advanced options‚ navigate to the copy settings menu and select your preferences. For detailed guidance‚ refer to the official Brother manual or online support resources‚ which provide step-by-step instructions for customizing your copying experience to meet specific needs.

Network and Connectivity

The Brother MFC-L2690DW offers robust network and connectivity options‚ including wireless networking‚ Ethernet‚ and Wi-Fi Direct for seamless integration with computers and mobile devices.

6.1 Configuring Network Settings

To configure network settings for the Brother MFC-L2690DW‚ access the control panel and navigate to the network menu. Select the wireless setup wizard to connect to your router using WEP‚ WPA‚ or WPA2 encryption. Enter your network password to establish a secure connection; For wired setups‚ connect an Ethernet cable to the printer and your router. Ensure the printer and devices are on the same network. Use the printer’s LCD to verify the connection status or print a network configuration report for troubleshooting. For advanced settings‚ visit the Brother support website to download and install the latest network drivers and software.

6.2 Troubleshooting Wireless Connection Issues

If the Brother MFC-L2690DW loses wireless connection‚ restart the printer‚ router‚ and device. Ensure the printer and device are on the same network. Check the Wi-Fi light on the printer is on and stable. Verify network settings by printing a network configuration report. Reset network settings via the control panel if necessary. Update the printer firmware to the latest version for compatibility. Use the Brother iPrint&Scan app to diagnose and resolve connection issues. For persistent problems‚ refer to the Brother support website for detailed troubleshooting guides or contact customer support for assistance.

Maintenance and Troubleshooting

Regular maintenance ensures optimal performance. Replace toner cartridges when low‚ clear paper jams promptly‚ and update firmware for improved functionality and security.

7.1 Replacing the Toner Cartridge

To replace the toner cartridge‚ open the front cover and release the cartridge by pulling it out. Remove the new cartridge from its packaging and gently rock it to distribute the toner. Align the new cartridge with the guides and push it in until it clicks. Close the front cover and test the printer. Always use genuine Brother cartridges for optimal performance. If the toner light remains on‚ reset the counter via the control panel. Properly dispose of the used cartridge to minimize environmental impact.

7.2 Clearing Paper Jams

If a paper jam occurs‚ turn off the printer and unplug it for safety. Open the front cover and gently pull out the jammed paper. Check the manual feed slot and other areas for any remaining fragments. Use a flashlight to inspect hidden areas. Once cleared‚ close all covers and restart the printer. If the issue persists‚ print the printer settings page to check for error messages. Regularly cleaning the printer’s internal rollers can prevent future jams. Always refer to the Brother MFC-L2690DW manual for detailed step-by-step guidance to ensure proper clearance and maintain printer functionality.

7.3 Updating Printer Firmware

Updating the Brother MFC-L2690DW printer firmware ensures optimal performance‚ security‚ and compatibility. Visit the official Brother Support website‚ search for your printer model‚ and download the latest firmware version. Select your operating system and follow the on-screen instructions to install the update. Connect the printer to your computer via USB or ensure it is on the same network. Do not power off the printer during the update process. Once complete‚ restart the printer to apply the changes. Regular firmware updates help resolve bugs‚ improve functionality‚ and enhance overall printing experience. Always verify the firmware version matches your device for compatibility.

Security and Safety

Ensure the Brother MFC-L2690DW operates securely by changing the default login password and following network security best practices. Always adhere to safety precautions for reliable operation.

8.1 Changing Default Login Password

Changing the default login password for your Brother MFC-L2690DW is essential for securing your printer and network. To do this‚ access the printer’s control panel‚ navigate to the “Settings” or “Network” menu‚ and select “Change Password.” Follow the on-screen instructions to create a strong‚ unique password. Alternatively‚ you can modify the password through the printer’s web-based management interface by entering its IP address in a web browser. Visit the Brother Support website for detailed step-by-step guidance. Regularly updating your password ensures enhanced security and prevents unauthorized access to your device.

8.2 Network Security Best Practices

Ensure your Brother MFC-L2690DW is secure by enabling WPA3 encryption and setting a strong SSID. Disable WPS to prevent vulnerabilities. Use a firewall and enable HTTPS for remote management. Regularly update firmware and limit access to the admin panel. Visit the Brother Support website for detailed security guides and best practices to safeguard your printer and network from unauthorized access.

8.3 Safety Precautions for Operation

Place the Brother MFC-L2690DW on a flat‚ stable surface away from direct sunlight and high humidity. Avoid exposure to water or extreme temperatures. Keep the printer out of reach of children and pets. Use only original Brother toner cartridges to prevent damage. Unplug the printer during lightning storms and use a grounded power source. Regularly clean the printer to avoid dust buildup. Handle paper jams carefully to prevent injury. Refer to the Brother Support website for detailed safety guidelines to ensure safe and optimal operation.

Advanced Settings and Customization

The Brother MFC-L2690DW offers advanced customization options‚ allowing users to adjust print quality settings‚ set custom paper sizes‚ and optimize performance for specific printing needs.

9.1 Adjusting Print Quality Settings

Adjusting print quality settings on the Brother MFC-L2690DW ensures optimal output for your documents. Access the printer driver through your computer to modify settings like resolution‚ toner density‚ and paper type. For enhanced clarity‚ select higher resolutions for text and images. Toner density can be adjusted to reduce consumption or improve image depth. Additionally‚ the ControlCenter4 utility allows fine-tuning of print settings‚ including brightness‚ contrast‚ and sharpness for scanned documents. Custom profiles can be saved for frequently used configurations‚ streamlining future print jobs. These adjustments empower users to tailor print quality to their specific needs‚ ensuring professional results every time.

9.2 Setting Up Custom Paper Sizes

Setting up custom paper sizes on the Brother MFC-L2690DW allows for precise printing on unique media. Access the printer driver through your computer and navigate to the “Paper” or “Media” settings. Select “Custom” and input the desired dimensions. Save the configuration for future use. The manual feed slot supports various paper types‚ such as envelopes and cardstock. Ensure the paper size matches the tray or slot settings for optimal results. Custom profiles can be saved for frequently used sizes‚ streamlining workflows. This feature enhances versatility‚ accommodating specialized printing needs with ease and accuracy.

Environmental and Energy Efficiency

The Brother MFC-L2690DW features Energy Star certification‚ ensuring energy efficiency. It includes energy-saving modes and recyclable components‚ promoting eco-friendly printing. Toner cartridges are also recyclable through Brother’s program.

10.1 Energy-Saving Features

The Brother MFC-L2690DW incorporates several energy-saving features to minimize power consumption. It boasts Energy Star certification‚ ensuring efficient energy use. The printer features Deep Sleep Mode‚ which significantly reduces power consumption when not in use. Additionally‚ the Auto Power Off function automatically turns off the printer after an extended period of inactivity. The use of LED technology also contributes to lower energy consumption. These features not only help reduce operating costs but also support environmental sustainability. The printer also includes a Toner Save Mode for draft printing‚ further optimizing energy and toner usage efficiently.

10.2 Recycling and Disposal Guidelines

Proper recycling and disposal of the Brother MFC-L2690DW and its components are crucial for environmental protection. Brother offers a toner cartridge recycling program‚ allowing users to return used cartridges for eco-friendly processing. Electrical waste‚ including the printer and accessories‚ should be disposed of according to local e-waste regulations. Users are encouraged to participate in community recycling initiatives or use designated collection centers. Additionally‚ Brother provides guidelines for safely handling and recycling paper‚ packaging materials‚ and other consumables. By adhering to these practices‚ users can contribute to reducing environmental impact while ensuring responsible waste management. Brother supports sustainable practices throughout the product lifecycle.

Official Brother Resources

Visit Brother’s official support website for comprehensive resources‚ including manuals‚ FAQs‚ and contact options. Access guides‚ drivers‚ and troubleshooting tools to maximize your MFC-L2690DW experience.

11.1 Brother Support Website

The Brother Support Website is your one-stop destination for all MFC-L2690DW-related resources. Access downloadable manuals‚ drivers‚ and firmware updates tailored to your printer model. The site also offers troubleshooting guides‚ FAQs‚ and detailed instructions for setting up and maintaining your device. Additionally‚ users can find contact information for Brother’s customer support team‚ ensuring assistance is available whenever needed. The website is user-friendly‚ allowing you to search by model number and navigate through categorized sections for easy access to the information you need. Regular updates ensure you stay informed about the latest features and security enhancements. Visit support.brother.com for a seamless support experience.

11.2 Downloading Manuals and Guides

Brother provides comprehensive manuals and guides for the MFC-L2690DW‚ available for download on their official support website. Users can access the full user manual‚ quick setup guide‚ and service manual in PDF format. These documents cover installation‚ operation‚ and troubleshooting‚ ensuring you maximize your printer’s capabilities. To download‚ visit the Brother Support Website‚ enter your printer model‚ and select the desired document from the downloads section. The manuals are searchable‚ making it easy to find specific information. Regularly updated‚ these guides ensure you have the latest details on features‚ maintenance‚ and best practices for your MFC-L2690DW.

11.3 Contacting Brother Customer Support

For assistance with the Brother MFC-L2690DW‚ visit the official Brother Support Website at support.brother.com. Here‚ you can access FAQs‚ troubleshooting guides‚ and contact options. Brother offers phone support for immediate help‚ as well as live chat for convenient online assistance. Additionally‚ the website provides a “Contact Us” section where you can submit inquiries directly. Brother’s customer support team is available to address technical issues‚ clarify product features‚ and guide you through setup or maintenance processes‚ ensuring a smooth experience with your MFC-L2690DW printer.

The Brother MFC-L2690DW is a versatile and efficient monochrome laser all-in-one printer‚ ideal for home or small office use. With its comprehensive features‚ including wireless connectivity‚ automatic duplex printing‚ and mobile printing capabilities‚ it offers a seamless printing experience. The detailed manual and accessible customer support ensure users can troubleshoot and maintain their printer with ease. By following the guidelines and utilizing the resources provided‚ users can maximize the performance and longevity of their Brother MFC-L2690DW‚ making it a reliable choice for their printing needs.

honeywell t1 pro manual

The Honeywell T1 Pro Non-Programmable Thermostat is a reliable, single-stage heating and cooling controller designed for ease of use and compatibility with various HVAC systems.

1.1 Overview of the Honeywell T1 Pro Non-Programmable Thermostat

The Honeywell T1 Pro Non-Programmable Thermostat is a straightforward, single-stage heating and cooling controller designed for simplicity and reliability. It features a backlit LED display with soft key controls, ensuring easy temperature adjustments. The thermostat is compatible with various HVAC systems, including electric warm air, gas, and electric hydronic heating. Its compact design and UWP mounting system make installation quick and hassle-free. The device operates on two AA batteries, eliminating the need for a common wire. With a focus on essential functionality, the T1 Pro is ideal for users seeking a no-frills, energy-efficient solution for basic climate control needs.

1.2 Key Features of the T1 Pro Thermostat

The Honeywell T1 Pro Thermostat offers a range of features designed for simplicity and efficiency. It includes a 2.37 sq. in. backlit display with soft key controls, making it easy to read and navigate. The thermostat supports both Fahrenheit and Celsius temperature settings and features built-in compressor protection to prevent damage to HVAC systems. It also includes fan operation settings for improved air circulation. The device is compatible with various heating and cooling systems, including electric warm air, gas, and electric hydronic systems. With a focus on reliability and ease of use, the T1 Pro ensures consistent and energy-efficient home comfort.

Package Contents

The Honeywell T1 Pro Thermostat package includes the thermostat unit, UWP mounting system, decorative cover plate, screws, anchors, and 2 AA batteries for easy installation.

2.1 Items Included in the Box

The Honeywell T1 Pro Thermostat box includes the thermostat unit, UWP mounting system, decorative cover plate, screws, anchors, and 2 AA batteries. These components ensure a seamless installation process. The UWP mounting system simplifies wall installation, while the decorative cover plate enhances the thermostat’s appearance. The screws and anchors provide secure wall mounting, and the batteries power the thermostat, eliminating the need for direct wiring. This comprehensive package offers everything needed for a straightforward setup, making it user-friendly for both professionals and DIY enthusiasts.

2.2 Optional Accessories and Mounting Hardware

The Honeywell T1 Pro Thermostat supports optional accessories to enhance functionality and installation flexibility. These include additional mounting hardware for unique wall types, such as uneven surfaces or deep cavities, ensuring secure and level installation. Optional adapters may be purchased for compatibility with specific HVAC systems or smart home integrations. Extended wiring kits are also available for installations requiring longer wire runs. These accessories are designed to complement the standard package, providing tailored solutions for various installation scenarios while maintaining the thermostat’s performance and reliability.

Installation Instructions

This section provides a comprehensive guide for installing the Honeywell T1 Pro Thermostat, including preparation, wiring, and safety precautions to ensure a smooth setup process.

3.1 Pre-Installation Checklist

Before installing the Honeywell T1 Pro Thermostat, ensure the following steps are completed:

– Turn off power to the HVAC system at the circuit breaker or switch.
– Verify compatibility with your heating and cooling system (e.g., single-stage heat only or 24V AC systems).
– Gather all tools and materials, including screws, anchors, and the UWP mounting system.
– Familiarize yourself with the wiring diagram and ensure all connections are labeled.
– Read the manual thoroughly to understand installation steps and safety guidelines.
– Ensure the thermostat is set to the correct temperature format (Fahrenheit or Celsius).
– Have replacement batteries ready for initial setup.
This checklist ensures a safe and efficient installation process.

3.2 Step-by-Step Installation Guide

To install the Honeywell T1 Pro Thermostat, follow these steps:
– Turn off power to the HVAC system at the circuit breaker.
– Separate the Junction Box Adapter from the Cover Plate (refer to Figure 1 in the manual).
– Mount the UWP system on the wall, ensuring it is level and securely fastened with screws and anchors.
– Connect the wiring to the appropriate terminals (RH/RC, G, W, Y) as per the wiring diagram.
– Attach the thermostat to the UWP mounting system.
– Restore power and perform a system test to ensure proper operation.
– Set the temperature format (Fahrenheit or Celsius) and configure basic settings.
This ensures a smooth and correct installation process.

3.3 Mounting the Thermostat Using the UWP System

The Honeywell T1 Pro Thermostat comes with the Universal Wall Plate (UWP) system for easy mounting. First, ensure the power to the HVAC system is turned off at the circuit breaker. Separate the Junction Box Adapter from the Decorative Cover Plate. Position the UWP on the wall, ensuring it is level, and mark the screw holes. Drill pilot holes if necessary and secure the UWP using the provided screws and anchors. Once the UWP is mounted, attach the thermostat to the system, ensuring a snug fit. This method provides a clean and professional installation without damaging the wall.

3.4 Connecting the Wiring to the Thermostat

To connect the wiring to the Honeywell T1 Pro Thermostat, start by identifying the terminals on the thermostat and the corresponding wires from the HVAC system. Typically, wires are labeled as R, W, Y, G, C, and others, depending on the system. Attach each wire to the appropriate terminal on the thermostat, ensuring secure connections. Refer to the wiring diagram provided in the manual to avoid mistakes. Once all wires are connected, double-check the connections for tightness and accuracy. Finally, restore the power and test the system to ensure proper operation. Proper wiring ensures safe and efficient thermostat functionality.

3.5 Final Installation Checks and Tests

After completing the installation, perform a series of checks to ensure the Honeywell T1 Pro Thermostat functions correctly. First, turn the power off at the breaker box and verify all connections are secure. Restore power and test the thermostat by adjusting the temperature settings to confirm the HVAC system responds. Check the display for proper operation and ensure no error messages appear. Test the fan operation by selecting different modes. Finally, confirm the thermostat is mounted level and securely on the wall. These final checks ensure the thermostat operates efficiently and safely, providing accurate temperature control for your home.

System Operation Settings

The Honeywell T1 Pro Thermostat offers straightforward operation with modes for heating, cooling, and fan control. It supports temperature settings in both Fahrenheit and Celsius.

4.1 Understanding the Thermostat’s Operating Modes

The Honeywell T1 Pro Thermostat operates in three primary modes: Heat, Cool, and Fan. In Heat mode, it activates the heating system to maintain the set temperature. Cool mode engages the cooling system to lower the room temperature. The Fan mode circulates air continuously, improving indoor air quality. Each mode is selected using the Mode button, allowing users to choose the desired operation based on their comfort needs. The thermostat also features adaptive recovery, optimizing system performance. These modes ensure efficient temperature control and energy savings, making it suitable for various home environments.

4.2 Setting the Temperature in Fahrenheit or Celsius

The Honeywell T1 Pro Thermostat allows users to set the temperature in either Fahrenheit or Celsius. By default, the thermostat is set to Fahrenheit, but this can be changed during the initial setup. To switch units, navigate to the menu, select the temperature format option, and choose the desired unit. The thermostat will then display all temperatures in the selected unit. This feature ensures compatibility with different user preferences and international standards. The temperature range for both units is clearly displayed, making it easy to adjust settings for optimal comfort. This flexibility enhances the thermostat’s usability.

4.3 Fan Operation Settings and Features

The Honeywell T1 Pro Thermostat offers advanced fan operation settings, including an “Auto” mode that automatically controls the fan based on heating or cooling demand. Users can also select “On” to run the fan continuously for constant air circulation. The thermostat features a built-in timer for the fan, allowing it to run for a set period after the heating or cooling cycle ends. This ensures even air distribution and helps maintain consistent temperatures. Additionally, the fan operation settings are easily accessible through the menu, providing users with full control over their system’s airflow. These features enhance comfort and energy efficiency.

Maintenance and Troubleshooting

Regular maintenance ensures optimal performance of the Honeywell T1 Pro Thermostat. Replace batteries annually and clean the display gently. Troubleshoot common issues like blank screens by checking power and connections.

5.1 Replacing the Batteries

To replace the batteries in your Honeywell T1 Pro Thermostat, follow these steps:
Turn off the power at the circuit breaker to avoid any electrical issues.
Remove the thermostat from the wall mount to access the battery compartment.
Slide open the battery compartment located on the back of the thermostat.
Discard the old AA batteries and insert two new AA alkaline batteries, ensuring correct polarity.
Close the battery compartment and remount the thermostat on the wall.
Restore power and check the display to confirm it is functioning properly.
This simple process ensures continuous operation without any downtime.

5.2 Common Issues and Troubleshooting Tips

If the display does not turn on, check the circuit breaker and ensure the power is on. Replace batteries if necessary. For temperature inaccuracies, calibrate the thermostat by navigating to the menu and adjusting the temperature offset. If the system does not respond, verify wiring connections and ensure all cables are securely attached. For recurring issues, reset the thermostat to factory settings by holding the menu button for 10 seconds. Always refer to the user manual for detailed troubleshooting steps to resolve specific problems efficiently and maintain optimal performance.

5.3 Resetting the Thermostat to Factory Settings

To reset the Honeywell T1 Pro Thermostat to factory settings, press and hold the Menu button for approximately 10 seconds until the display resets. This process will restore all default settings, erasing any custom preferences. Before resetting, ensure the thermostat is powered on. After resetting, the thermostat will restart, and you may need to reconfigure basic settings like temperature format (Fahrenheit or Celsius) and system mode. For detailed instructions, refer to the user manual or contact Honeywell customer support. Resetting is ideal for resolving persistent issues or preparing the device for a new installation.

Warranty and Support

The Honeywell T1 Pro Thermostat is backed by a 5-year limited warranty, covering defects in materials and workmanship. For support, visit Honeywell’s official website or contact customer assistance.

6.1 5-Year Limited Warranty Details

The Honeywell T1 Pro Thermostat is covered by a 5-year limited warranty, ensuring protection against manufacturing defects in materials and workmanship. This warranty applies to the original purchaser and is valid for residential use only. It covers repairs or replacements of defective parts during the warranty period. However, damages caused by improper installation, misuse, or normal wear and tear are excluded. For warranty claims, users must provide proof of purchase and follow Honeywell’s claim procedures. Refer to the official Honeywell website for detailed terms and conditions. Contact Honeywell customer support for assistance with warranty-related issues.

6.2 Contacting Honeywell Customer Assistance

For any questions, concerns, or support needs regarding the Honeywell T1 Pro Thermostat, customers can reach out to Honeywell’s dedicated customer assistance team. Visit the Honeywell Home website for contact details, including phone numbers, email, and live chat options; Support is available in multiple languages, and representatives are trained to assist with installation, troubleshooting, and warranty inquiries. Additionally, the website offers a comprehensive FAQ section and downloadable resources to address common issues. For urgent matters, call the toll-free number provided in the user manual. Representatives are available Monday-Friday, 9 AM-5 PM EST.

Technical Specifications

The Honeywell T1 Pro features a 2.37 sq. in. LED backlit display, compatibility with single-stage HVAC systems, and operates on 2 AA batteries. Dimensions: 4-49/64 in x 4-49/64 in x 11/32 in.

7.1 Compatibility with Heating and Cooling Systems

The Honeywell T1 Pro Non-Programmable Thermostat is designed to work seamlessly with a variety of heating and cooling systems. It is compatible with electric warm air, gas, and electric hydronic systems. This versatility makes it suitable for different home setups, ensuring efficient temperature control. The thermostat also supports single-stage heating and cooling operations, making it a reliable choice for standard HVAC configurations. Additionally, its compatibility with 24V systems ensures wide applicability across various installations. This broad compatibility allows users to maintain consistent comfort without needing multiple control units.

7.2 Display and Interface Features

The Honeywell T1 Pro Non-Programmable Thermostat features a 2.37 square-inch LCD display with an LED backlight, ensuring easy readability in low-light conditions. The interface includes soft-key controls for intuitive navigation and adjustments. The display provides clear temperature readings, system mode indicators, and battery status. With a resolution that ensures sharp text and icons, the thermostat offers a user-friendly experience. The LED backlight automatically adjusts for optimal visibility, while the soft keys simplify menu navigation and temperature adjustments. This design ensures seamless interaction and precise control over heating and cooling settings.

7.3 Dimensions and Mounting Requirements

The Honeywell T1 Pro Thermostat measures 4-49/64 inches x 4-49/64 inches x 11/32 inches (121 mm x 121 mm x 9 mm), ensuring a compact and sleek design. It uses the Universal Wall Plate (UWP) mounting system for easy installation. The thermostat is compatible with standard J-box adapters and includes screws and anchors for secure wall mounting. Its small footprint allows for a flush-mount installation, blending seamlessly with any home decor. The UWP system ensures compatibility with most existing wiring configurations, making it a versatile option for various HVAC setups. This design ensures stability and longevity of the thermostat’s performance.

Advanced Features and Settings

The Honeywell T1 Pro features built-in compressor protection to prevent short cycling and adaptive recovery for efficient temperature management, optimizing energy use and system longevity.

8.1 Built-In Compressor Protection

The Honeywell T1 Pro Thermostat includes built-in compressor protection, a feature designed to prevent rapid cycling of the compressor, which can cause excessive wear and tear. This protection ensures the compressor operates within safe parameters, reducing the risk of damage and extending the lifespan of the HVAC system. By minimizing short cycling, the thermostat helps maintain consistent temperatures while optimizing energy efficiency. This feature is particularly beneficial for systems that are prone to frequent start-stop cycles, ensuring reliable performance and reducing potential maintenance costs over time.

8.2 Adaptive Recovery and Energy Saving Features

The Honeywell T1 Pro Thermostat features adaptive recovery, a technology that learns the heating and cooling system’s performance to recover the set temperature efficiently. This ensures the system starts early enough to reach the desired temperature without unnecessary energy use. Additionally, the thermostat includes energy-saving features like smart fan operation and optimized cycling, which help reduce energy consumption while maintaining comfort. These features work together to lower energy bills and extend system longevity, providing a balance between efficiency and performance; The adaptive recovery feature also minimizes temperature fluctuations, ensuring consistent comfort levels throughout the day.

User Guide and Reference Manual

The Honeywell T1 Pro User Guide provides detailed instructions for installation, operation, and troubleshooting. It includes step-by-step guides to ensure optimal use of the thermostat’s features;

9.1 Navigating the Menu and Settings

Navigating the Honeywell T1 Pro menu is straightforward. Press and hold the center Menu button to access settings. Use the arrows to adjust values and select options. The backlit display clearly shows current settings, making it easy to configure. Features like temperature units (Fahrenheit or Celsius) and fan operation can be adjusted. The menu also provides access to advanced features such as compressor protection and battery monitoring. The user-friendly interface ensures quick and efficient navigation, allowing users to customize their comfort settings effortlessly. This design simplifies thermostat operation for all users.

9.2 Understanding the LED Indicators and Display

The Honeywell T1 Pro features a clear, backlit display showing temperature, mode, and fan status. LED indicators provide visual feedback: green for heating, blue for cooling, and yellow for fan operation. The display also shows battery level and system status. Icons indicate active settings, such as energy-saving modes or compressor protection. The intuitive design ensures users can quickly understand system operation. The display’s brightness adjusts automatically, and the LED indicators help troubleshoot issues like low batteries or system errors. This clear visual feedback enhances user experience and simplifies thermostat management.

Compatibility and Integration

The Honeywell T1 Pro integrates seamlessly with various HVAC systems, including electric, gas, and hydronic heating, and works alongside other Honeywell Home products for enhanced smart home functionality.

10.1 Working with Smart Home Systems

The Honeywell T1 Pro Thermostat is designed to integrate effortlessly with popular smart home systems, enhancing your home’s automation capabilities. It works seamlessly with platforms like Honeywell Home, allowing for remote temperature adjustments and scheduling through the Honeywell Home app. Additionally, it can be paired with voice assistants such as Amazon Alexa and Google Assistant, enabling voice commands for a hands-free experience. This compatibility ensures that your thermostat adapts to your lifestyle, providing optimal comfort and energy efficiency. The T1 Pro’s smart home integration makes it easy to manage your HVAC system from anywhere, at any time.

10.2 Integration with Other Honeywell Products

The Honeywell T1 Pro Thermostat is fully compatible with other Honeywell products, creating a cohesive home comfort system. It integrates smoothly with Honeywell’s range of HVAC equipment, including gas furnaces, heat pumps, and air handlers. Additionally, it works in tandem with Honeywell’s air quality products, such as humidifiers and air cleaners, to enhance indoor air quality. The thermostat also pairs with Honeywell’s security and automation devices, offering a comprehensive smart home solution. This compatibility ensures a unified system that optimizes performance, efficiency, and comfort, allowing for seamless control through the Honeywell Home app.

Safety Precautions

Ensure electrical safety by disconnecting power before installation. Handle the thermostat carefully to avoid damage. Properly dispose of batteries and recyclable materials. Avoid exposing the device to open flames or extreme temperatures.

11.1 Electrical Safety Guidelines

Always disconnect power at the circuit breaker or switch before installing or servicing the thermostat. Ensure all wires are securely connected to avoid short circuits. Never expose the device to water or moisture, as this can cause electrical hazards. Use only the recommended batteries to prevent overheating or leakage. Keep the thermostat away from direct sunlight and extreme temperatures. Follow all local regulations for disposal of electronic components. Properly recycle batteries and packaging materials. If unsure about any procedure, consult a licensed electrician or contact Honeywell customer support for assistance. Safety precautions ensure reliable operation and protect against potential risks.

11.2 Proper Disposal and Recycling Instructions

To dispose of the Honeywell T1 Pro Thermostat responsibly, first, contact your local waste management agency for guidelines on recycling electronic devices. Remove and recycle the batteries separately, as they contain hazardous materials. The thermostat’s packaging, including plastic and cardboard, can be recycled through standard municipal programs. Ensure all components are handled in an environmentally friendly manner to minimize ecological impact. Proper disposal adheres to local regulations and promotes sustainable practices. Honeywell encourages eco-conscious disposal to protect the environment and conserve resources. Always follow regional guidelines for electronic waste recycling to ensure compliance and safety.

FAQs

Frequently Asked Questions provide solutions to common inquiries about the Honeywell T1 Pro Thermostat, addressing installation, operation, and troubleshooting for optimal performance and user understanding.

12.1 Common Questions About the T1 Pro Thermostat

The Honeywell T1 Pro Thermostat often raises questions about its compatibility, installation, and features. Users frequently ask if it works with smart home systems, how to replace batteries, and troubleshoot common issues. Many inquire about mounting requirements and system compatibility. Others seek clarity on operating modes and temperature settings. Additionally, questions arise about warranty details and where to find customer support. These inquiries highlight the need for clear guidance to ensure smooth operation and optimal performance of the thermostat.

12.2 Tips for Optimal Performance

For optimal performance, ensure the Honeywell T1 Pro Thermostat is installed on a flat surface and away from direct sunlight or drafts. Regularly clean the display and internal sensors to maintain accuracy. Replace batteries annually or when the low-battery indicator appears. Use the adaptive recovery feature to save energy while maintaining comfort. Check wiring connections periodically to avoid signal loss. Ensure proper system compatibility before installation. Adjust fan settings to balance airflow and energy efficiency. Refer to the user manual for personalized tips tailored to your HVAC system. These practices ensure long-term reliability and efficient temperature control.